
Beautify the DeepSeek Harness UI with AI: the appearance preset studio
wallpaper-plugin turns dressing up dsh into three moves: flip light, dark or follow-system, compose wallpapers in the studio — or just ask the AI, and one message later you hold a named theme covering 15 UI tokens in both modes.
Last updated: 2026-09-27
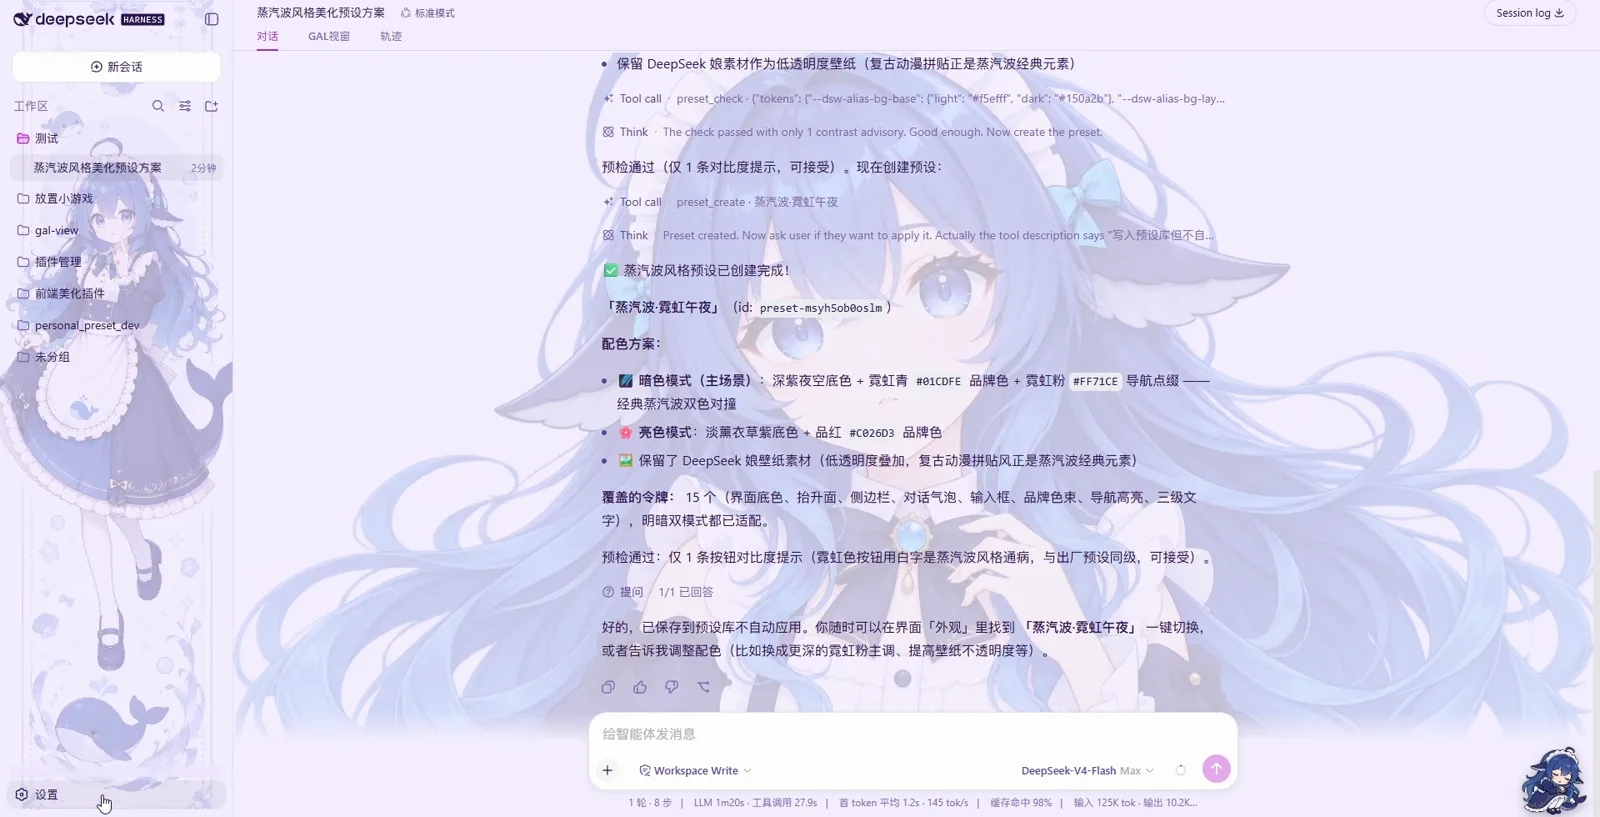
Dressing up DeepSeek Harness usually dies at the first hurdle: the word theme suggests hand-writing CSS. The plugin on this page — wallpaper-plugin, built by the Bilibili uploader 优妮控 (GitHub: Ayase34/wallpaper-plugin) — takes a different route. It adds an 外观预设 (appearance presets) entry to settings, renders every preset in its studio as a card you can apply, edit, duplicate or restore, and ships a set of AI tools that assemble a whole theme from one sentence. This guide follows the author's own screen recording frame by frame.
Every screenshot below is a still from that single Bilibili video, cropped with one fixed recipe that removes the browser chrome and the channel watermark, and each one deep-links back to the second it came from. Nothing here is a mockup — the hex values, token counts and size limits you will see are the ones the plugin actually prints. For putting the plugin on your machine in the first place, the install guide covers profiles and linking. How to install dsh plugins
Quick answer
- ▸The plugin is wallpaper-plugin (github.com/Ayase34/wallpaper-plugin, MIT). One line installs it: dsh plugin --profile web add github:Ayase34/wallpaper-plugin — settings then gains an 外观预设 entry.
- ▸Appearance itself is a three-state switch — 浅色, 深色, 跟随系统 — and every named preset is a card with apply, edit, duplicate, delete and restore-backup buttons.
- ▸Wallpapers are assembled in a layer editor (16:9 canvas, rotation, opacity, mirrors, 合成并上传) from a library of up to 100 images at 20MB each, assigned separately for light and dark mode.
- ▸One chat message can theme the whole UI: preset_check preflights the design, then preset_create wrote 蒸汽波·霓虹午夜 — 15 of 369 UI tokens, both modes — and saved it without auto-applying.
Step by step
Find the appearance switches
- 1
See what a dressed-up dsh looks like
The recording opens on the author's everyday home screen, already wearing a preset: a maid whale-girl wallpaper fills the session area at low opacity, the sidebar keeps its own poster, and the composer still reads Workspace Write with DeepSeek-V4-Flash Max selected. This is the baseline this page upgrades — and a good sanity check that wallpapers sit under the UI rather than over it.
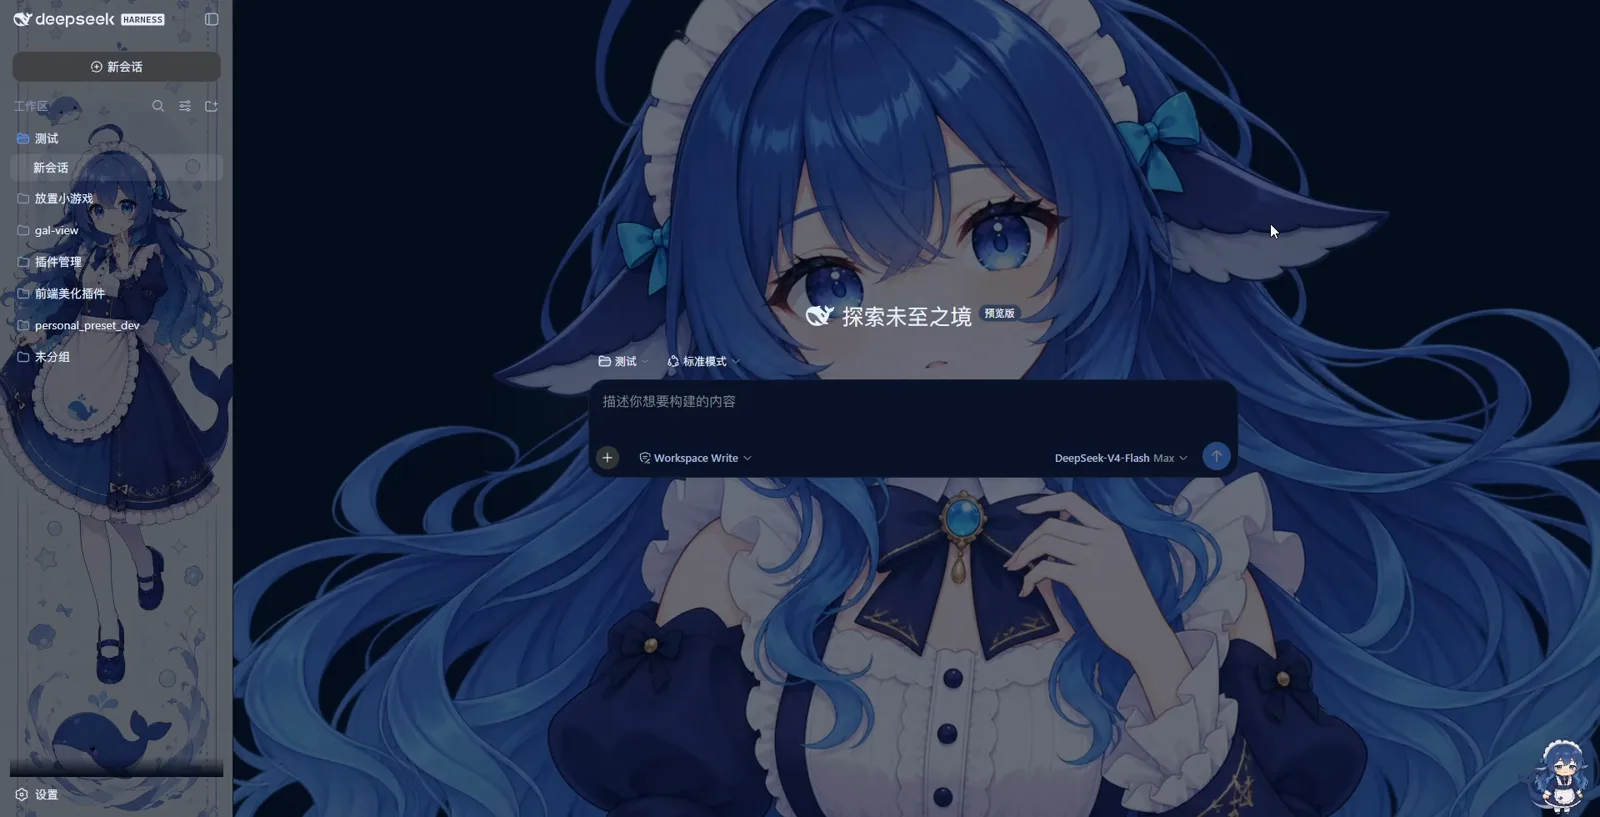
The starting line: dsh in dark mode, the author's own wallpaper preset already applied.Watch at 0:40 - 2
Open settings and meet the three appearance states
The gear icon opens a dialog whose nav reads 通用设置, 外观预设, 模型, 插件 and Agent 预设. Under 外观 you get exactly three states — 浅色, 深色 and 跟随系统 — the very switch the AI-made preset hooks into later. One tab below it, 外观预设, is the plugin's entry point.
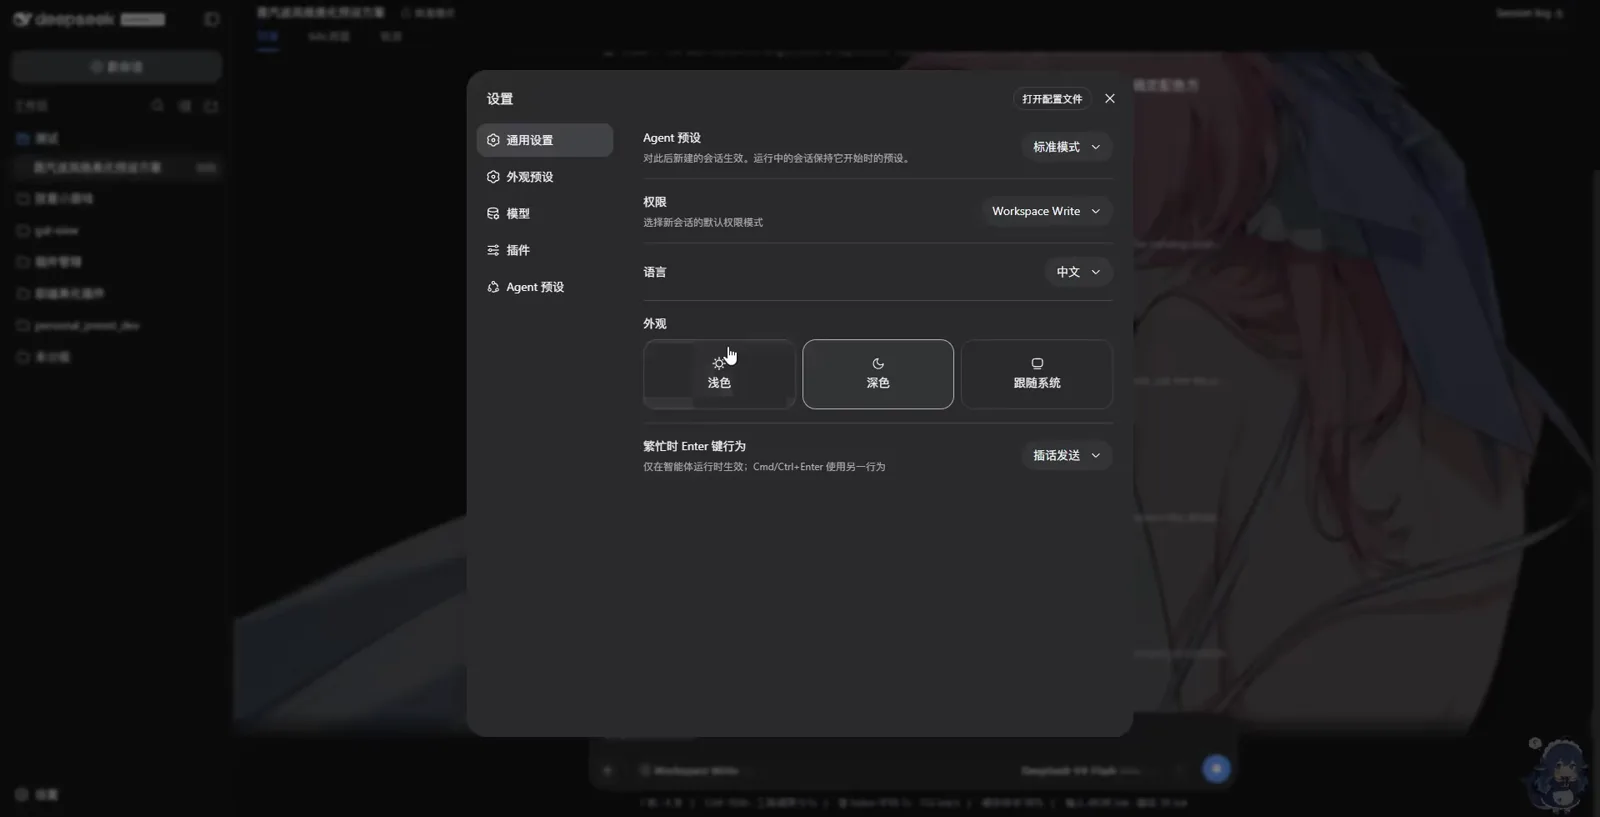
Three appearance states — and one tab down, the 外观预设 entry this page is about.Watch at 1:40
The appearance preset studio
- 3
Read the preset studio as a card list
The studio lists presets as cards — 默认, the author's draft, the finished 蒸汽波·霓虹午夜 — each carrying 应用, 编辑, 复制, 删除 and 还原备份. 新建 and 从当前外观新建 start a card from scratch or from the live theme; 导入 restores a shared ZIP. The headline feature hides behind 素材与部件: the 图层合成壁纸 dialog, a 16:9 canvas at 1920×1080 where materials become layers with rotation, opacity, z-order and mirrors, ending in 合成并上传.
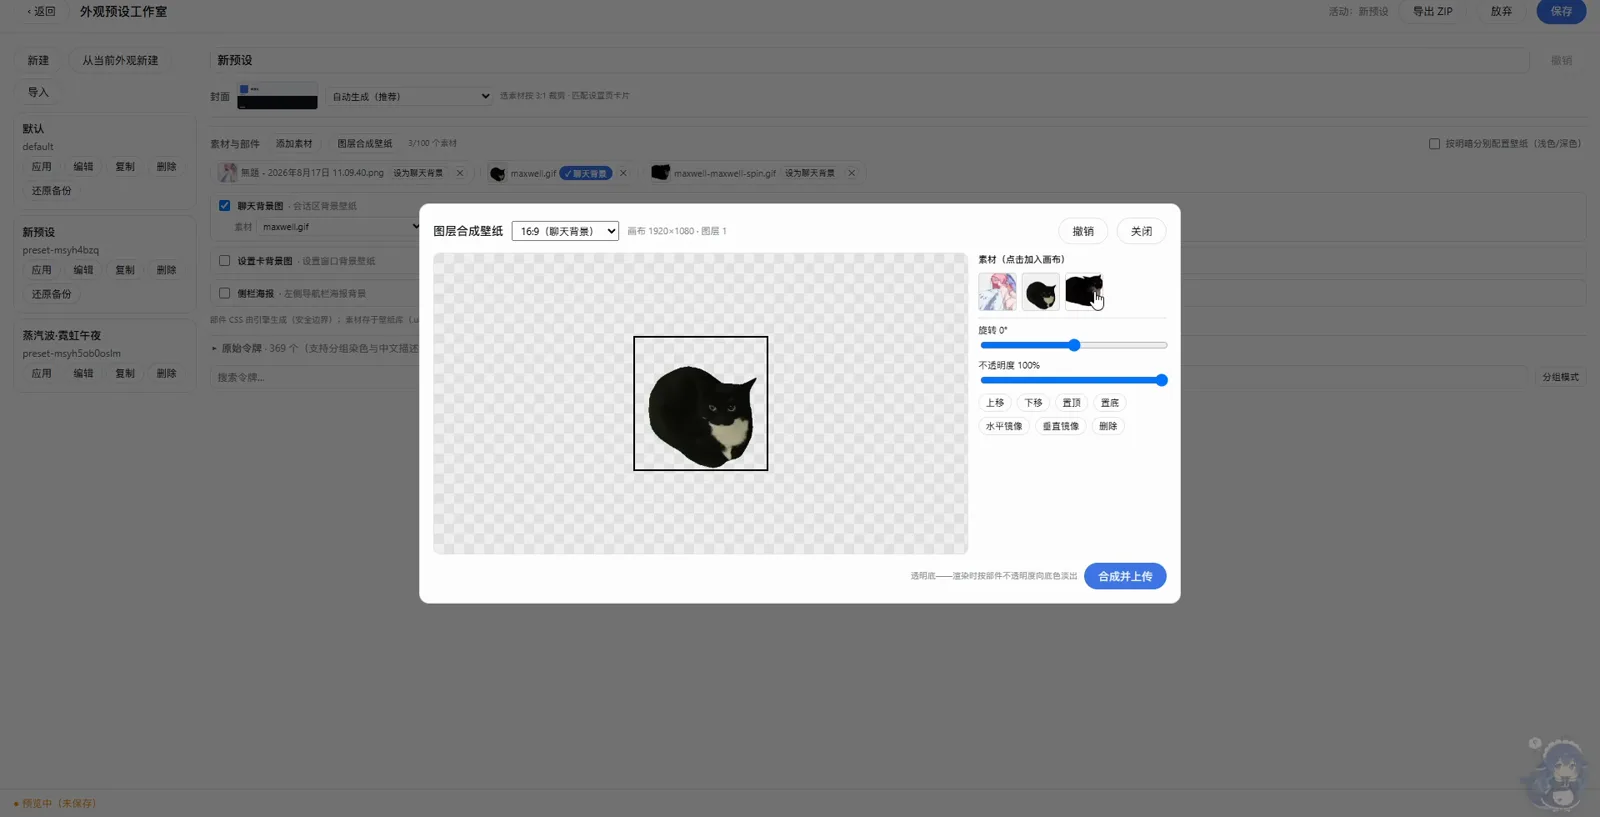
The studio with the layer editor open: one cat on a 16:9 canvas, ready for 合成并上传.Watch at 2:20 - 4
Feed the library: three parts, two modes
Assets live in a library capped at 100 images, 20MB each — the recording counts 3/100, later 4/100. Every upload becomes a chip with a one-click 设为聊天背景. Wallpapers attach to three fixed-ratio parts: the 16:9 chat background, the 1:1 settings-card background and the 1:5 sidebar poster, and the 按明暗分别配置壁纸 switch gives each part its own light and dark asset.
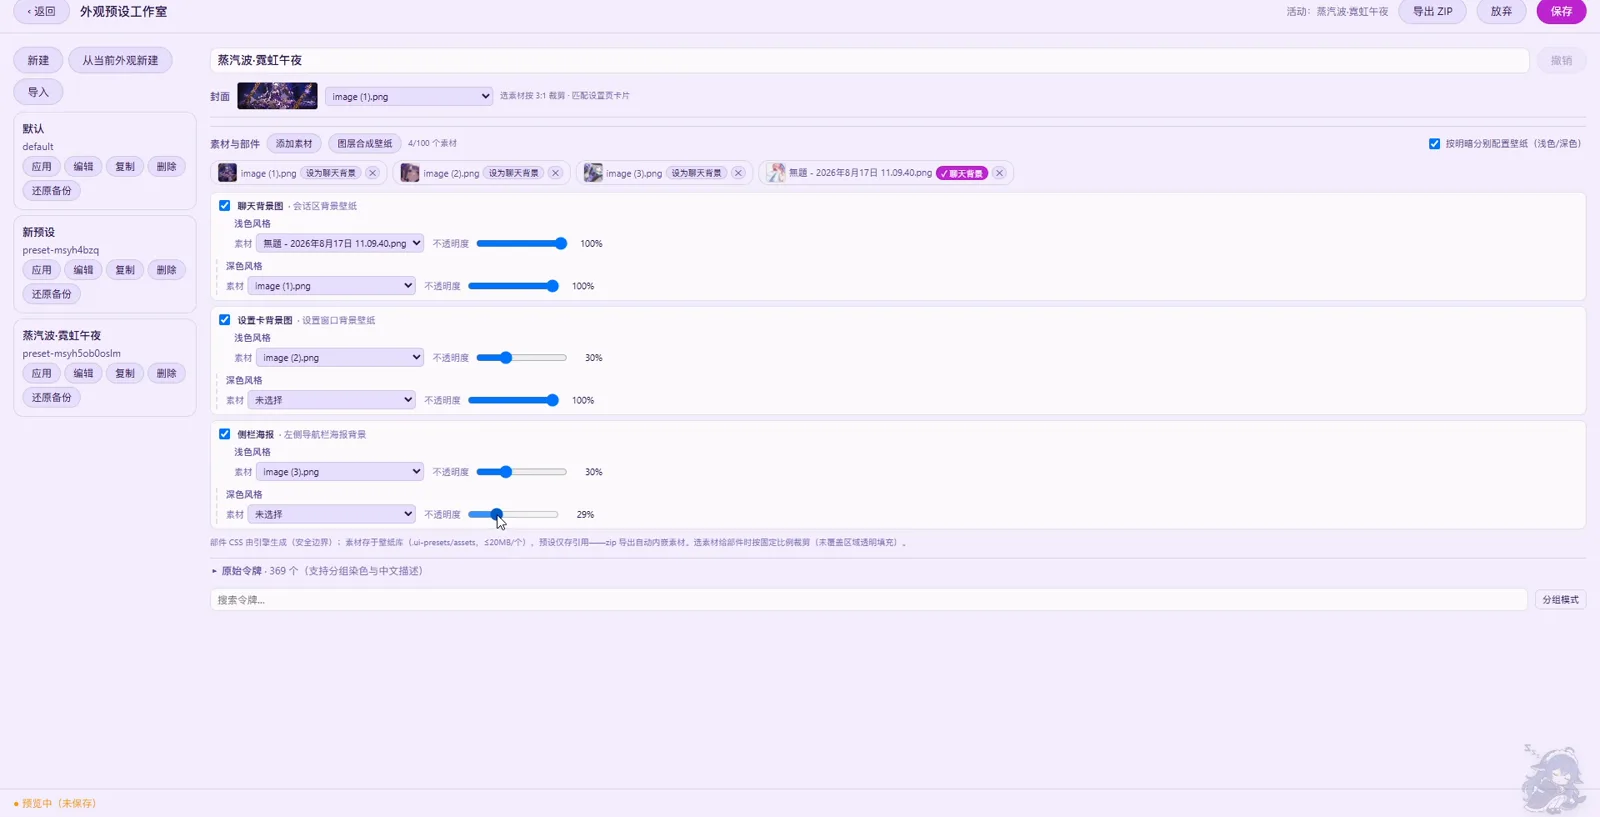
4/100 library slots used — every upload becomes a chip with a one-click 设为聊天背景.Watch at 5:20 - 5
Tune per element, inside a safe boundary
Opacity is per part and per mode: this frame holds the settings-card background at 30% in light mode and the sidebar poster at 29% in dark. The footnote at the bottom is worth reading in full — part CSS is AI-generated inside a declared safe boundary, assets live under .ui-presets/assets, presets store only references and the ZIP export embeds them — and the 369 raw tokens, grouped, colorable and Chinese-labelled, are what deep tuning works on.
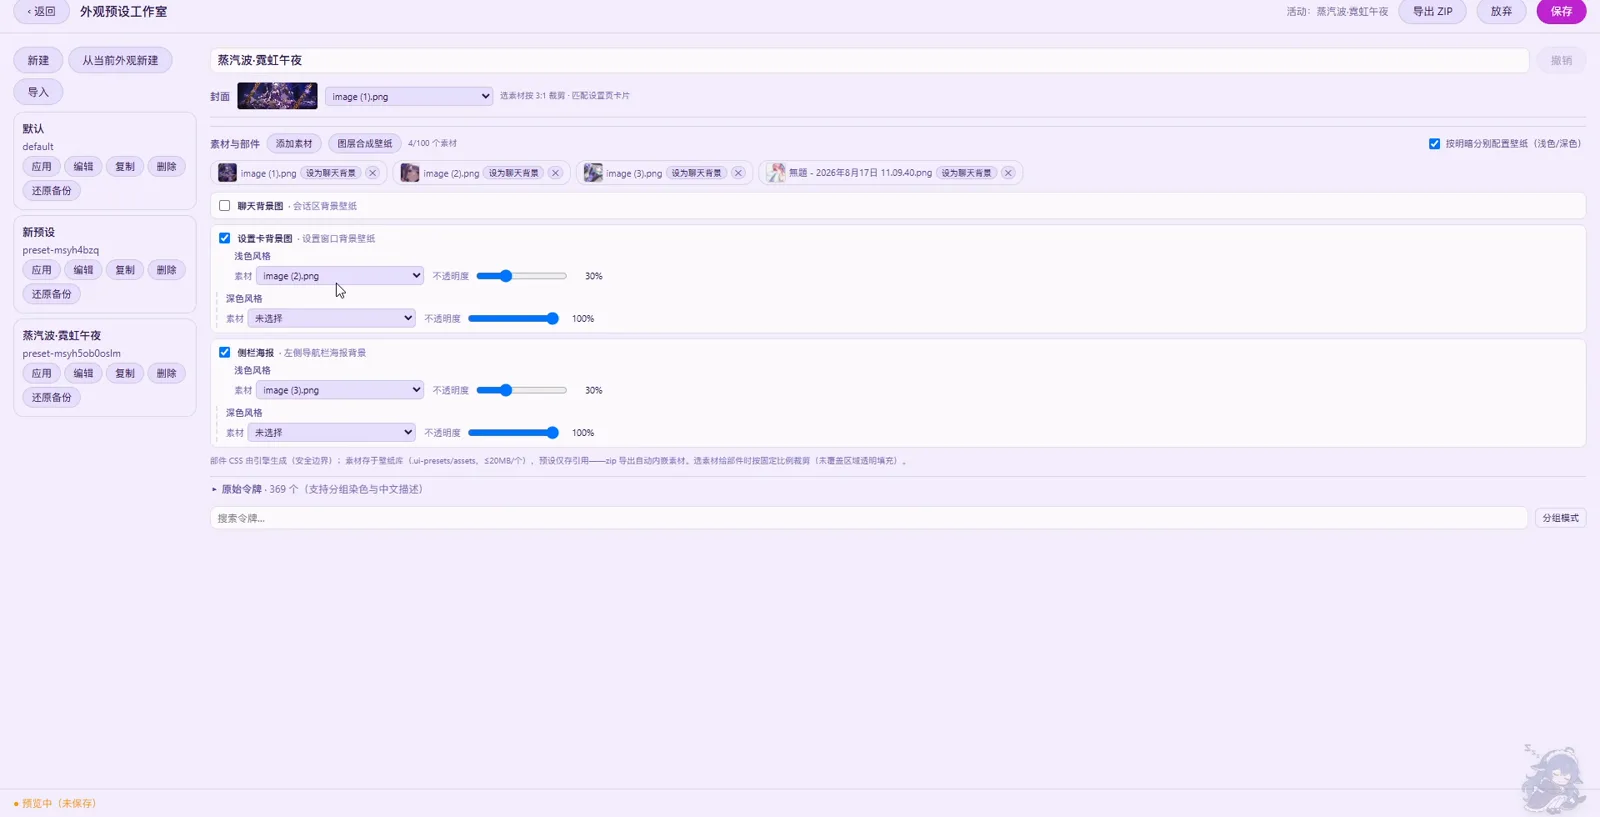
Per-part, per-mode opacity: 30% card background in light mode, 29% sidebar poster in dark.Watch at 5:00
Let the AI spin a theme
- 6
Ask for a theme, then flip the switch
The hero screenshot at the top is a plain chat: the author asks to keep the DeepSeek-girl artwork as a low-opacity wallpaper, preset_check runs a preflight — one contrast advisory, accepted — and preset_create·蒸汽波·霓虹午夜 answers with the palette (neon cyan #01CDFE, neon pink #FF71CE, magenta #C026D3), a 15-token coverage list adapted for both modes, saved to the library without applying. The frame below is that same conversation a minute later, wearing the theme: deep-purple ground, neon outlines, a new wallpaper. Compare it with the hero — that is the whole before-and-after.
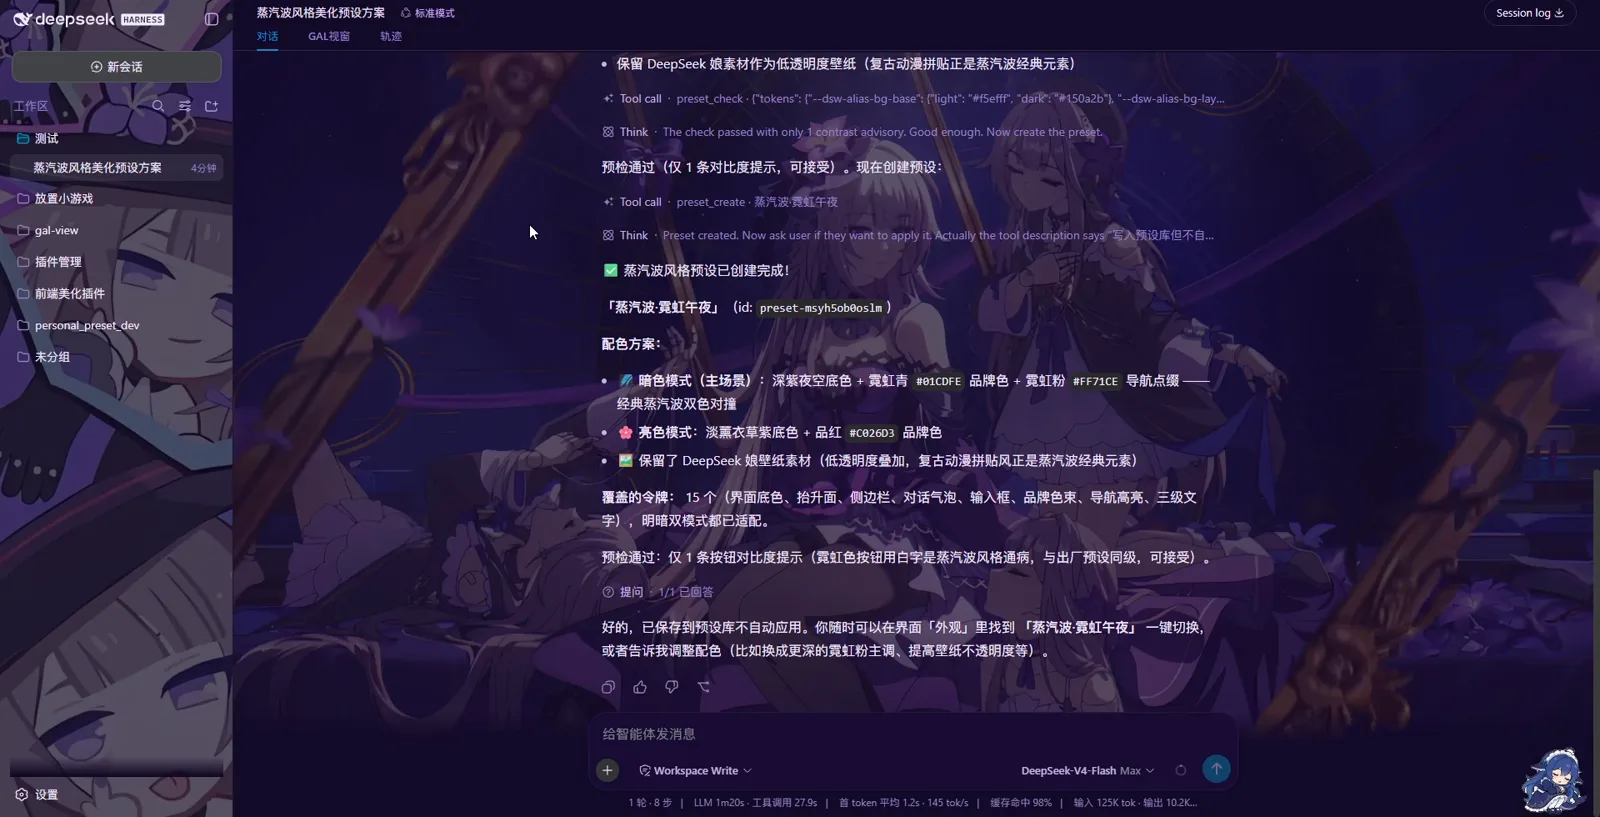
The same conversation after applying 蒸汽波·霓虹午夜 — read it against the hero at the top.Watch at 5:42
wallpaper-plugin FAQ
The questions that come up between installing the plugin and trusting it with your UI.
What is this plugin called, and how do I install it?
The repo is Ayase34/wallpaper-plugin (MIT), and the video author links it in the description of their own upload — the very video this page follows. Install it like any community plugin: dsh plugin --profile web add github:Ayase34/wallpaper-plugin. Afterwards the settings dialog gains the 外观预设 tab; if it does not appear, check that the profile you added the plugin to is the one the Web UI is running.
Is it safe to let an AI redecorate my UI?
Three guardrails are visible in the recording. Scope: the part CSS the AI writes is generated inside a declared safe boundary. Preflight: every run passes through preset_check, which in the video reports exactly one contrast advisory — neon-pink buttons with white text, noted as the same class as the factory preset — before anything is created. And no auto-apply: the finished preset is saved to the library and the UI stays untouched until you apply it, with 还原备份 on every preset card to roll back.
Why does it say 15 tokens here and 369 tokens there?
Two different layers. The AI covers 15 of the commonly seen tokens — surface, elevated, sidebar, chat bubbles, composer, brand, nav highlight, tertiary text — and adapts each for light and dark. Beneath that, the studio exposes 369 raw tokens with group coloring and Chinese descriptions, which is where you go when the AI's choice is close but not quite right. Small surface, deep floor.
What are the material limits, and how do I share a preset?
The library holds up to 100 images at 20MB each, cropped to each part's fixed ratio — 16:9 chat background, 1:1 settings card, 1:5 sidebar poster — with unfilled areas left transparent. Presets store references, not copies, so sharing runs through 导出 ZIP, which embeds every referenced material. The recipient imports the ZIP in the studio and gets the preset, its cover and all assets back in one piece.
Related guides
Where to go next once your dsh wears a theme.
Render HTML right in the chat
A different kind of AI-built UI: pages and widgets rendered inside the conversation, not applied to the app's skin.
Read the guideBrowse the plugin market
Find more community plugins for dsh, from wallpaper engines to the widgets that sit beside this one.
Read the guideHow to install dsh plugins
The general install workflow this page assumes: profiles, the plugin add command and where plugins live on disk.
Read the guidedsh desktop apps
Prefer your themed UI outside the browser? The desktop wrappers that carry the Web UI, wallpaper included.
Read the guideSource
The video is a Bilibili screen recording in Chinese with no caption track, so the steps above were written from what is on screen — the studio's own labels, the AI transcript and the palette values. The plugin it demonstrates is wallpaper-plugin: the uploader links the GitHub repo (Ayase34/wallpaper-plugin) in the video description. For the general plugin workflow, see the plugin install guide