Run DeepSeek Harness natively in Termux on your phone
Three frame-verified Android screen recordings — the one-click Termux installers, the first dsh web launch at 127.0.0.1:3080, and a real C compile-and-run test. No root, no desktop.
Last updated: 2026-10-09
DeepSeek Harness does not need a desktop to be useful. Every recording on this page was shot on an Android phone: Termux running in a normal app window, DSH installed by a community one-click script, and the agent's web UI served by the phone itself at http://127.0.0.1:3080. What you see below is exactly what your screen will show.
This page is the single-route deep dive — the Termux terminal path, command line by command line. For the three-routes overview of getting DSH onto a phone, open Run DSH on your phone, three routes
TL;DR
- ▸DSH runs natively inside Termux: the web UI is served from the phone at 127.0.0.1:3080 — no root, no desktop, no cloud host.
- ▸Community one-click scripts automate the hard part — compiling node-pty, koffi and sharp for Android.
- ▸Budget 10–30 minutes and about 2 GB of storage for the first install; the script keeps a log at ~/dsh-install-*.log.
- ▸The first compile pops a danger-full-access permission prompt — Android has no sandbox layer, so read it before approving.
The nine frame-verified steps
Part 1 · Termux setup and the one-click script
- 1
Install Termux from the right store
Termux comes from F-Droid or the GitHub releases — the Google Play build is outdated and breaks these scripts, as the anchor repo's README warns. The recording opens on the app drawer with Termux already installed; the first commands inside are pkg update, then pkg install git.
$pkg update$pkg install git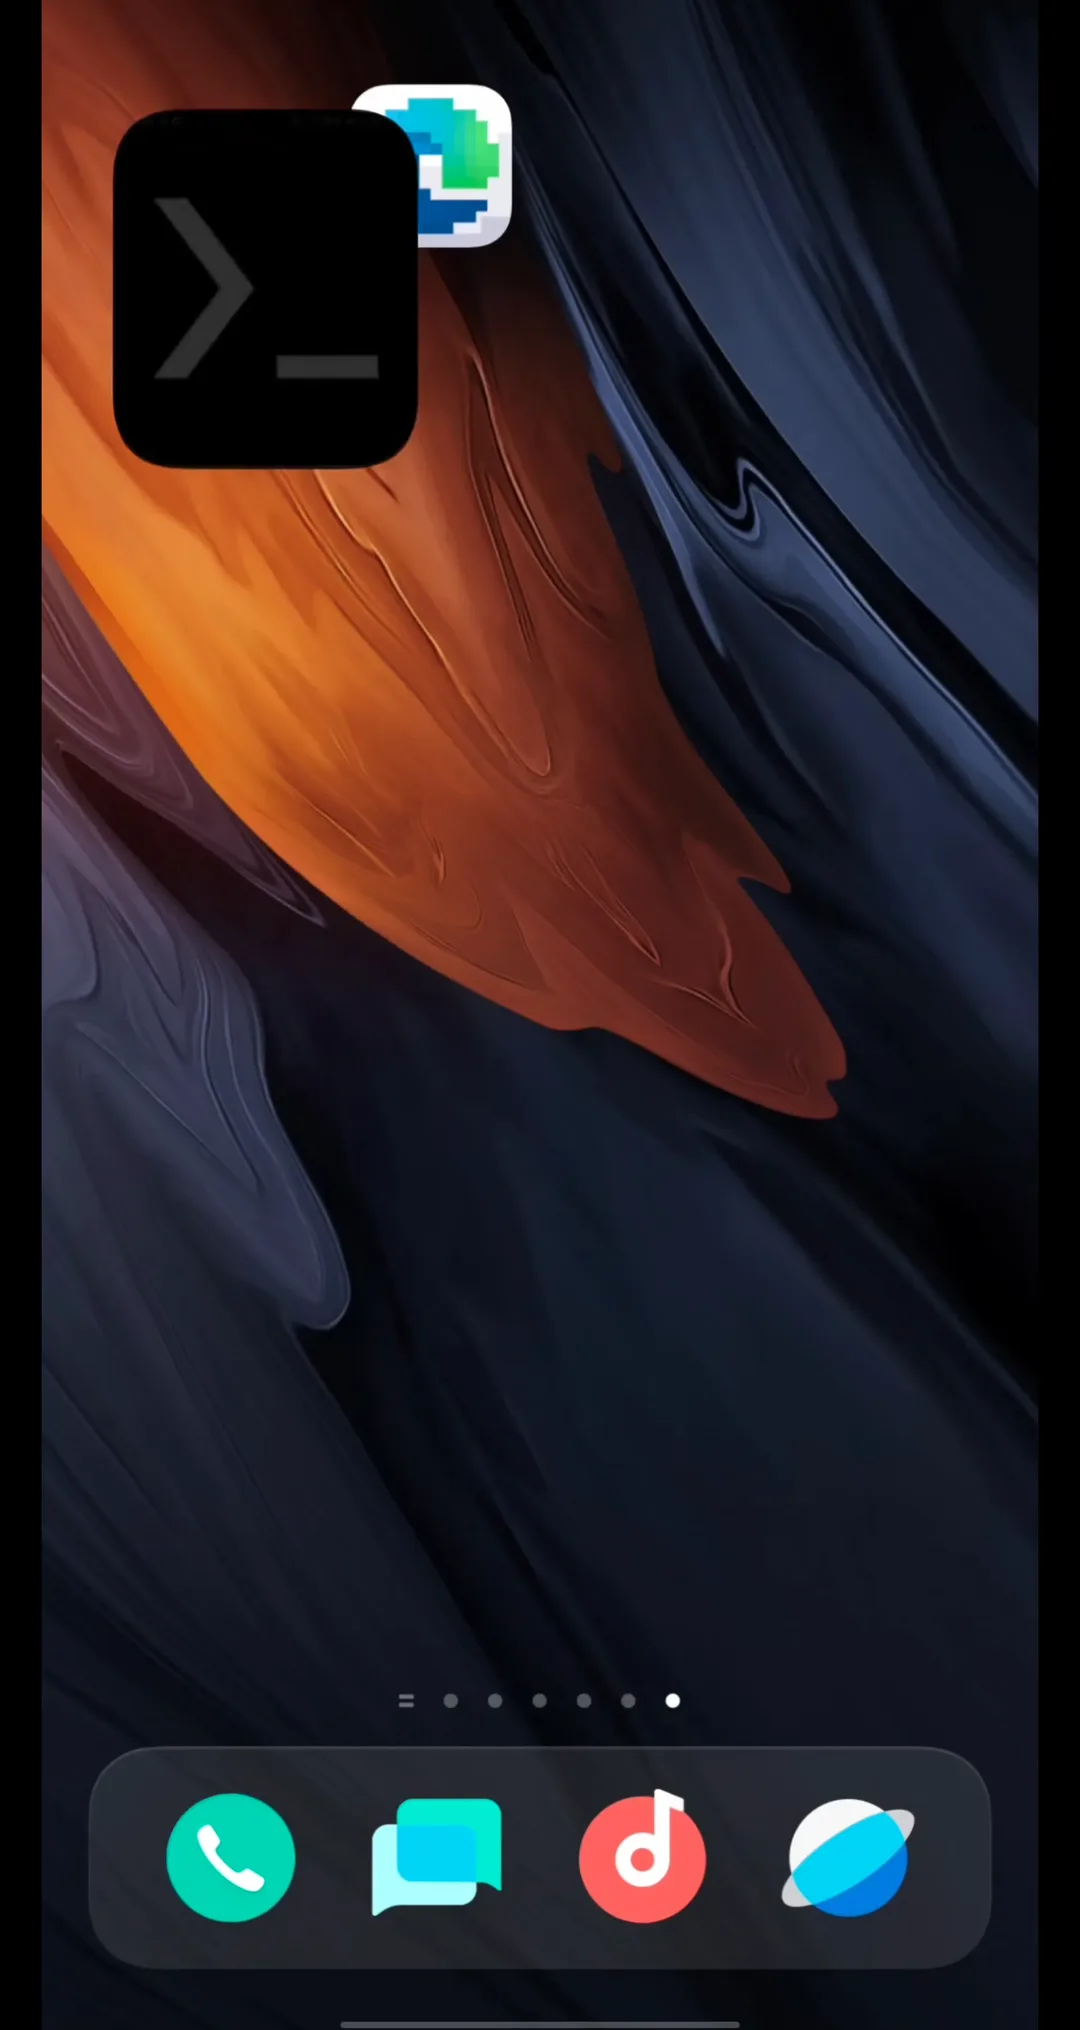
Termux lives on F-Droid or GitHub Releases — skip the outdated Google Play build.Watch at 0:04 - 2
Clone the one-click script
The tutorial's description carries every command. git clone pulls MIOYULIN/install-dsh-termux (★3), then cd install-dsh-termux. Re-running the clone? Git answers that the path already exists — just cd into it, exactly as the frame shows.
$git clone https://github.com/MIOYULIN/install-dsh-termux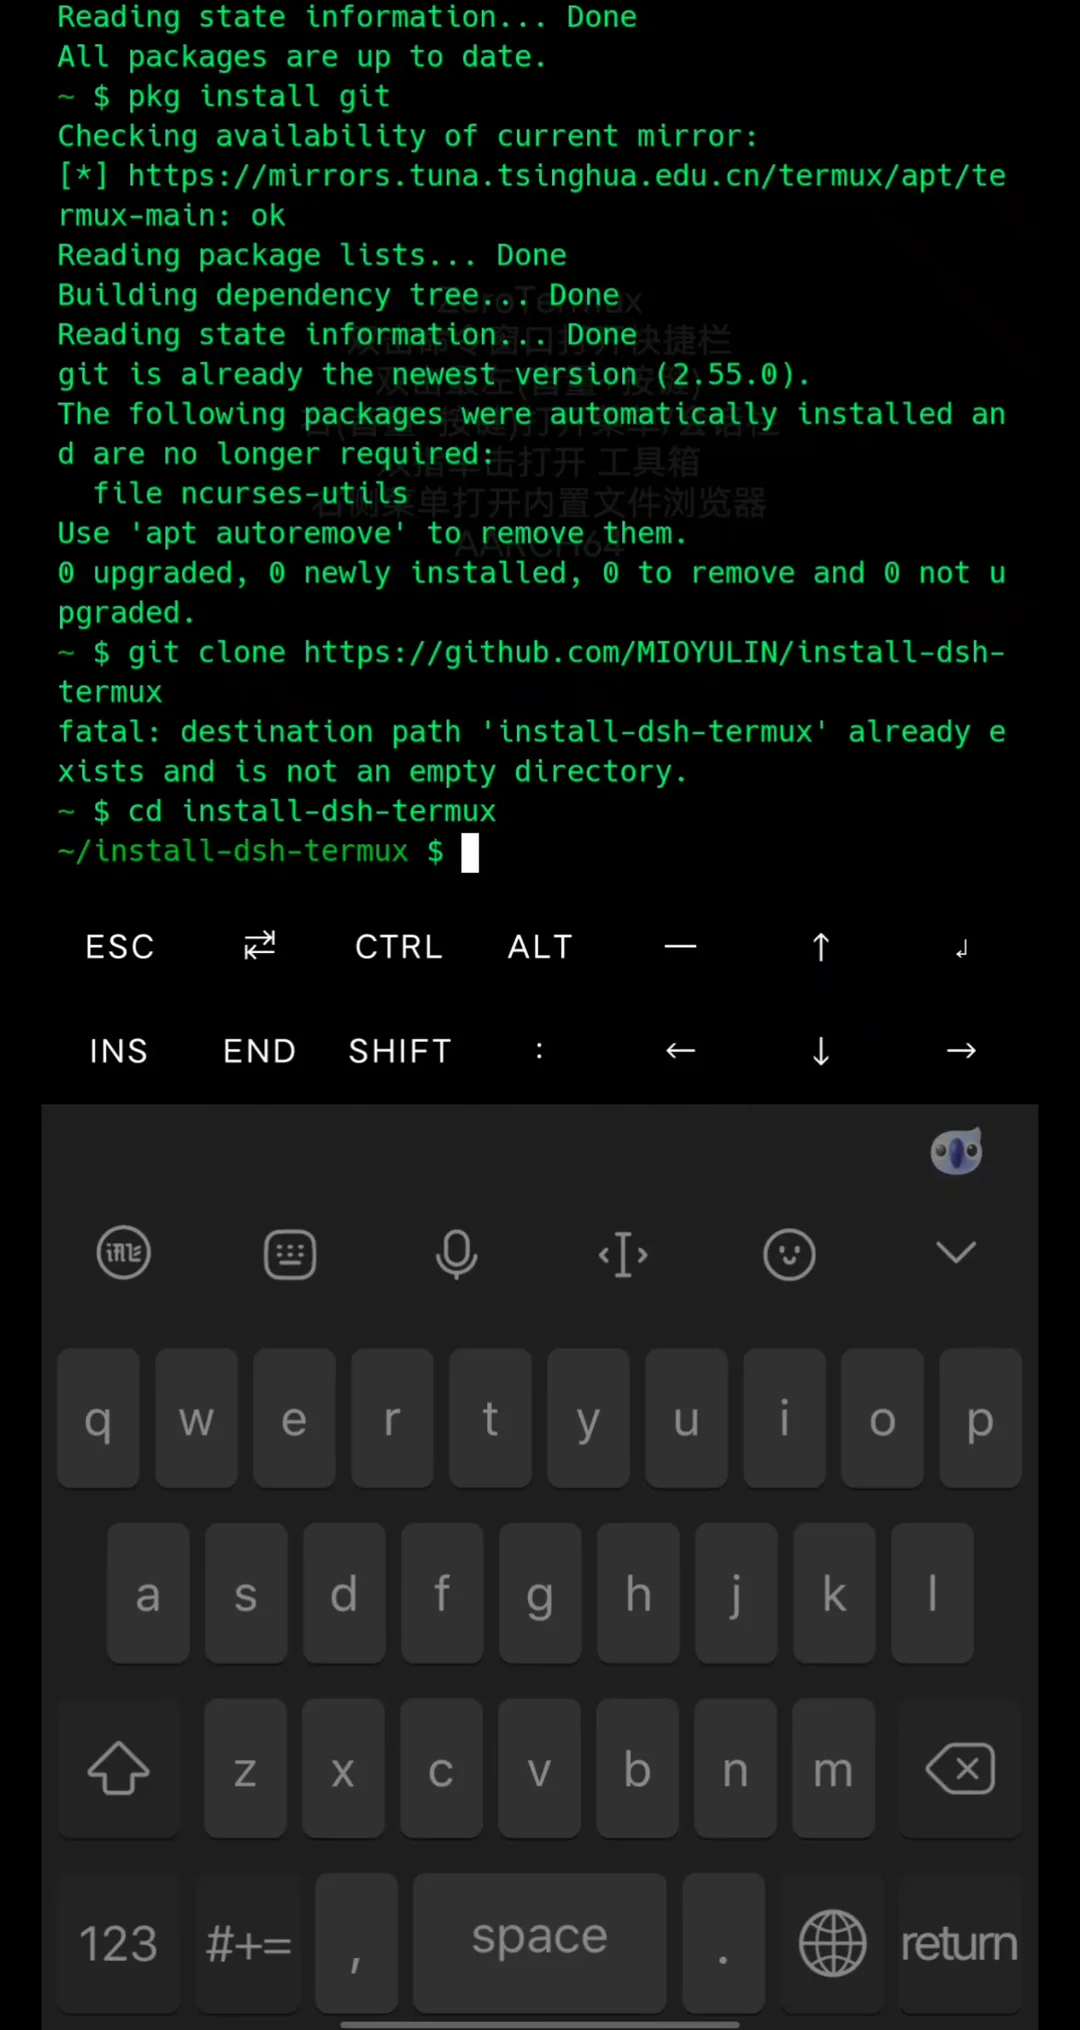
Commands verbatim from the video description; the already-exists fatal only means the folder was cloned before.Watch at 0:48 - 3
Run the installer and wait out the compile
bash install-dsh-termux.sh upgrades packages, then compiles the Android-hostile native modules (node-pty, koffi, sharp) — 10 to 30 minutes, logged to ~/dsh-install-*.log. It ends on a green 安装完成 banner that prints the two next commands: source ~/.bashrc and dsh web.
$bash install-dsh-termux.sh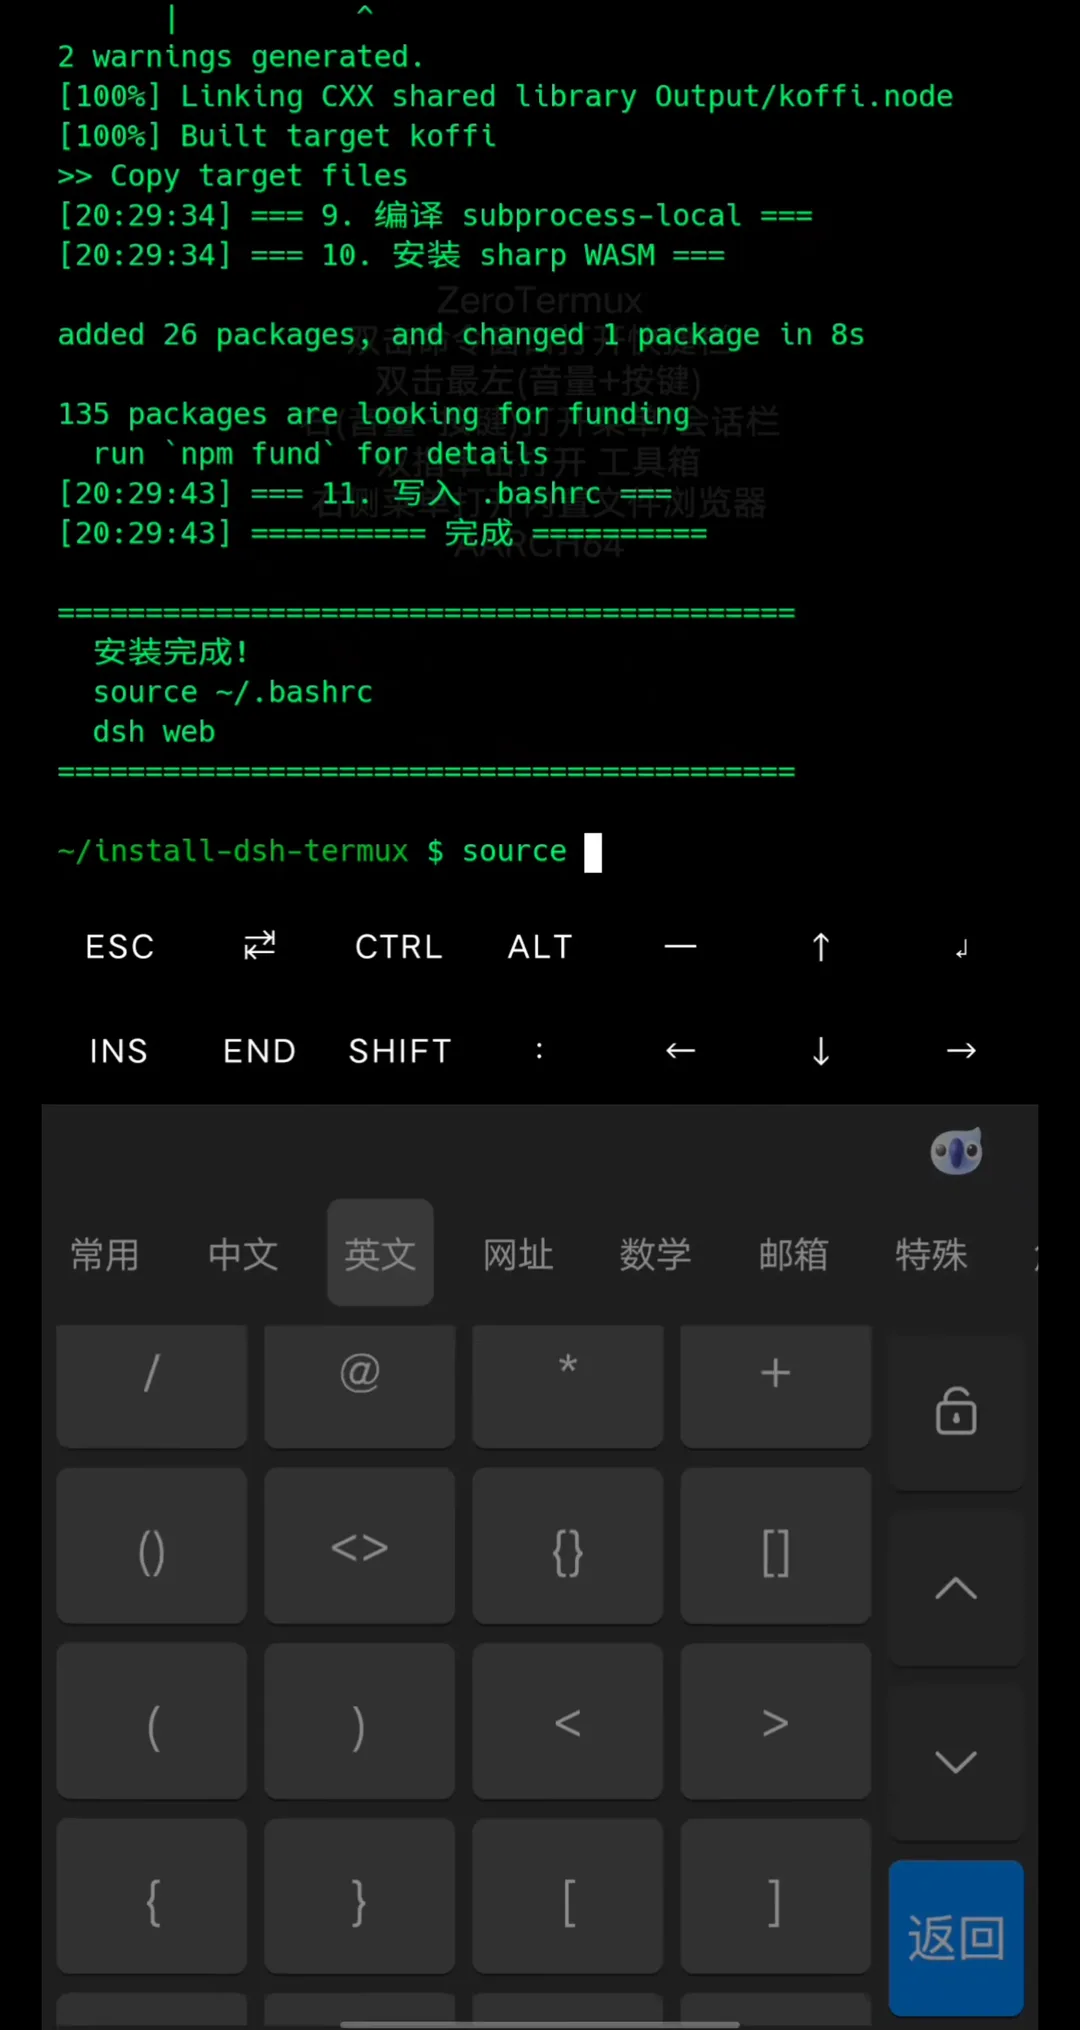
Ten-plus minutes of compiling end in two short commands.Watch at 2:13 - 4
Launch dsh web and open the phone's own UI
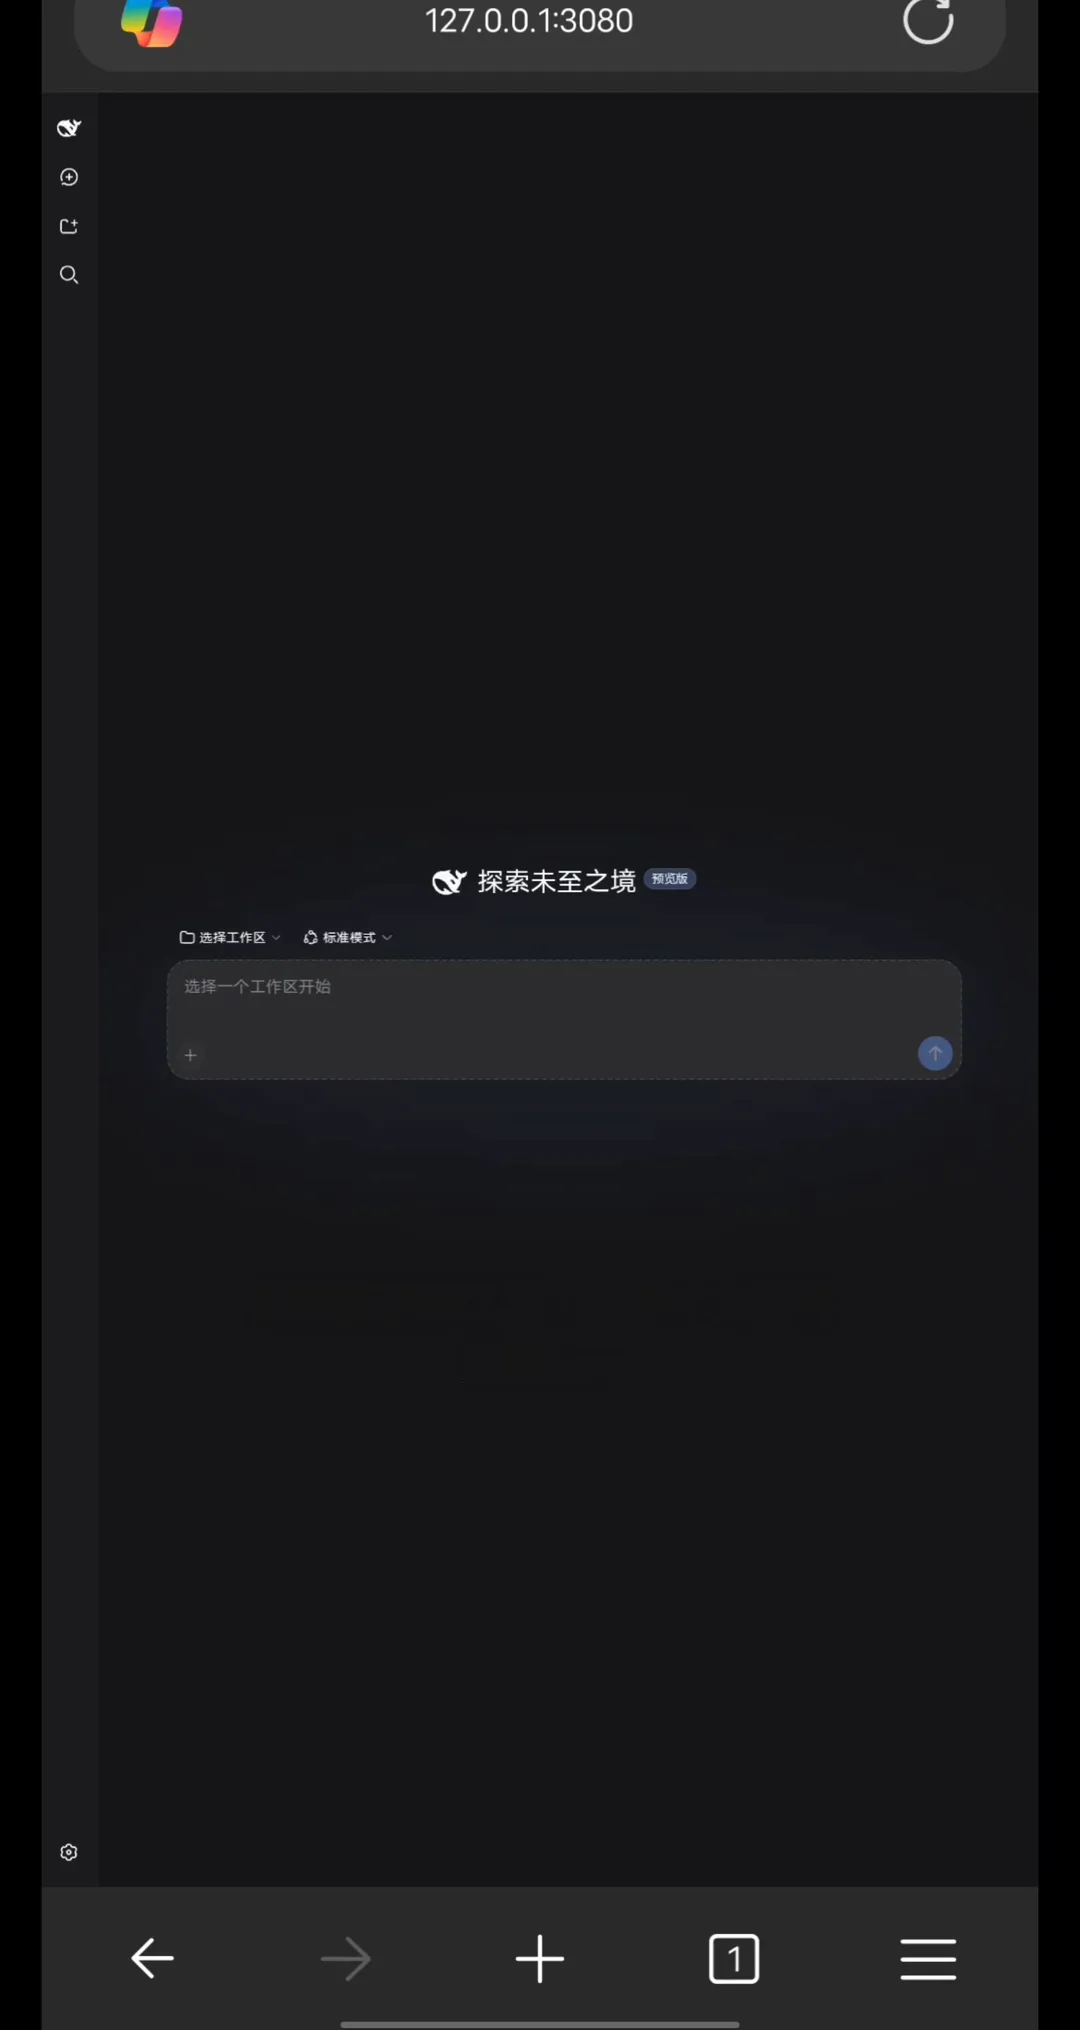
source ~/.bashrc makes the dsh command available; dsh web starts the server on the phone itself. Any local browser then reaches the agent at http://127.0.0.1:3080 — the welcome screen below is that first load, served by the handset, not a remote host.
$source ~/.bashrc$dsh webSame video, final shot: the UI never leaves the handset.Watch at 2:50
Part 2 · A second one-click script, end to end
- 5
A second script, same battle plan
A different creator's one-click installer shows the same anatomy: pnpm resolves @deepseek-ai/dsh 0.1.0-rc.6 in one shot, then a 10-step checklist repairs what Android breaks — node-gyp (3/10), node-pty (4/10), sharp with its wasm32 fallback (5/10).
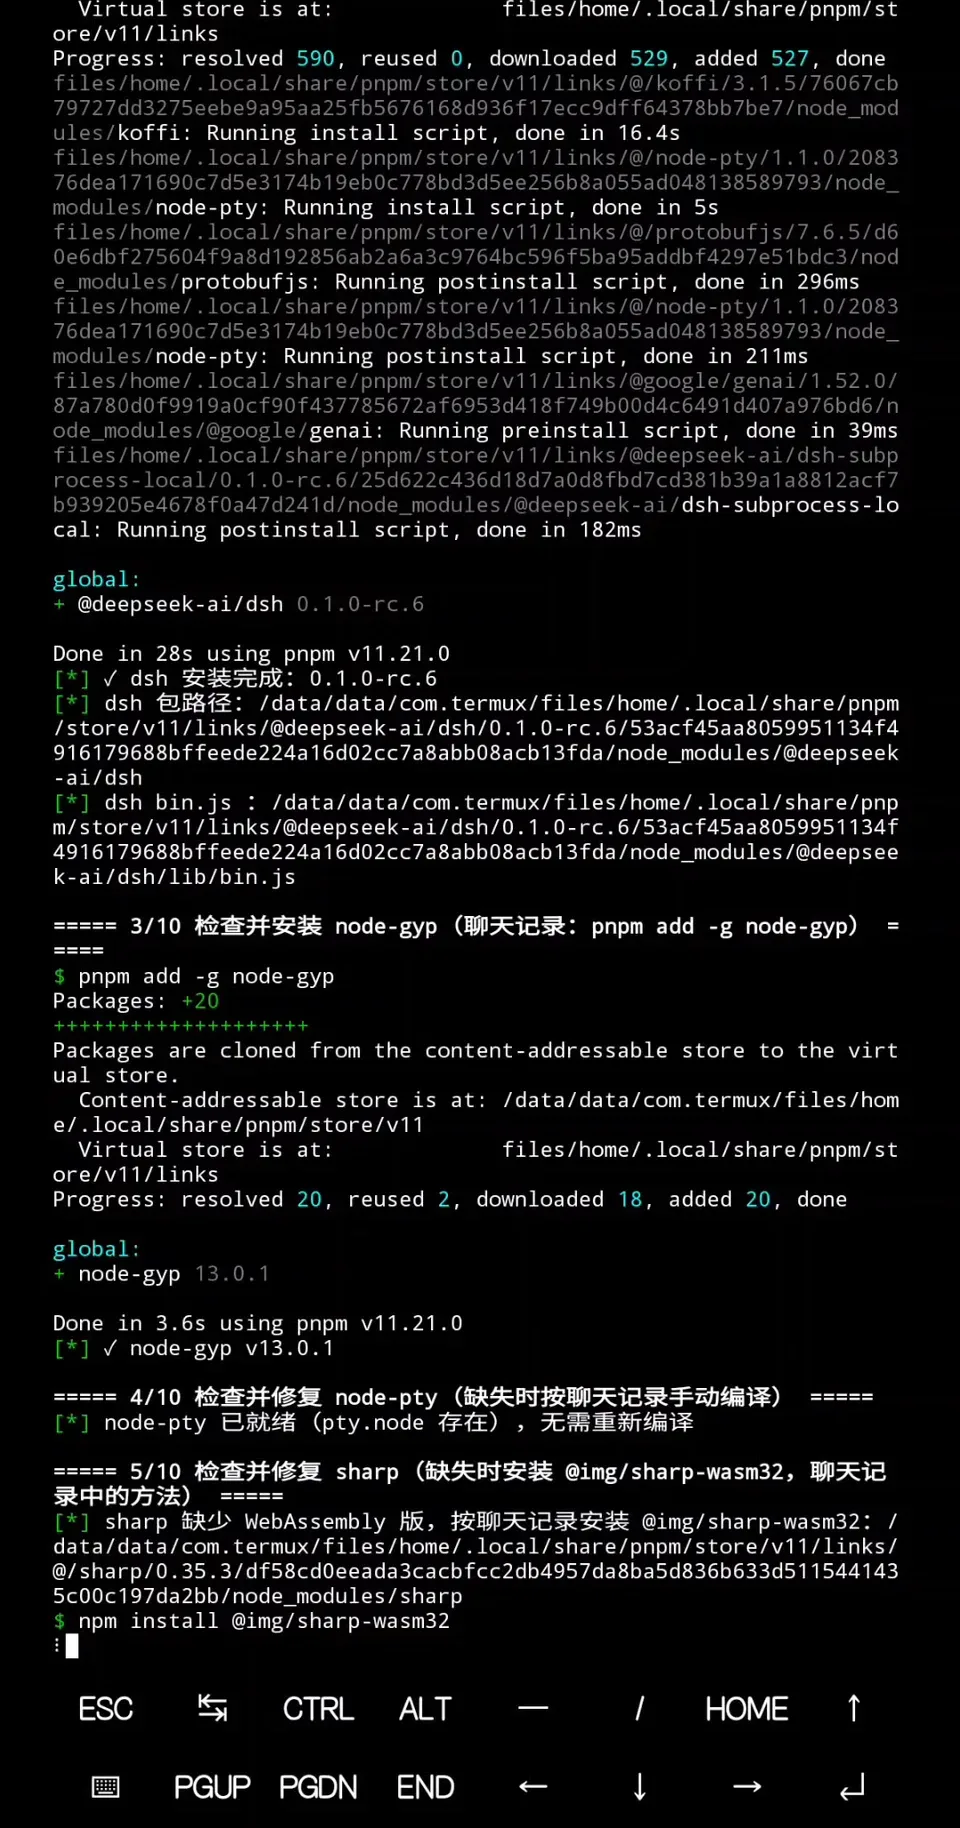
Different script, same recipe: install DSH, then fix Android's native modules.Watch at 0:22 - 6
The checklist that ends in a smoke test
Steps 6–10 verify koffi, heal 512 profile symlinks, and run a smoke test against the web server before printing the summary: dsh 0.1.0-rc.6, web address http://127.0.0.1:3080, a generated ~/dsh-web.sh launcher, and the note that your API key goes in the web UI or ~/.dsh/.credentials.yaml.
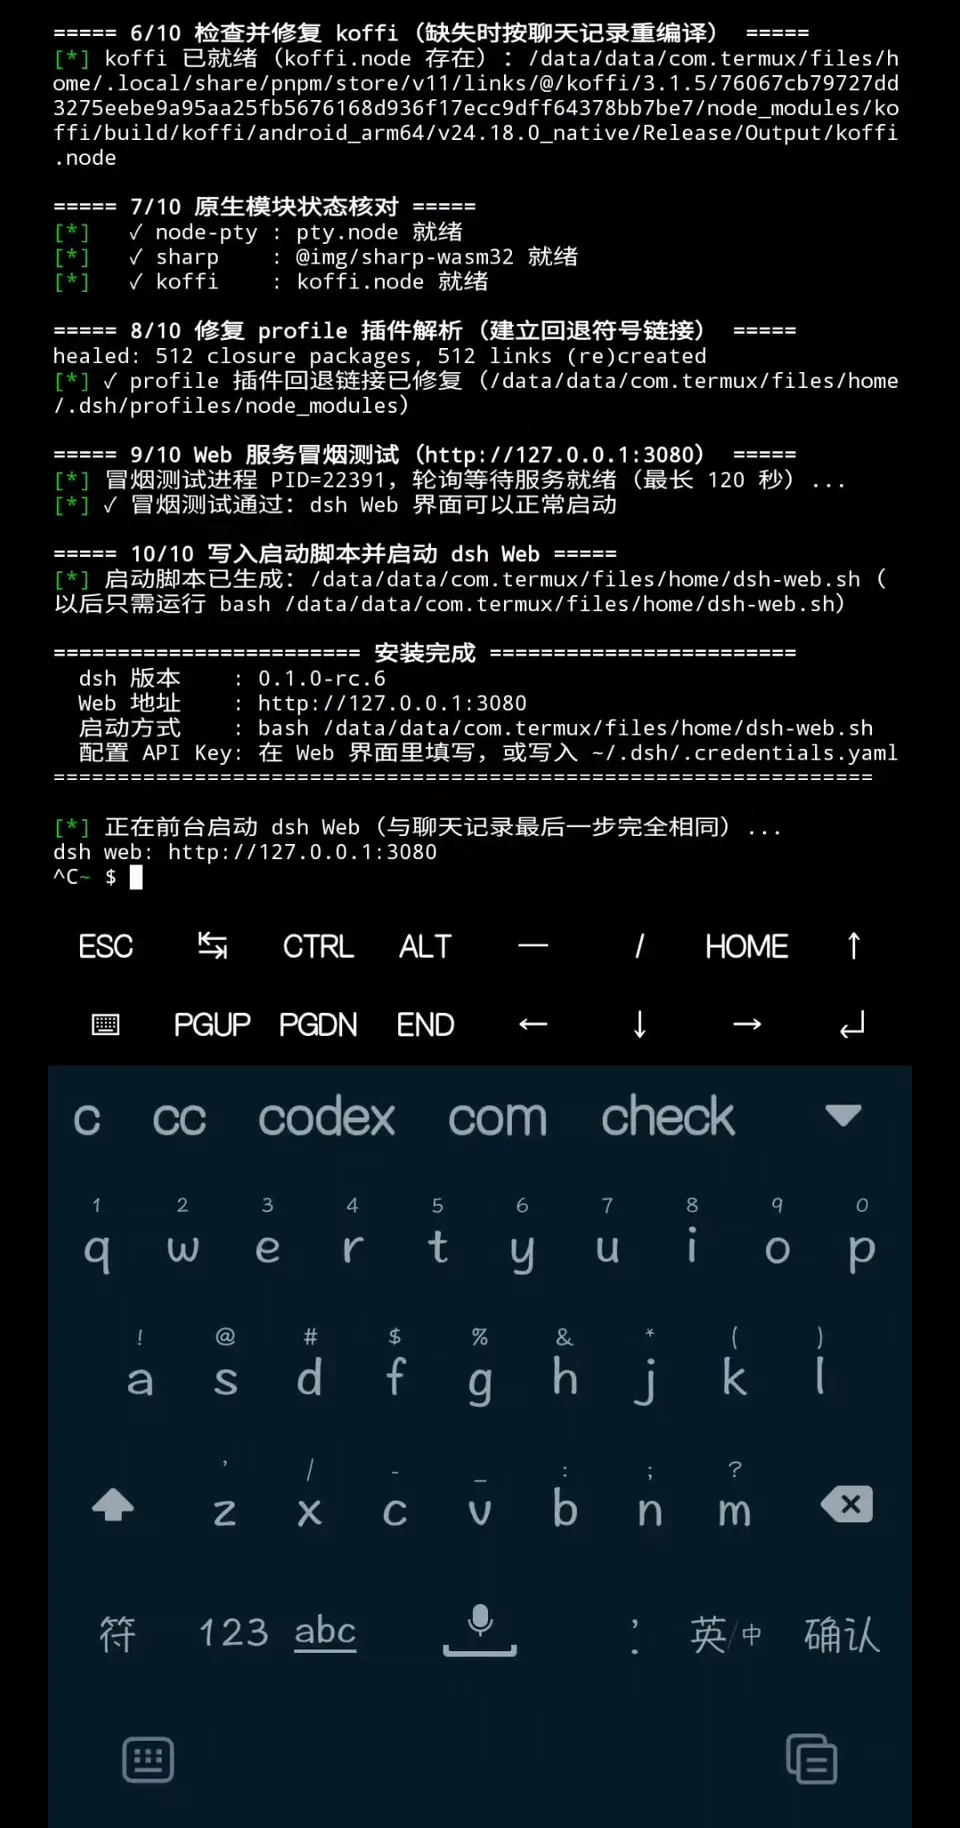
The script even generates a ~/dsh-web.sh launcher for next time.Watch at 0:46
Part 3 · Proof of life: compiling on the phone
- 7
Expect a sandbox wall on the first compile
In the live-test recording, asking DSH to build a C hello world first hits a red Bash error in the traces: Android has no bwrap/landlock sandbox, so executing a binary requires danger-full-access. DSH asks instead of assuming — a Permission Request card offers Approve (recommended) or Reject.
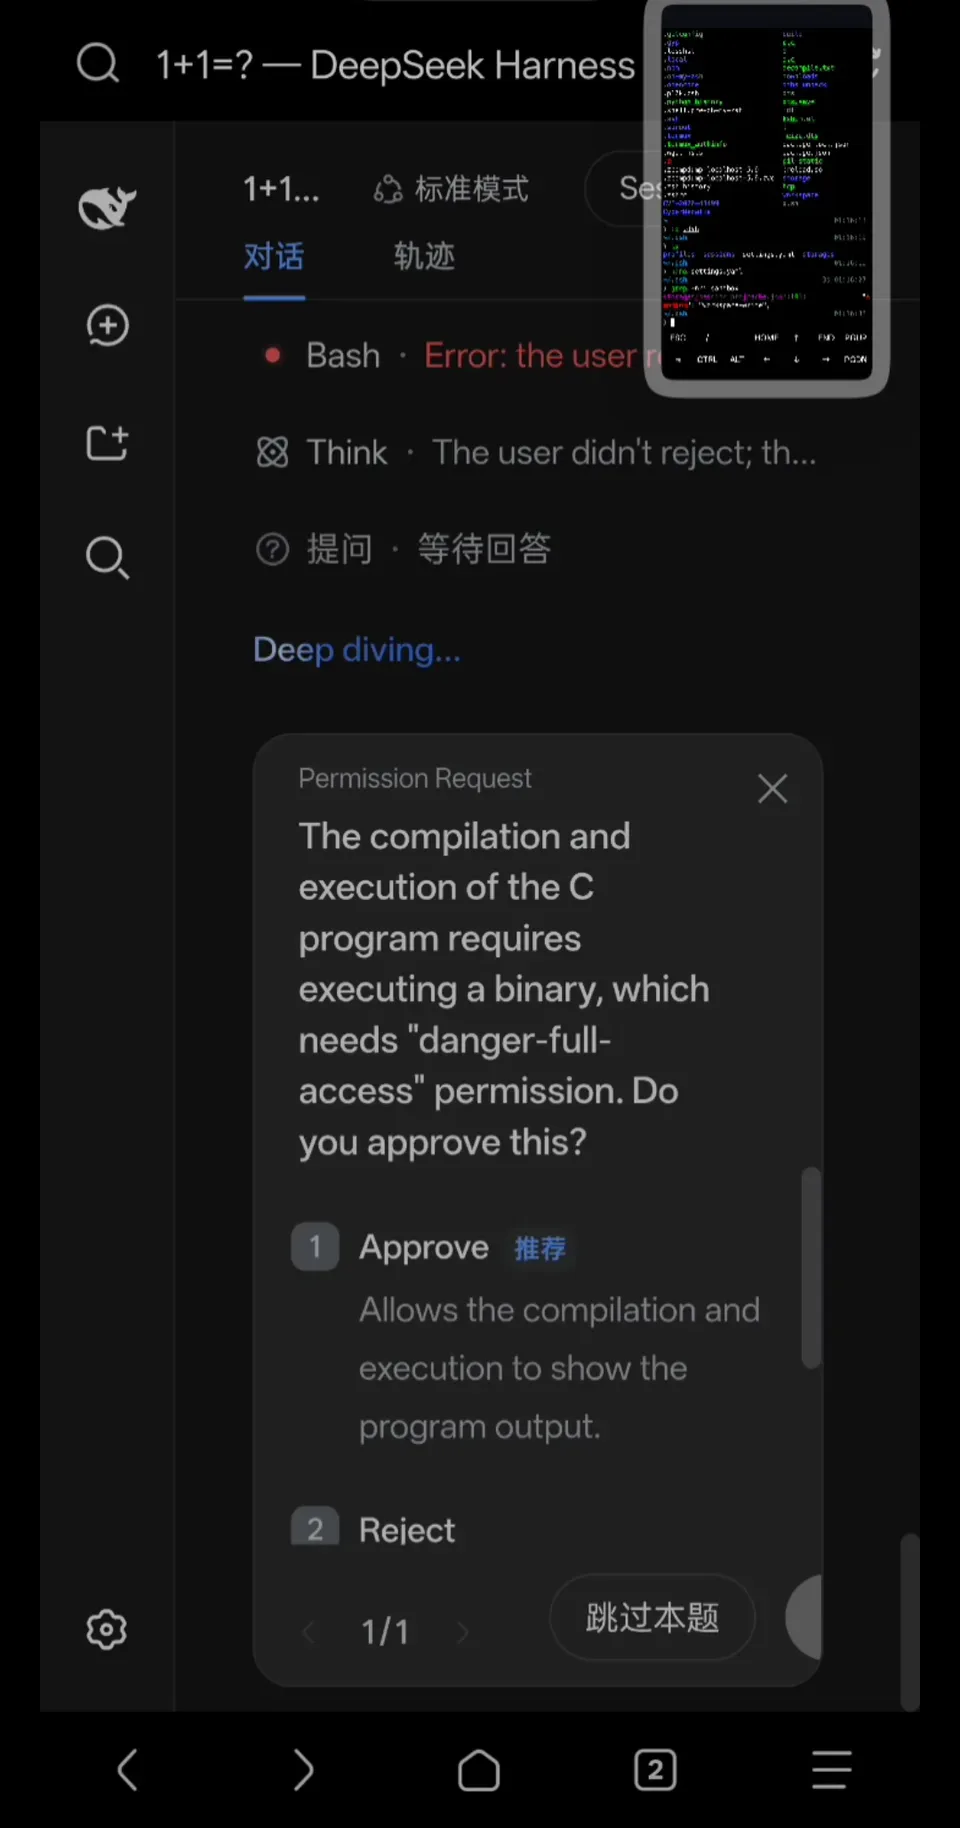
Android has no sandbox layer — DSH asks instead of assuming.Watch at 1:01 - 8
Approve, and gcc runs on the phone
After approving, the toolchain compiles hello.c and executes the binary on the handset: the chat answers with “compiled and executed successfully” and Hello, World! — a real aarch64 binary built and run inside Termux.
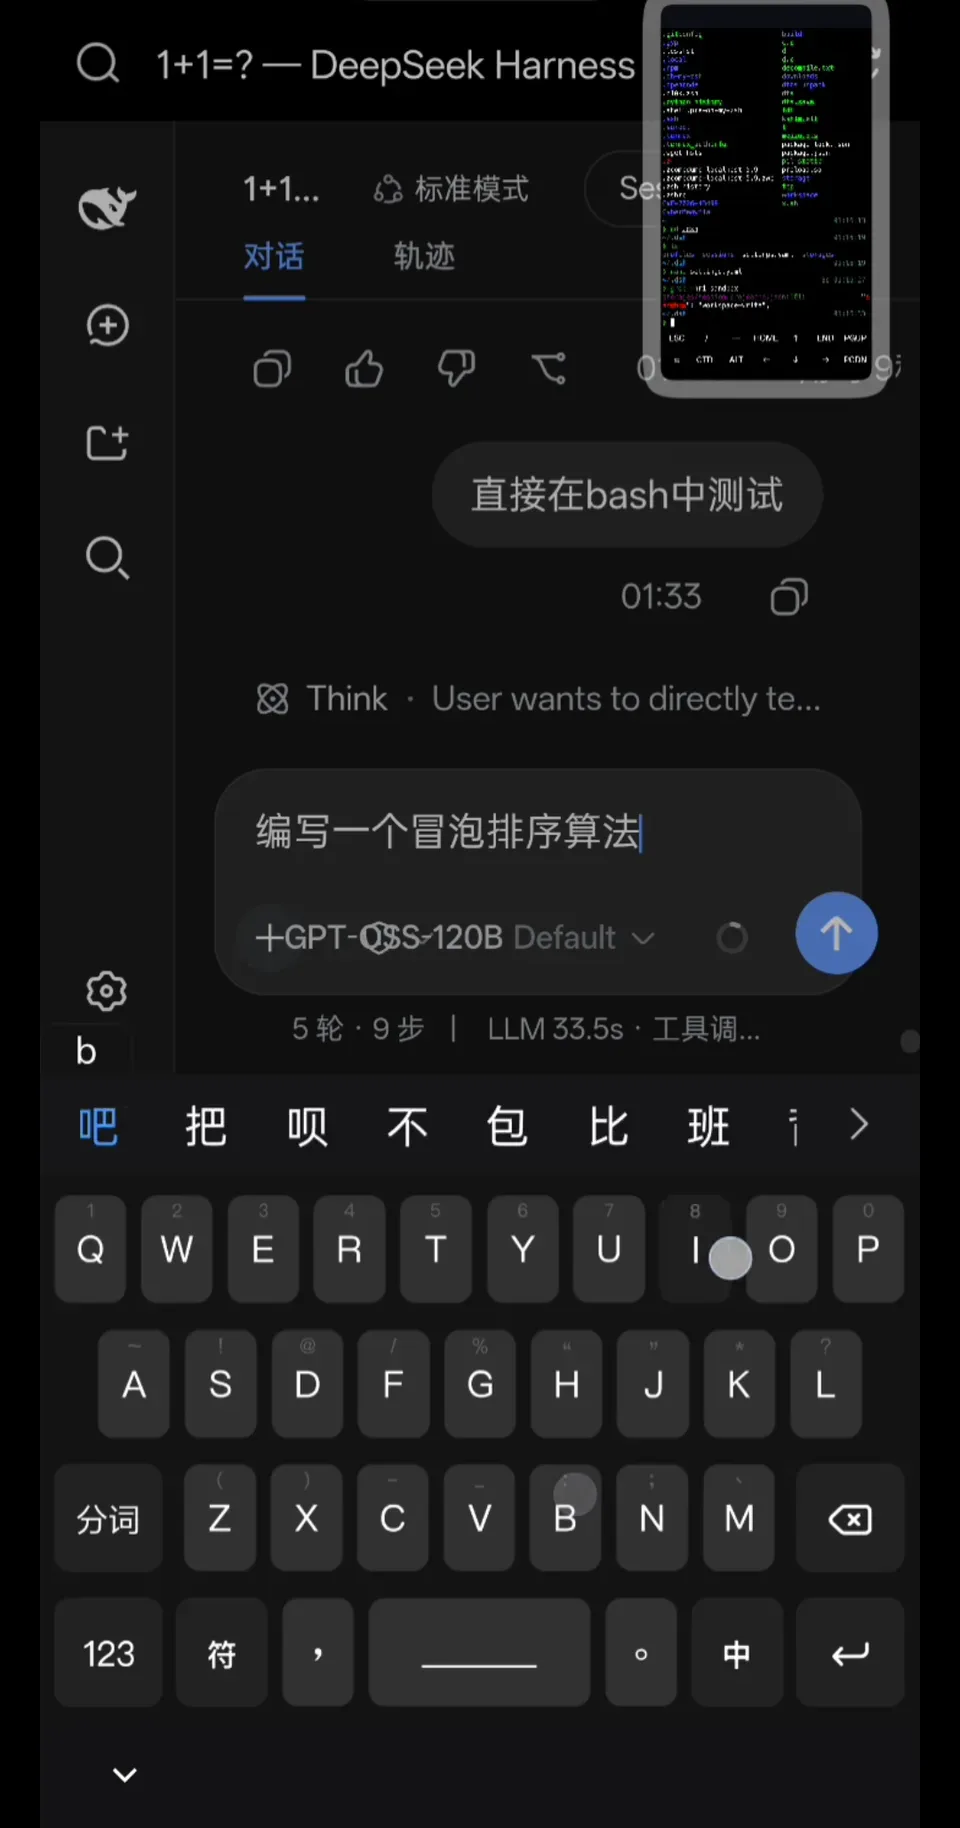
gcc built and ran the binary on the handset itself.Watch at 2:01 - 9
A real workload: sort, compile, run
The same session then writes a bubble sort, compiles it, and runs it — the answer renders the program's own output: original array 64 34 25 12 22 11 90, sorted array 11 12 22 25 34 64 90. Write, build, execute, all on the phone.
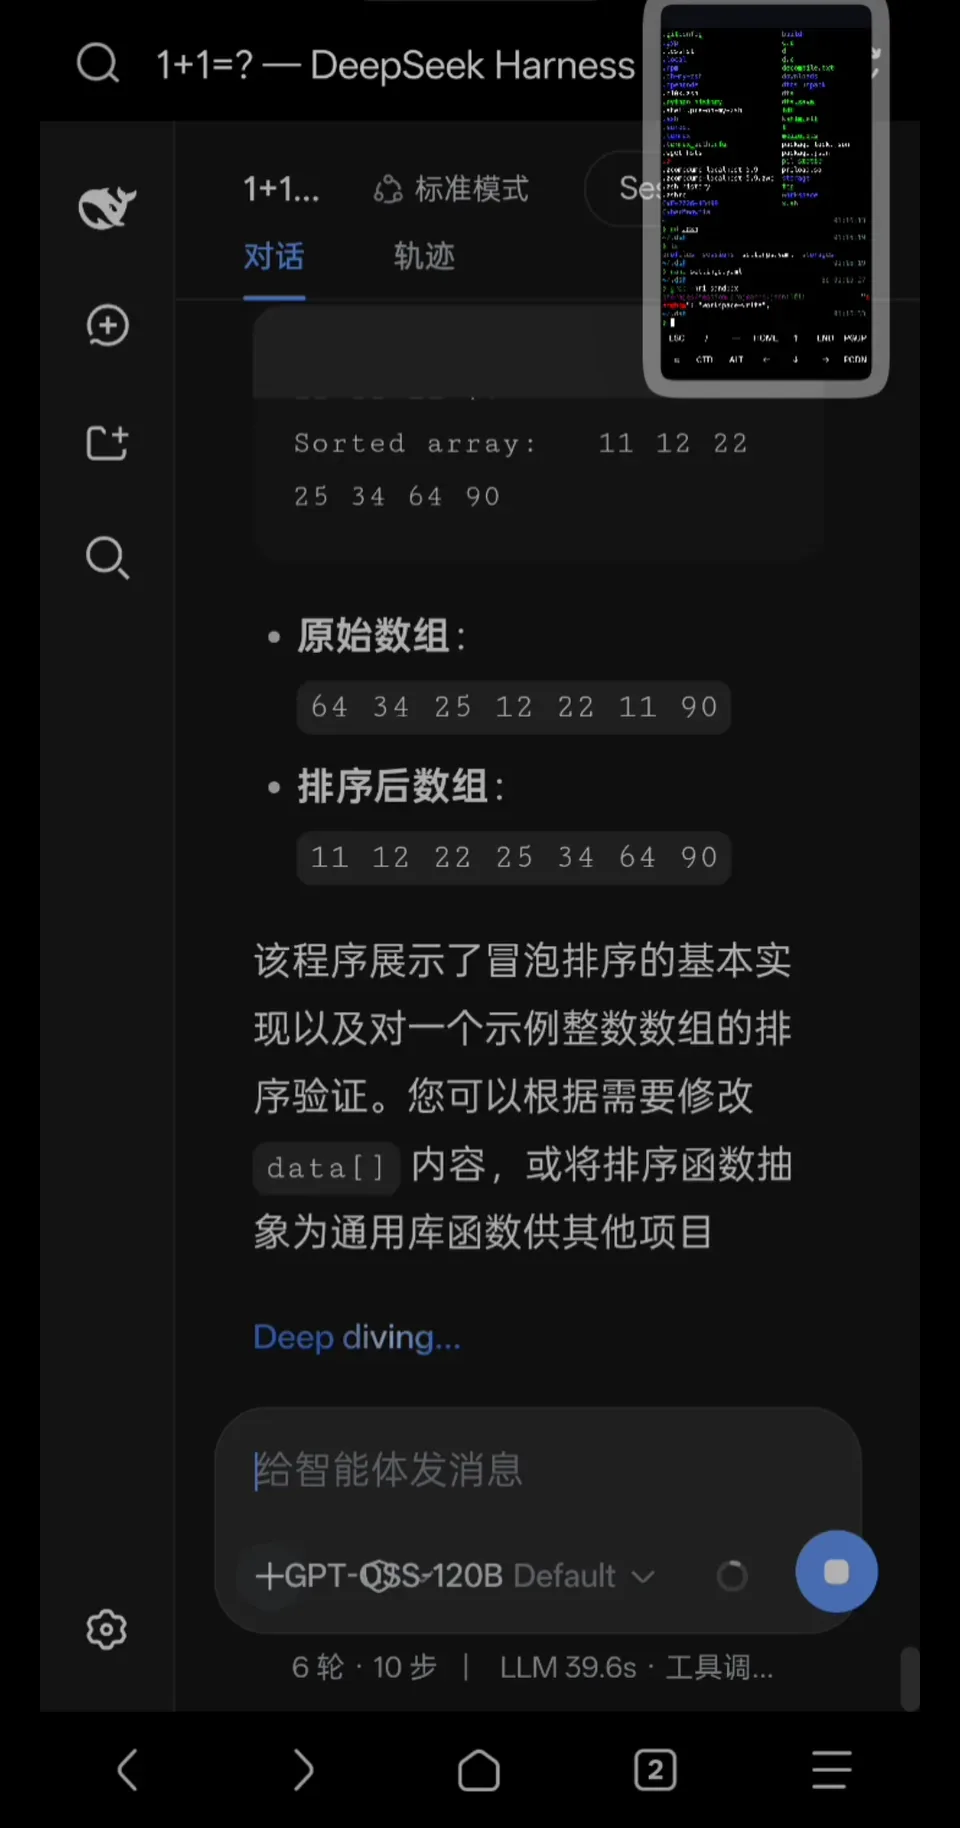
A complete write-compile-run cycle, all on the phone.Watch at 2:13
Frequently asked questions
The questions this page gets asked most, answered from the recordings and the two anchor repositories.
Do I need root to run DeepSeek Harness in Termux?
No. Termux is a regular Android app, and everything — Node, the compiled native modules, the DSH server — lives inside its userspace. The web server binds to 127.0.0.1 only, so nothing is exposed to the network.
Which Termux build should I install?
F-Droid or the GitHub releases. The anchor repo's README is explicit: do not use the Google Play build — it is outdated and the install scripts fail on it. Verified hardware is aarch64/arm64.
How long does the one-click install take?
Expect 10–30 minutes: the script upgrades packages and compiles native modules like node-pty and koffi from source. Budget roughly 2 GB of storage, keep the network stable, and don't interrupt it — every run leaves a log at ~/dsh-install-*.log.
Which one-click script should I use?
Two are verified on this page, both third-party community work: FunnelCakes/deepseek-harness-android (★43, setup.sh, verified against dsh rc.7) and MIOYULIN/install-dsh-termux (★3, verified against 0.1.0-rc.6). Neither is official — read each script's risk notes before running it.
Where does my DeepSeek API key go?
Into the Models page of the web UI, or directly into ~/.dsh/.credentials.yaml, which is written with 0600 permissions. The server only listens on localhost. One honest caveat the recordings surface: on Android the agent runs with danger-full-access because no sandbox substitute exists — treat approval prompts seriously and keep this to a personal device.
How is this different from the DSH mobile apps?
This page covers the Termux terminal route: the full toolchain compiles and runs on the phone. Native APP clients with QR pairing, standalone shells and the HarmonyOS port are different projects, covered by the on-phone overview page; for ordinary x86 Linux there is a separate install guide.
Related guides
Where to go next, depending on which route fits you.
Run DSH on your phone, three routes
QR-paired native clients, a frame-recorded local container client, or terminal plus browser — pick the mobile route that fits, 9 frames with timestamps
Read the guideInstall DeepSeek Harness on Linux
A frame-verified Linux walkthrough: Node.js, one npx command, provider setup — plus a WSL section for Windows users.
Read the guideDeepSeek Harness: the 10-step tour
From git clone to headless mode — install, providers, presets, creator-mode plugins, sandboxing and receipts, in one guided walkthrough.
Read the guidedsh-pocket: DeepSeek Harness in your pocket
Pair your phone by scanning a QR code: the dsh-pocket plugin mirrors your computer's dsh web over LAN or a free Cloudflare tunnel, with real-time two-way control — 7 frame-checked screenshots.
Read the guideSources and credits
All three recordings are third-party tutorials from Bilibili creators — not DSH team material — and every frame above links back to its own timestamp. View counts are Bilibili API values as of the 2026-10-09 check; star counts were verified via the GitHub API the same day.