Install DeepSeek Harness on Windows: Step-by-Step Guide (2026)
From Node.js to your first task: the complete DeepSeek Harness (dsh) install walkthrough for Windows 10 and 11 — 10 steps, 17 screenshots taken from real installs, each one deep-linking back to the source video.
Last updated: 2026-08-30
DeepSeek Harness (dsh) is a developer preview, but on Windows it installs like any other npm package: install Node.js, run one global install command in PowerShell, then open the Web UI at http://127.0.0.1:3080 — no WSL required.
This guide breaks the whole process into 10 steps, with screenshots captured from real install sessions. Every image carries a timestamp link, so if your screen ever looks different from the walkthrough you can jump straight to that moment in the source video.
The 10-step Windows install, with screenshots
- 1
Install Node.js first
DeepSeek Harness needs Node.js 20 or newer (Node 22 LTS is recommended). Download the Windows installer from nodejs.org, run it with the default options, then verify in any terminal: node --version should print v20 or higher.
$node --version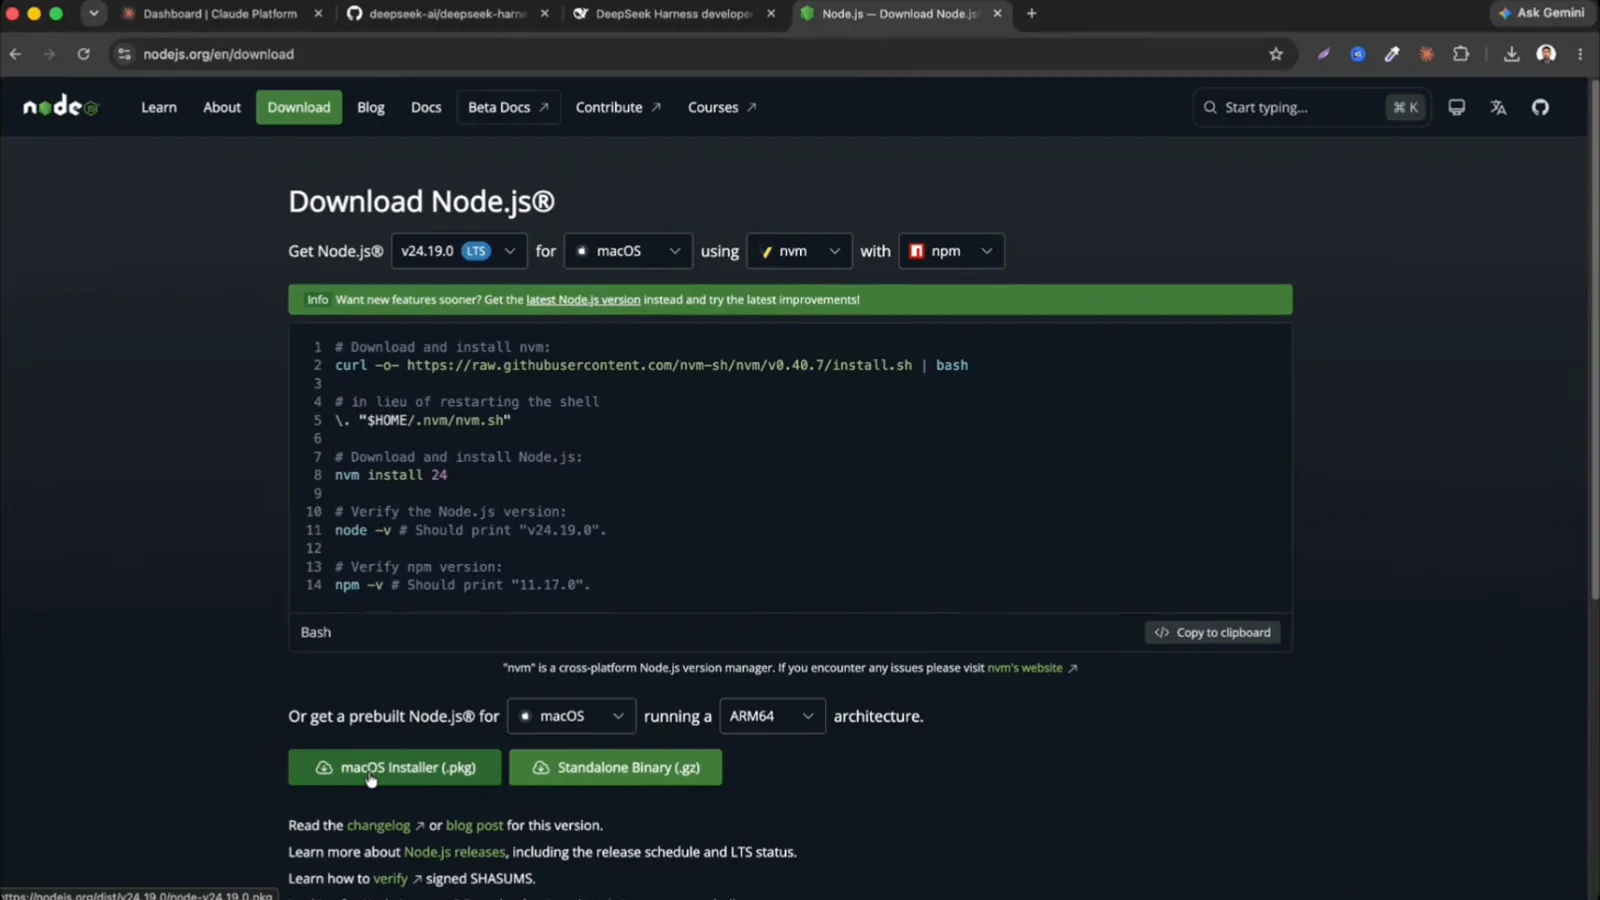
The nodejs.org download page — grab the Prebuilt Installer for Windows.Watch at 1:01 - 2
Open PowerShell and install DSH globally
Open PowerShell from the Start menu and run the global install command below. The -g flag installs DeepSeek Harness globally, so the dsh command works from any folder. npm wraps up in about half a minute with added 454 packages; run dsh web and it prints dsh web: http://127.0.0.1:3080 — and opens your browser by default.
$npm install -g @deepseek-ai/dsh$dsh web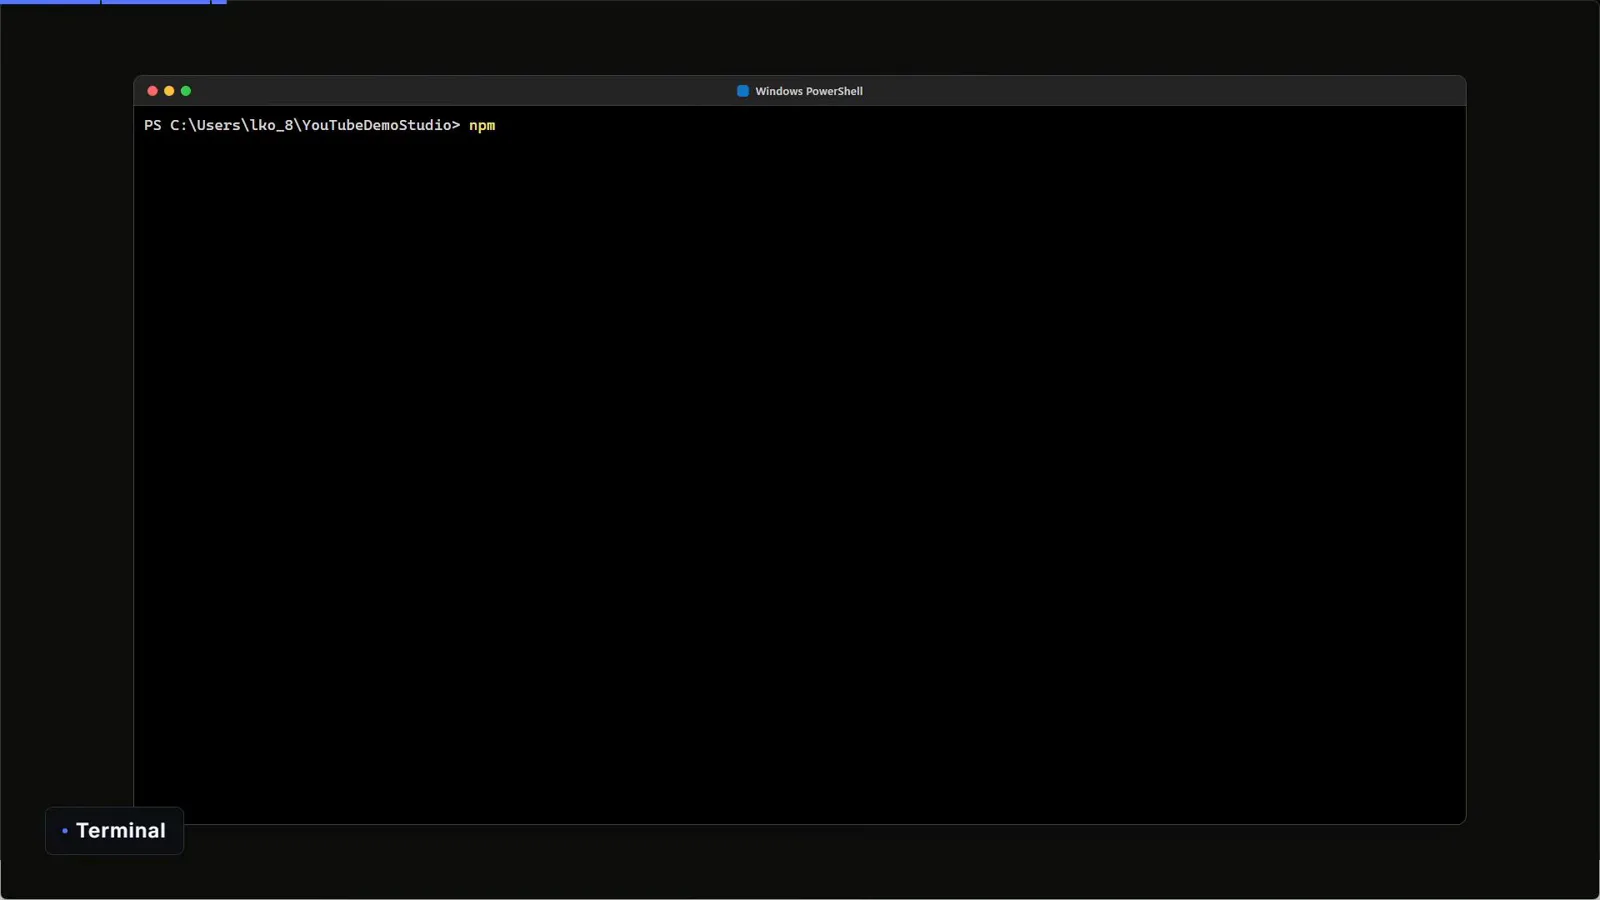
PowerShell ready at your user folder — this is where the install command goes.Watch at 1:27 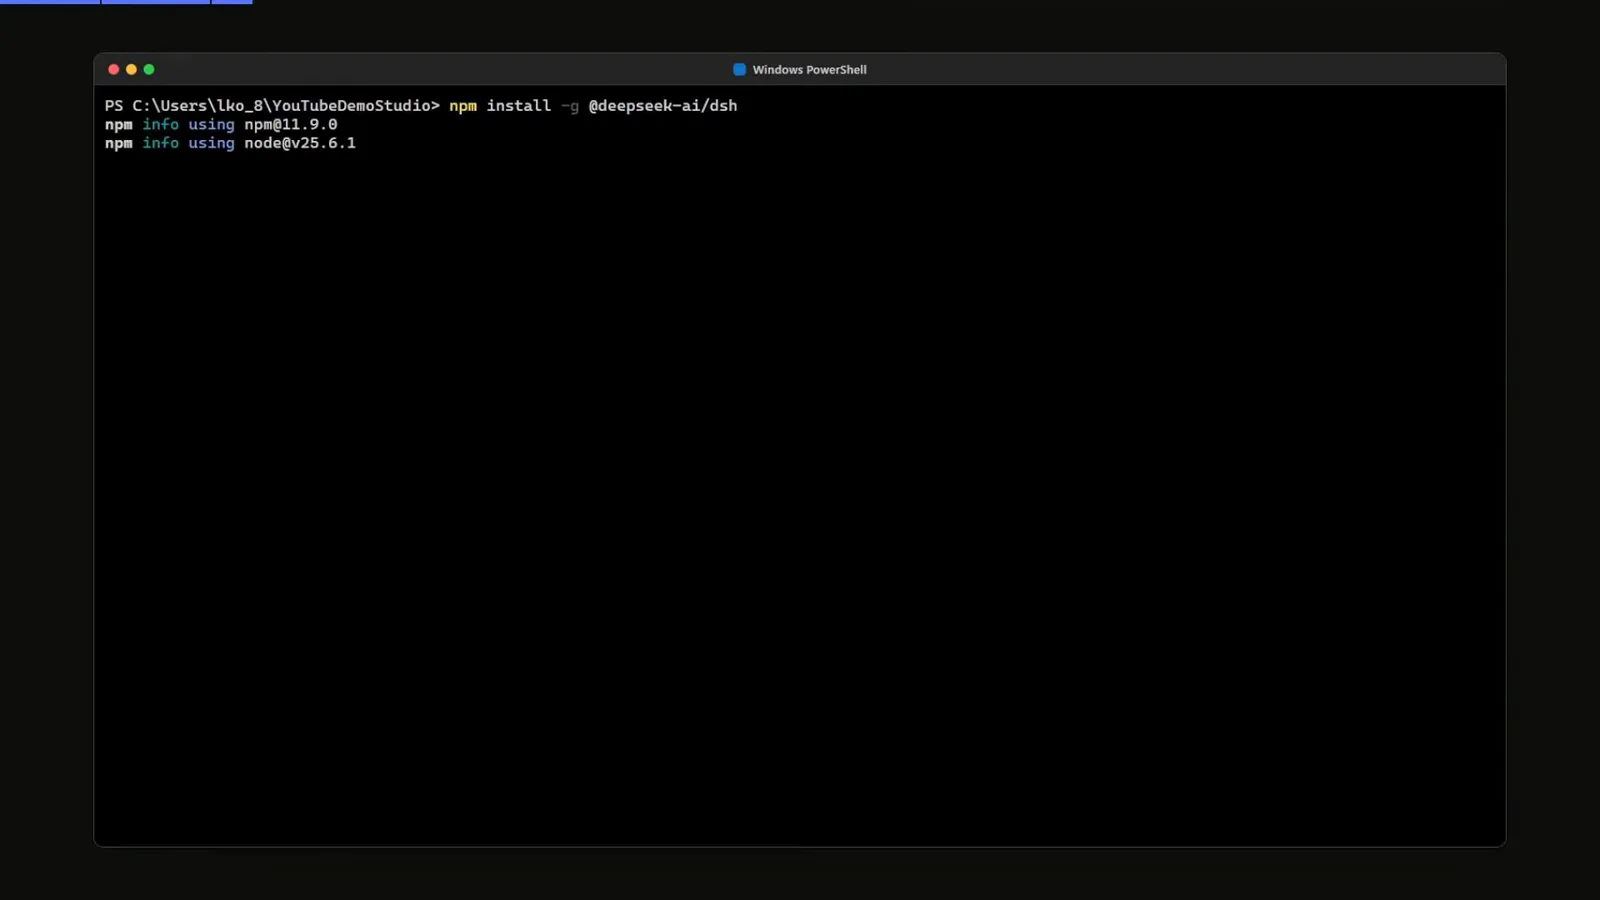
The global install command: npm install -g @deepseek-ai/dsh.Watch at 1:37 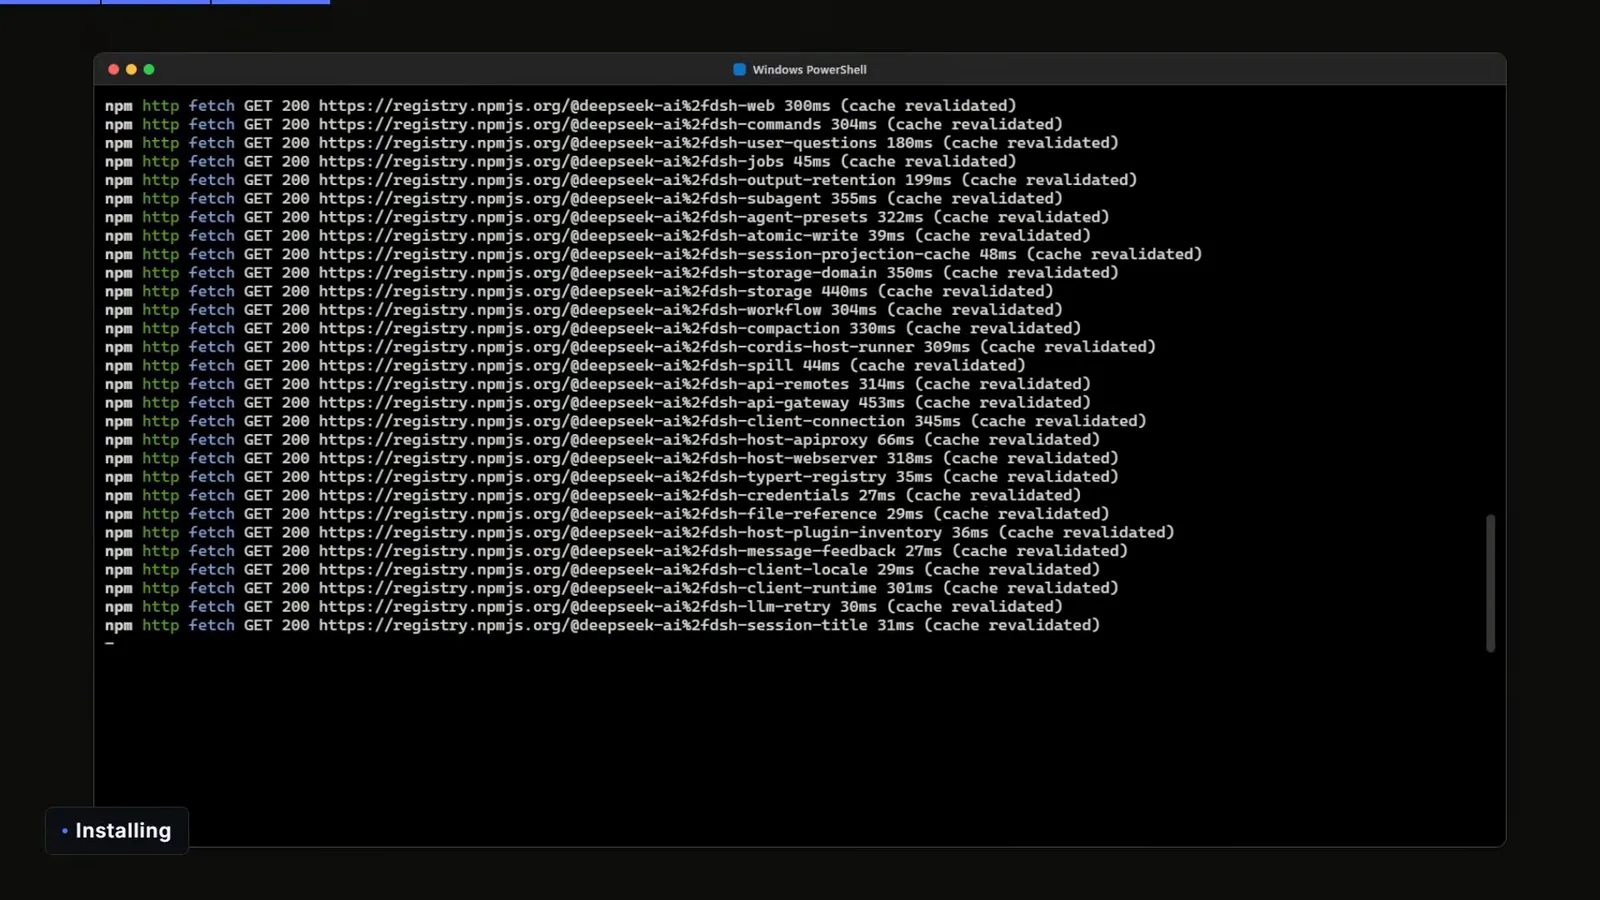
npm pulling the DeepSeek Harness packages from the registry.Watch at 2:07 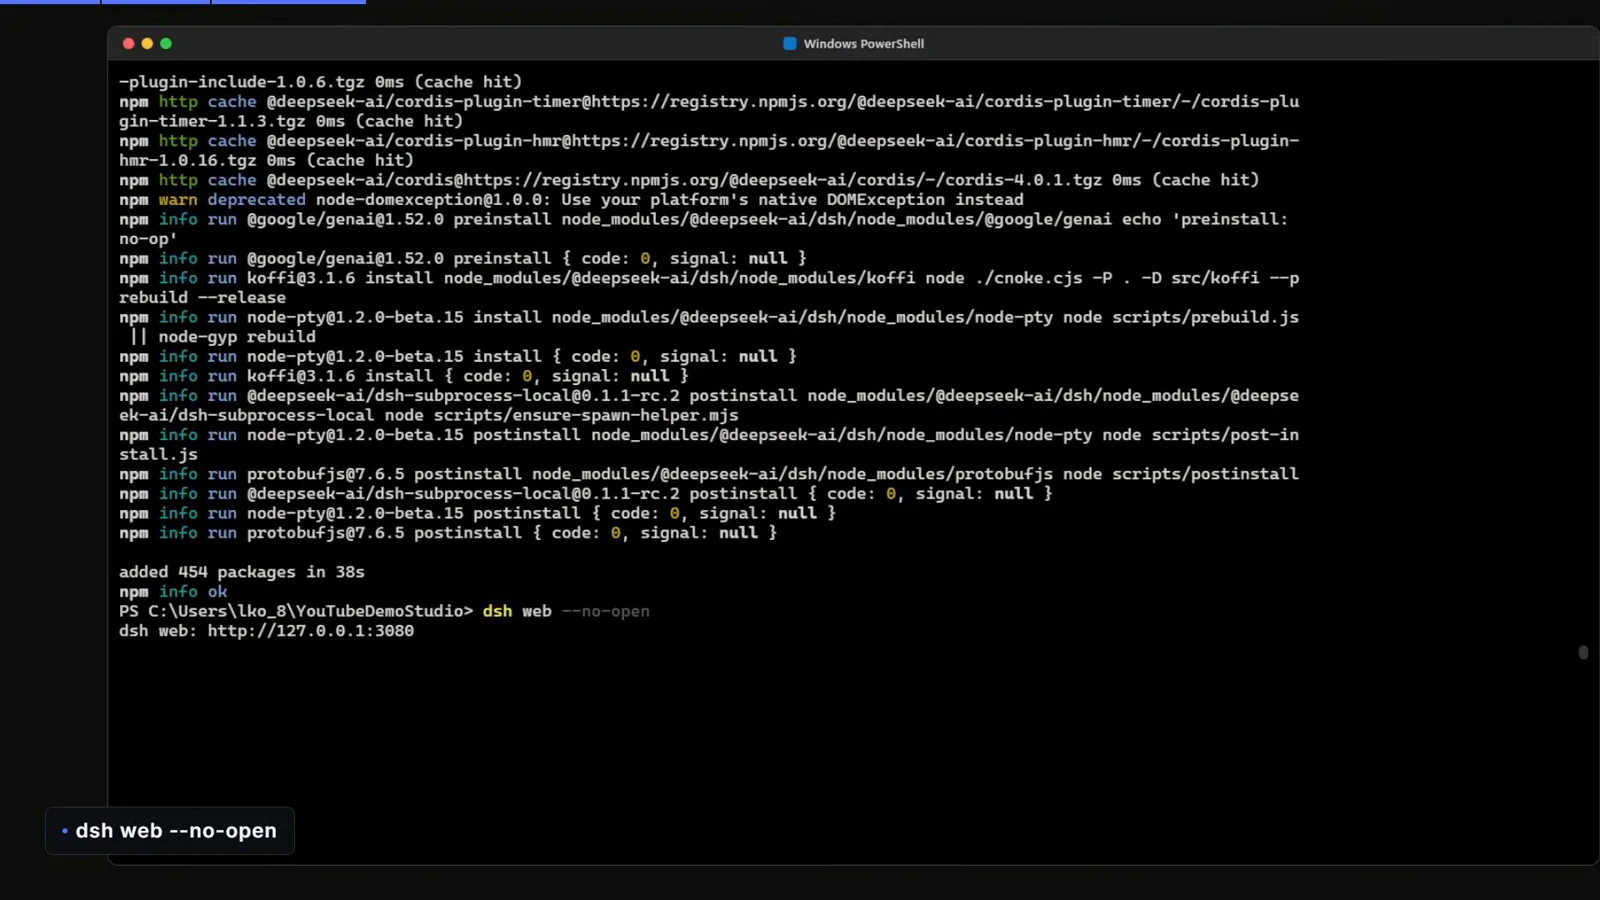
added 454 packages — then dsh web prints the local URL.Watch at 2:21 - 3
No-install alternative: one line with npx
Rather not install anything permanently? npx @deepseek-ai/dsh web downloads and runs DSH in one line — type y when it asks 'Ok to proceed?'. Nothing stays installed, which makes this a good way to try DSH out. (The screenshot below was taken in the macOS terminal, but the command is exactly the same in PowerShell.)
$npx @deepseek-ai/dsh web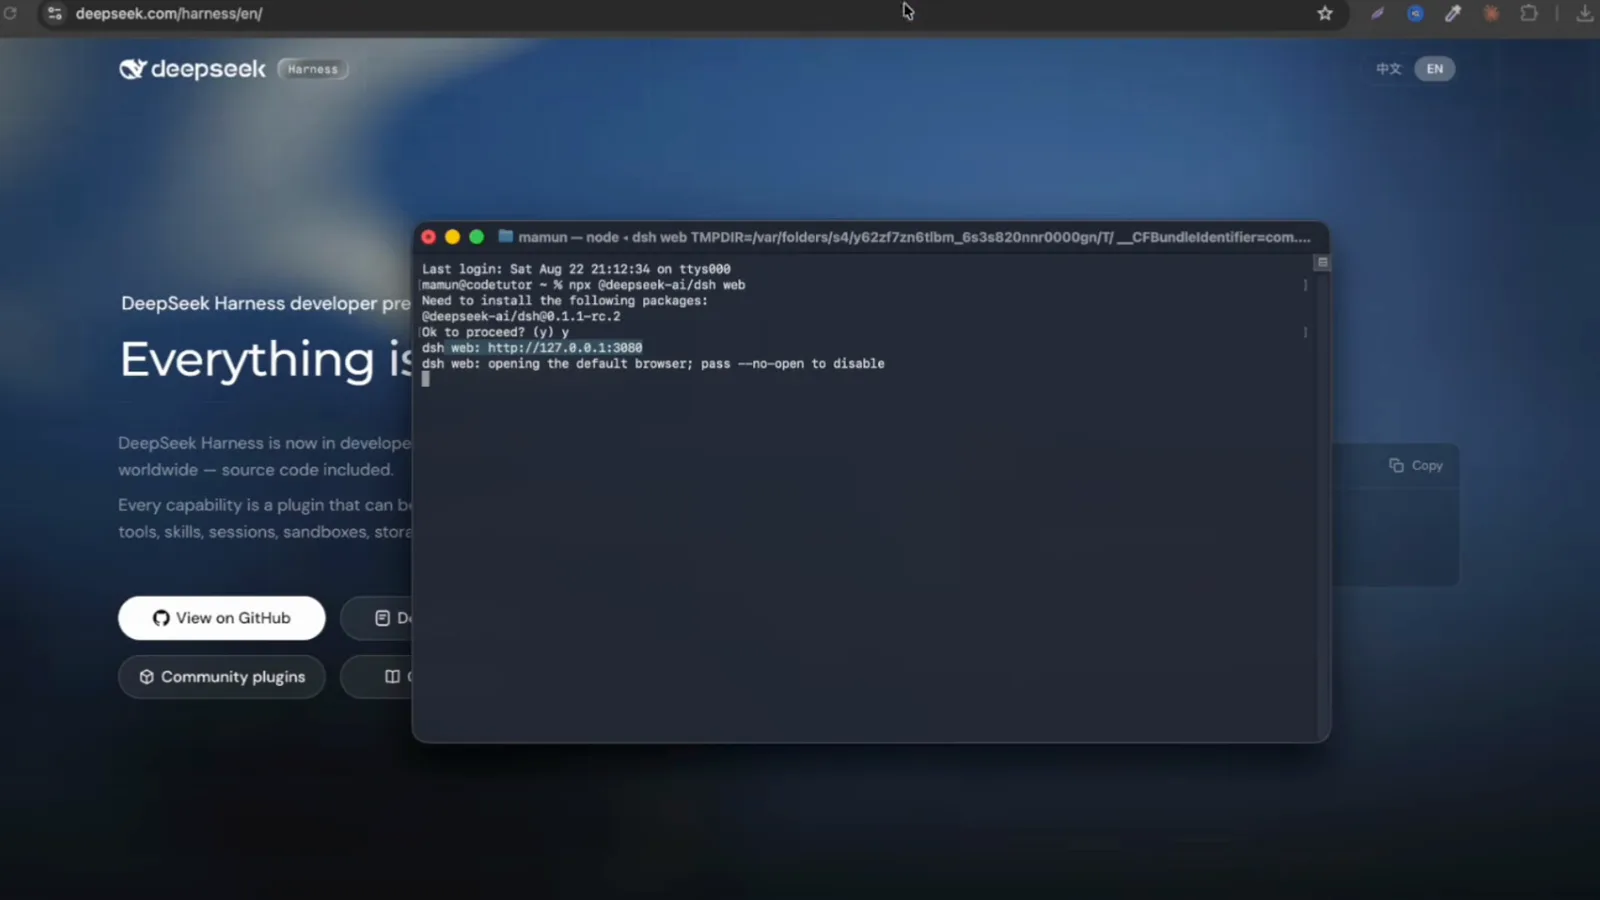
The one-line alternative: npx @deepseek-ai/dsh web (same command in PowerShell).Watch at 1:51 - 4
First launch: testing notice and API key
The first time the Web UI opens you will see an Internal Testing Notice — DeepSeek Harness is a developer preview — so click Continue. Next, DSH asks for your DeepSeek API key to configure the official DeepSeek provider. Create a key at platform.deepseek.com (API usage is billed by DeepSeek), paste it in, and click Save and continue. Treat the key like a password.
First launch shows an Internal Testing Notice — click Continue.Watch at 2:43 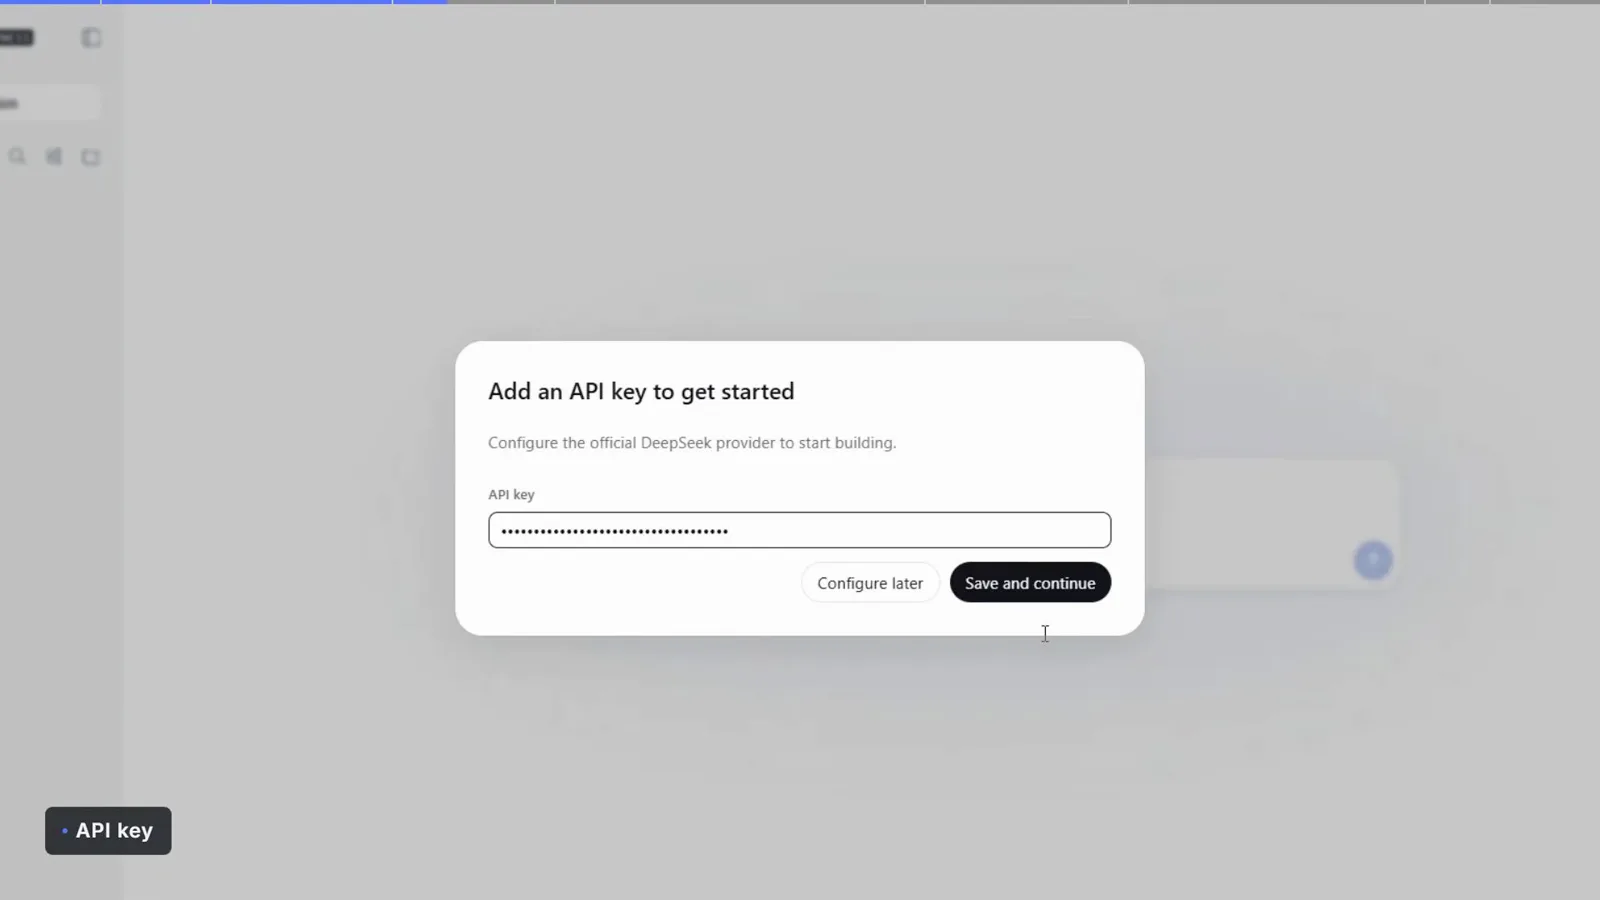
Paste your DeepSeek API key and click Save and continue.Watch at 2:52 - 5
Choose a workspace and mode
The workspace is the folder the agent is allowed to modify — in Workspace Write mode it is the permission boundary. Pick a project folder you care about, and leave Standard mode selected: it is the default preset for full coding-agent work.
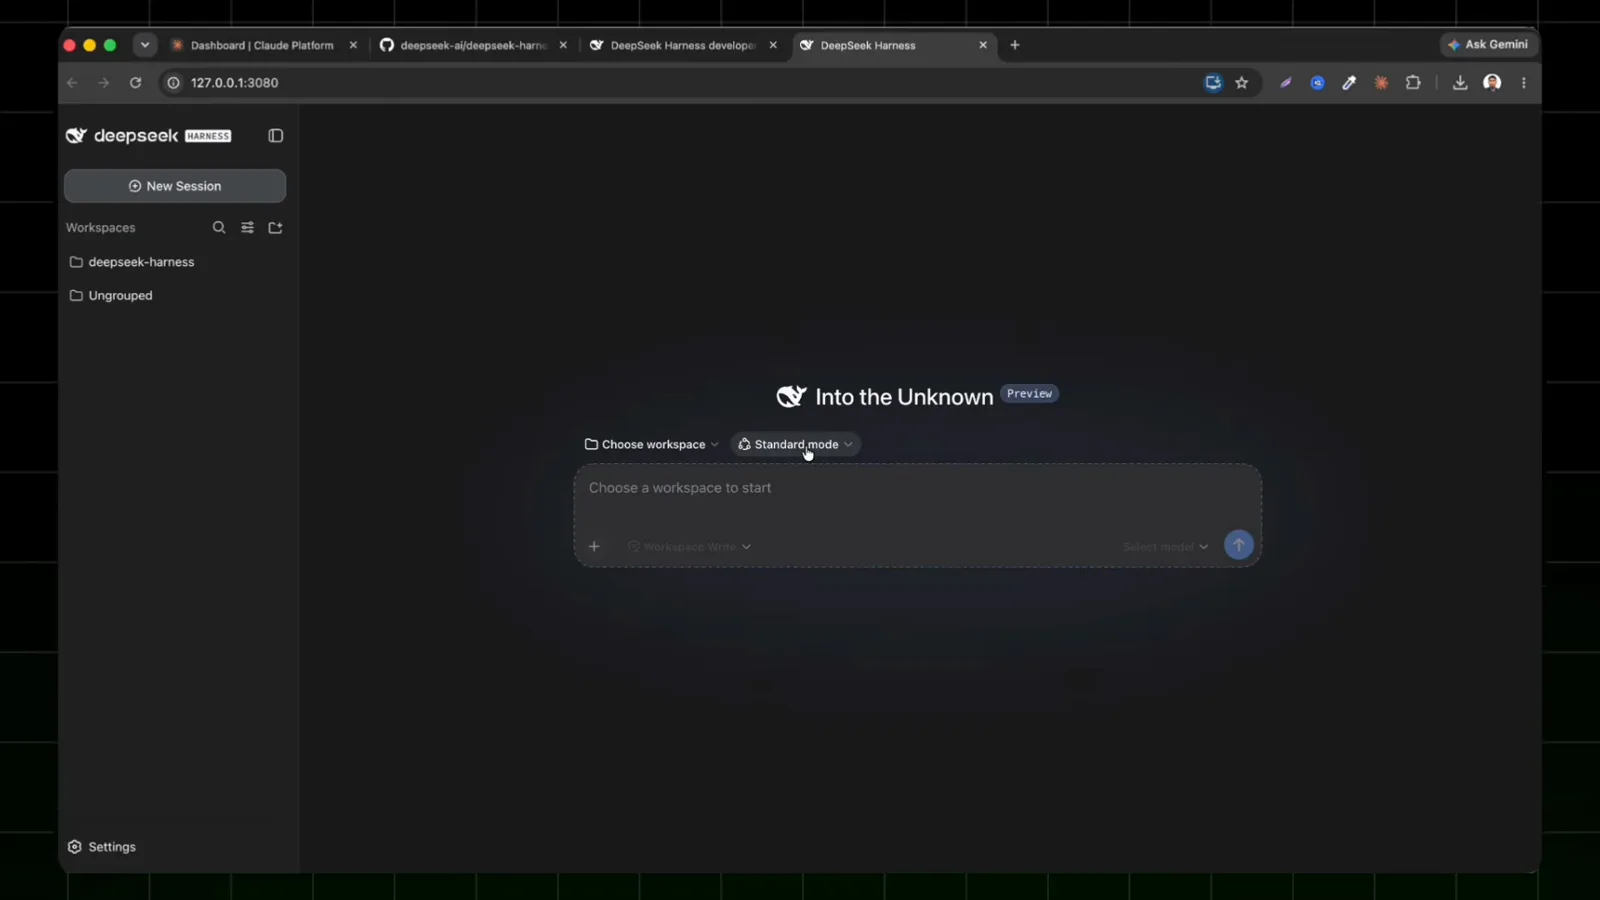
Pick the workspace folder and leave Standard mode selected.Watch at 2:01 - 6
Connect models in Settings
Open Settings → Models: the DeepSeek provider is already listed, so paste the same API key and click Apply. Need another model? + Add provider lists anthropic, openrouter, ollama and dozens more.
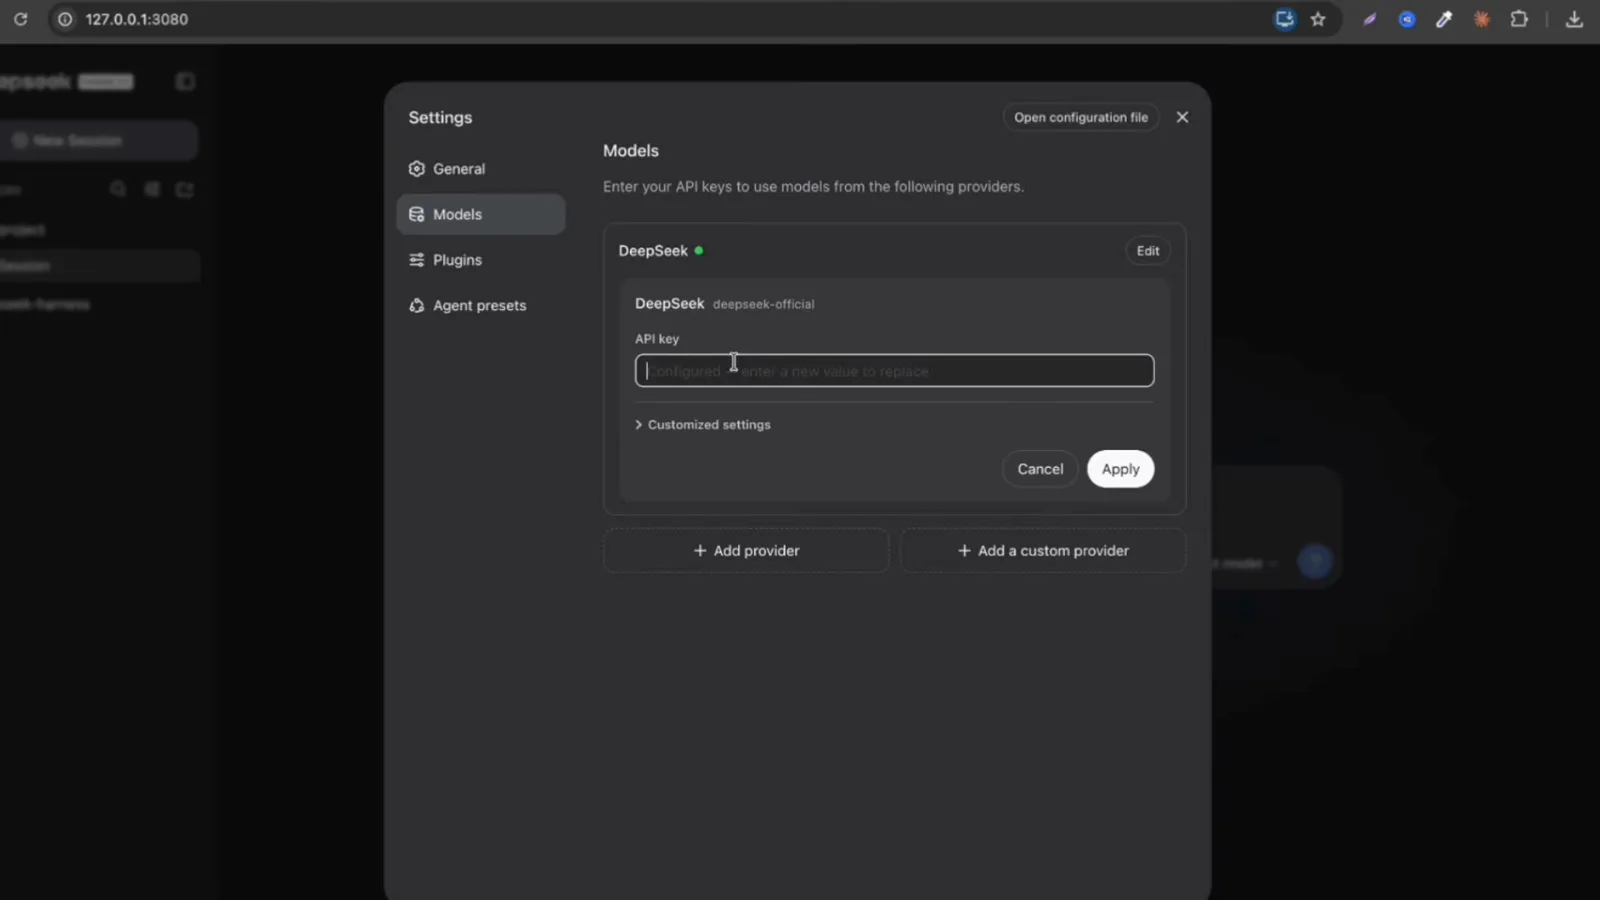
Settings → Models: paste your key and click Apply.Watch at 2:43 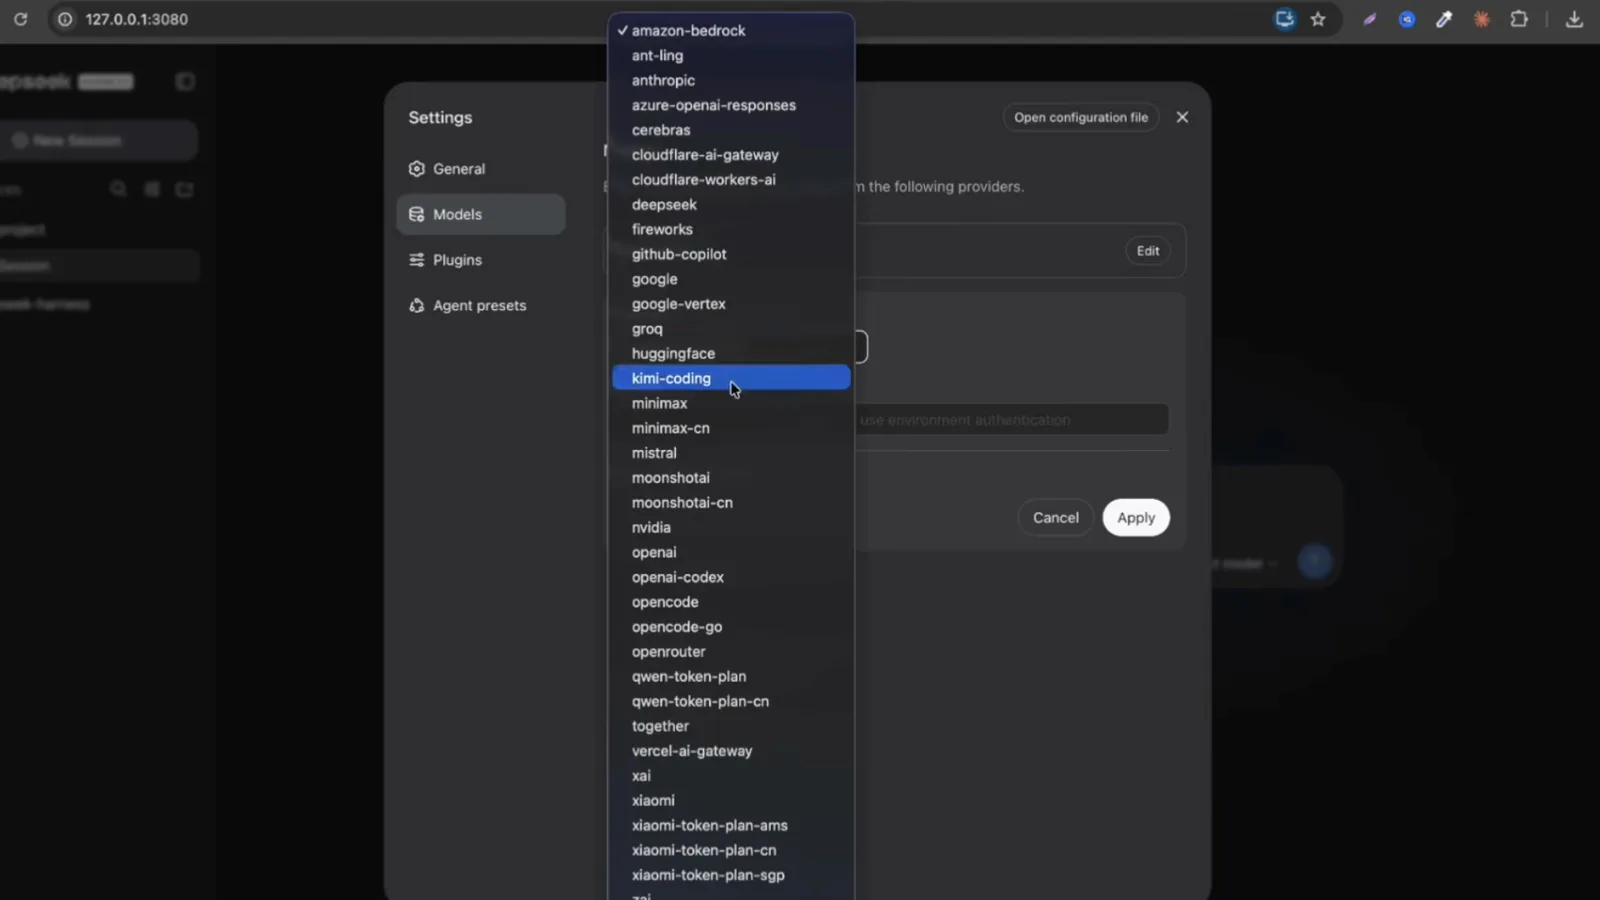
+ Add provider: anthropic, openrouter, ollama and dozens more.Watch at 2:59 - 7
Know the four agent presets
DeepSeek Harness ships four built-in agent presets: Standard (the full coding agent), PTC (the same tools chained through a Code-Mode TypeScript SDK), Minimal (a persistent shell plus a file editor only) and Creator (author your own presets). You can switch between them any time in Settings.
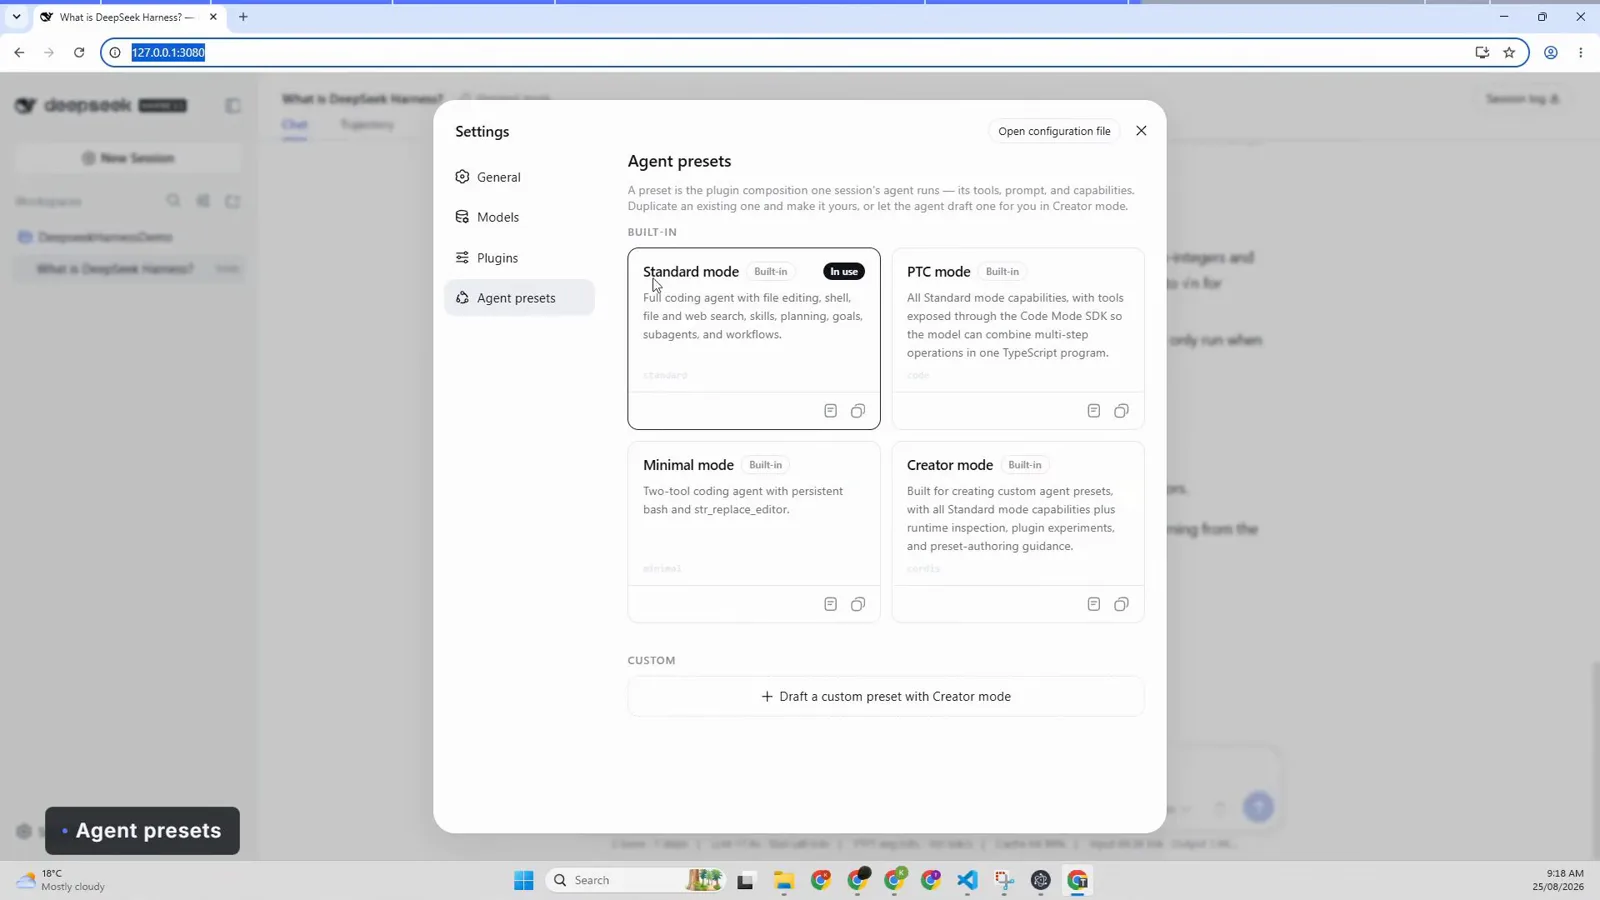
The four built-in presets — Standard, PTC, Minimal, Creator.Watch at 7:20 - 8
Set permissions and pick a model
Three permission levels: Read Only, Workspace Write (the sensible default) and Full access. In the model picker, DeepSeek-V4-Flash is the fast option for everyday tasks while DeepSeek-V4-Pro handles the harder ones; reasoning Effort is adjustable too.
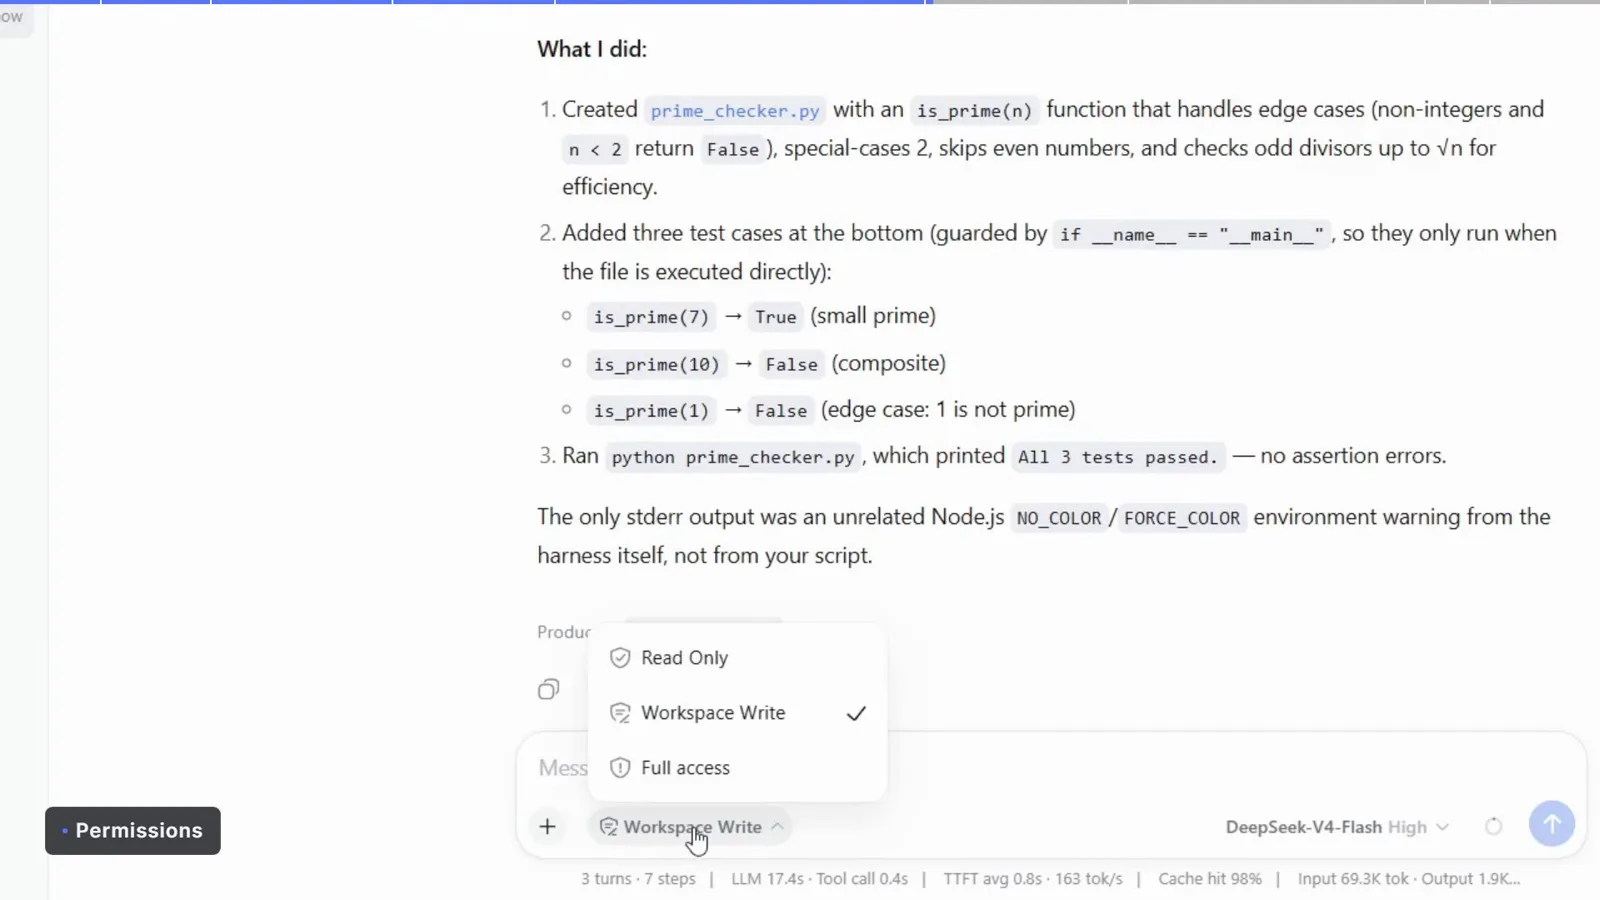
Three permission levels — Workspace Write is the sensible default.Watch at 6:00 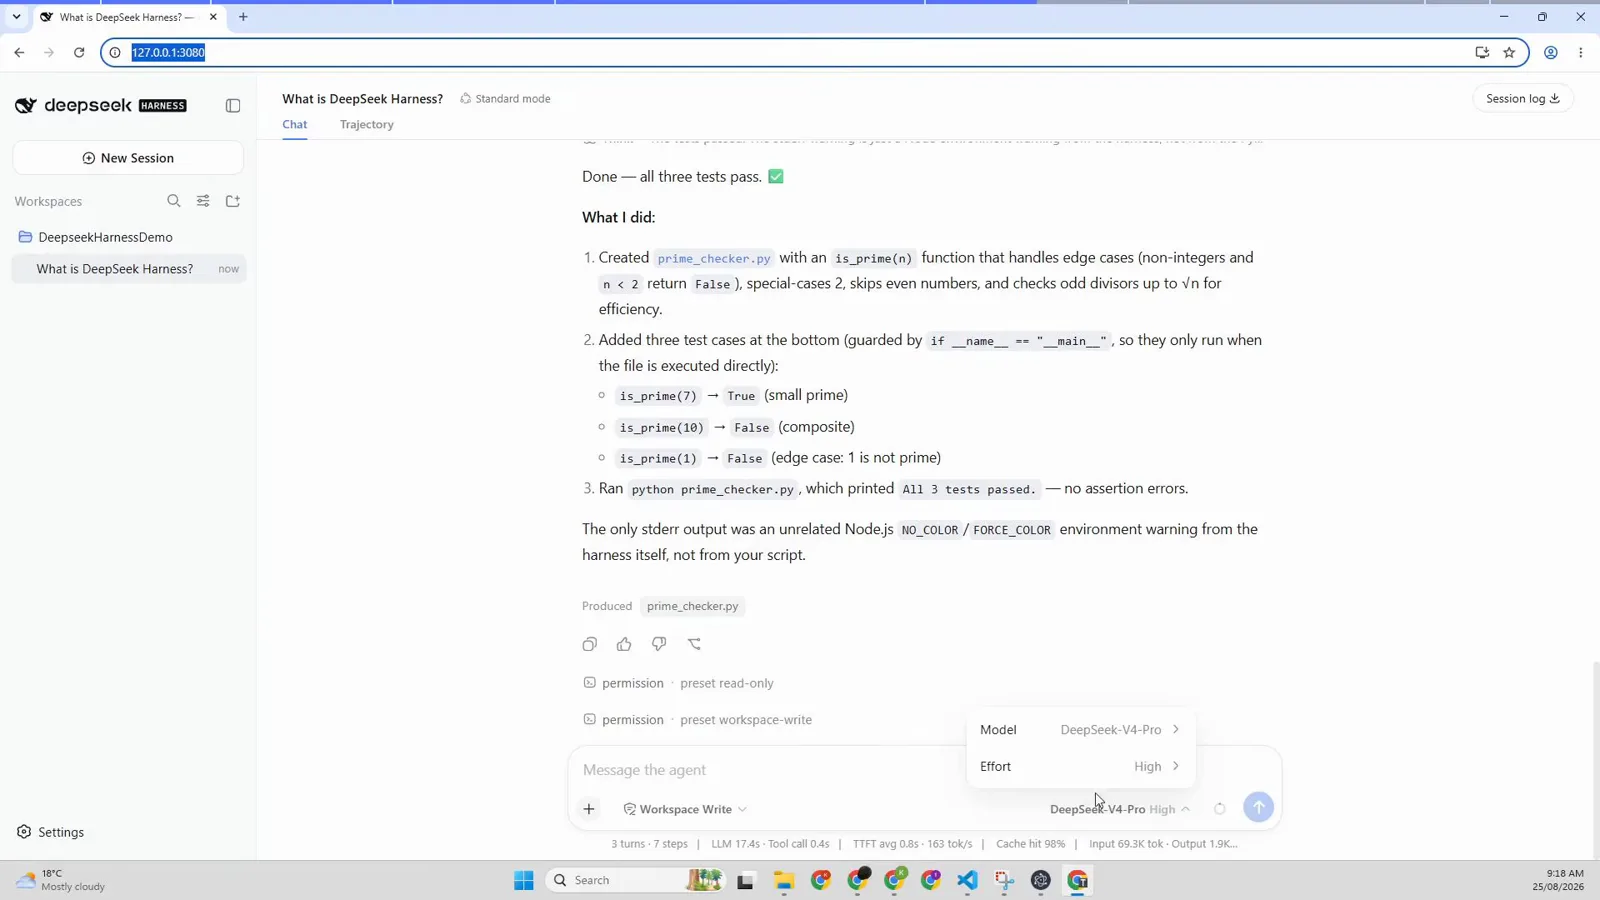
DeepSeek-V4-Flash for speed, DeepSeek-V4-Pro for harder tasks.Watch at 6:40 - 9
Everything is a plugin
Open Settings → Plugins: Shell, Agent loop, Web search and 160+ more plugins compose the agent. Each one can be inspected, configured or replaced — that is the harness idea. Installable community plugins are browsable in our plugin directory.
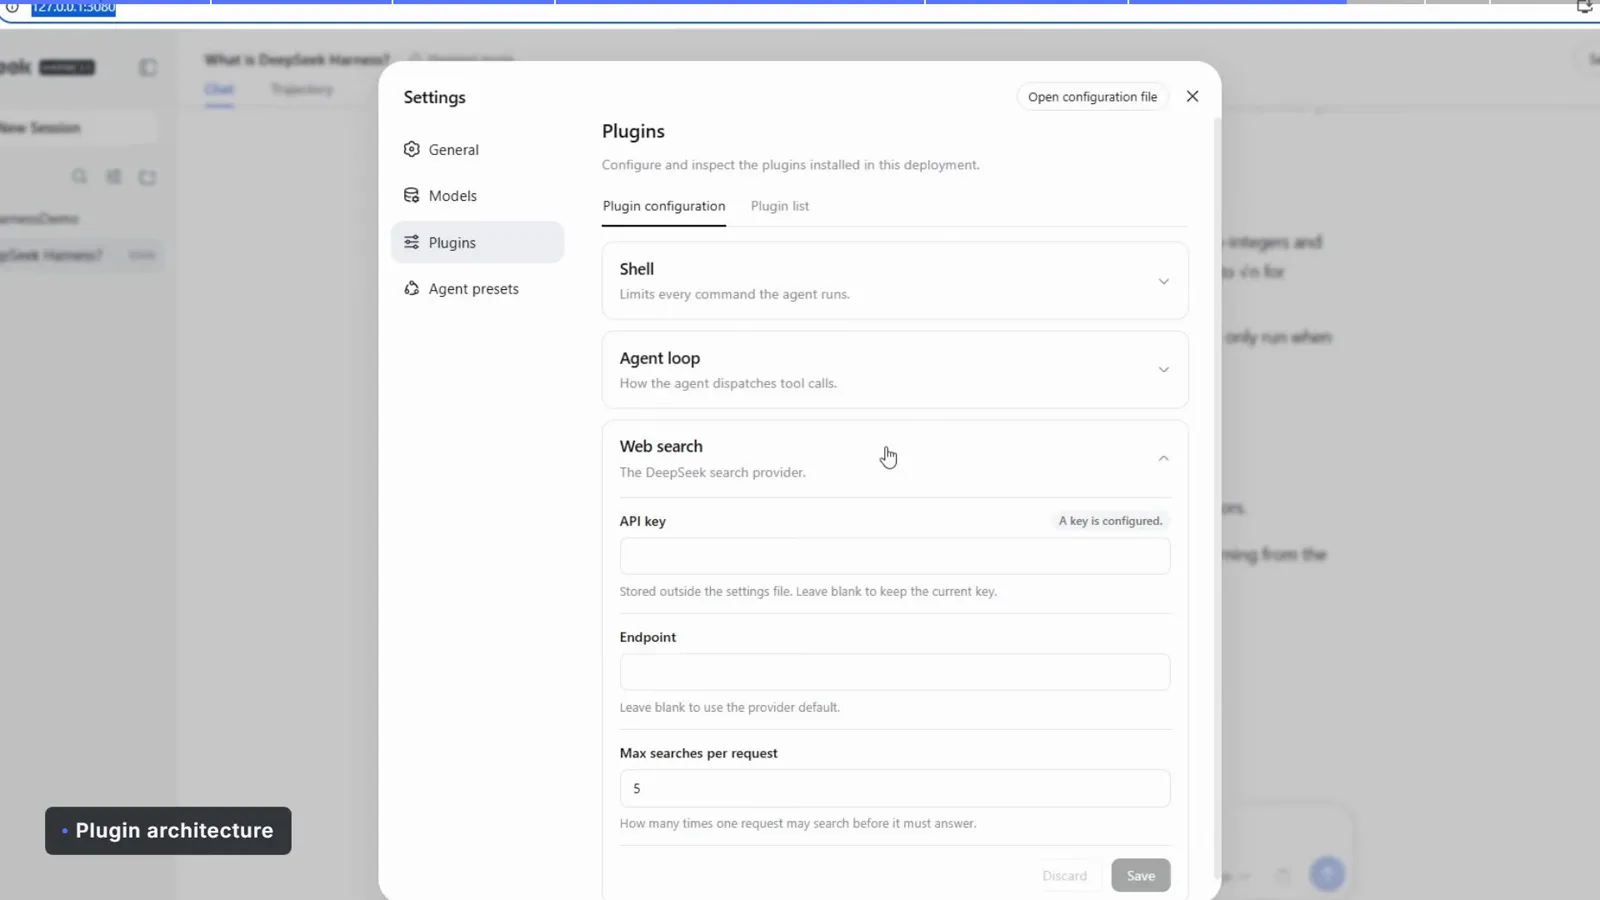
Settings → Plugins: Shell, Agent loop, Web search and more.Watch at 8:40 - 10
Run your first task and inspect the Trajectory
Ask anything — for example: 'In one sentence, what is DeepSeek Harness?'. The Trajectory tab records every step, tool call and token count, and the task tracker shows progress as CREATE FILE → WRITE CODE → RUN TESTS. From here, install a few plugins and make the harness yours.
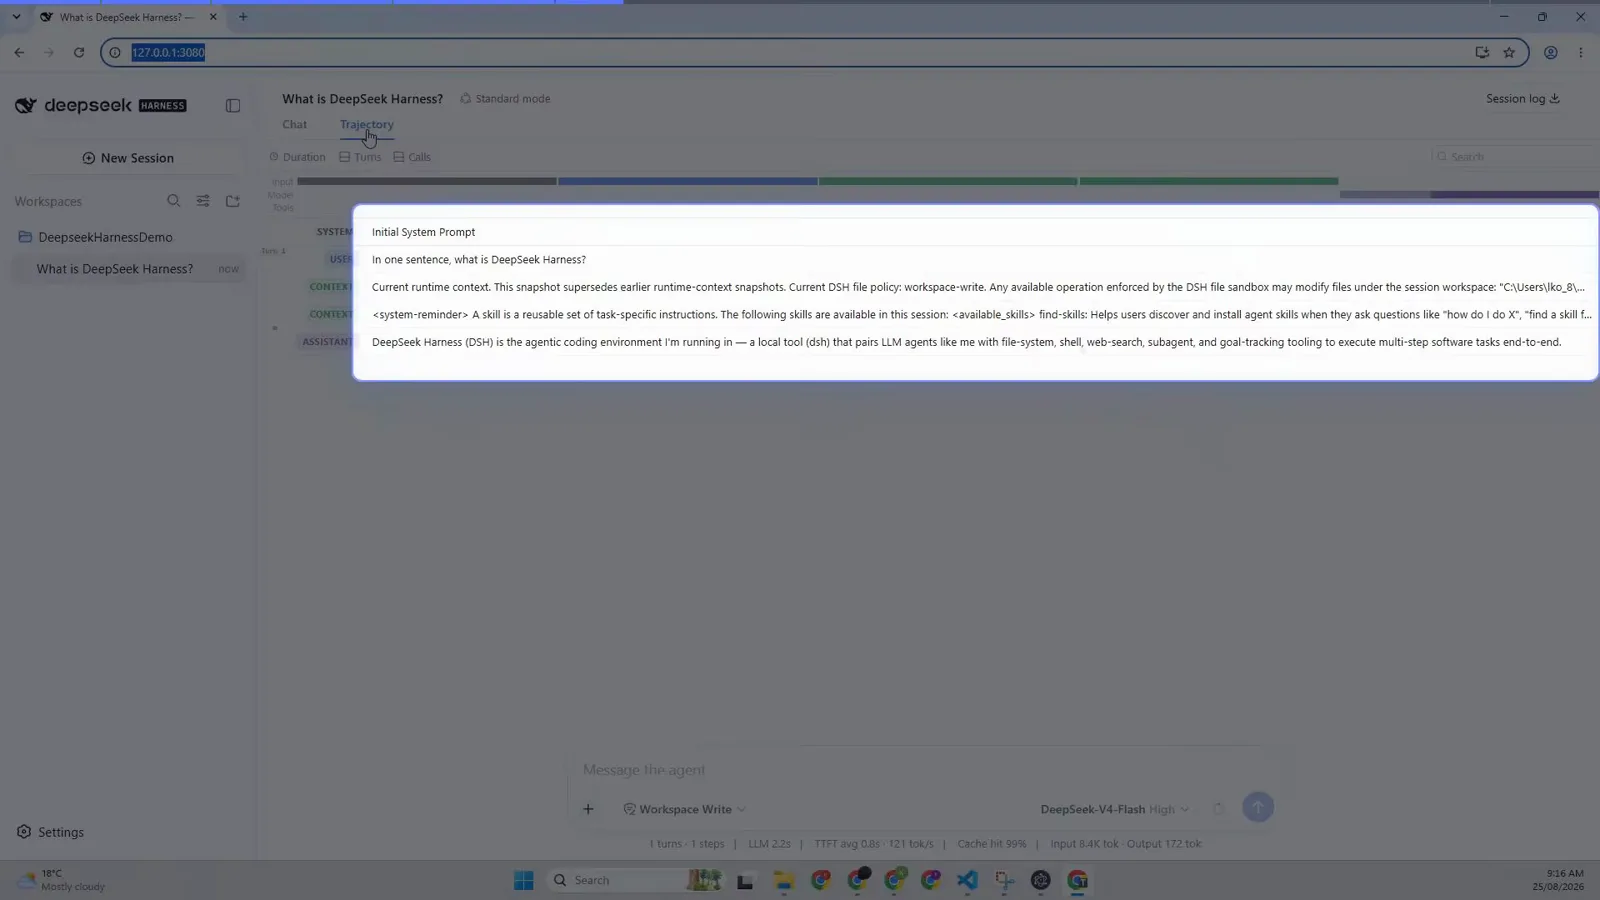
The Trajectory tab records the Initial System Prompt of every task.Watch at 4:00 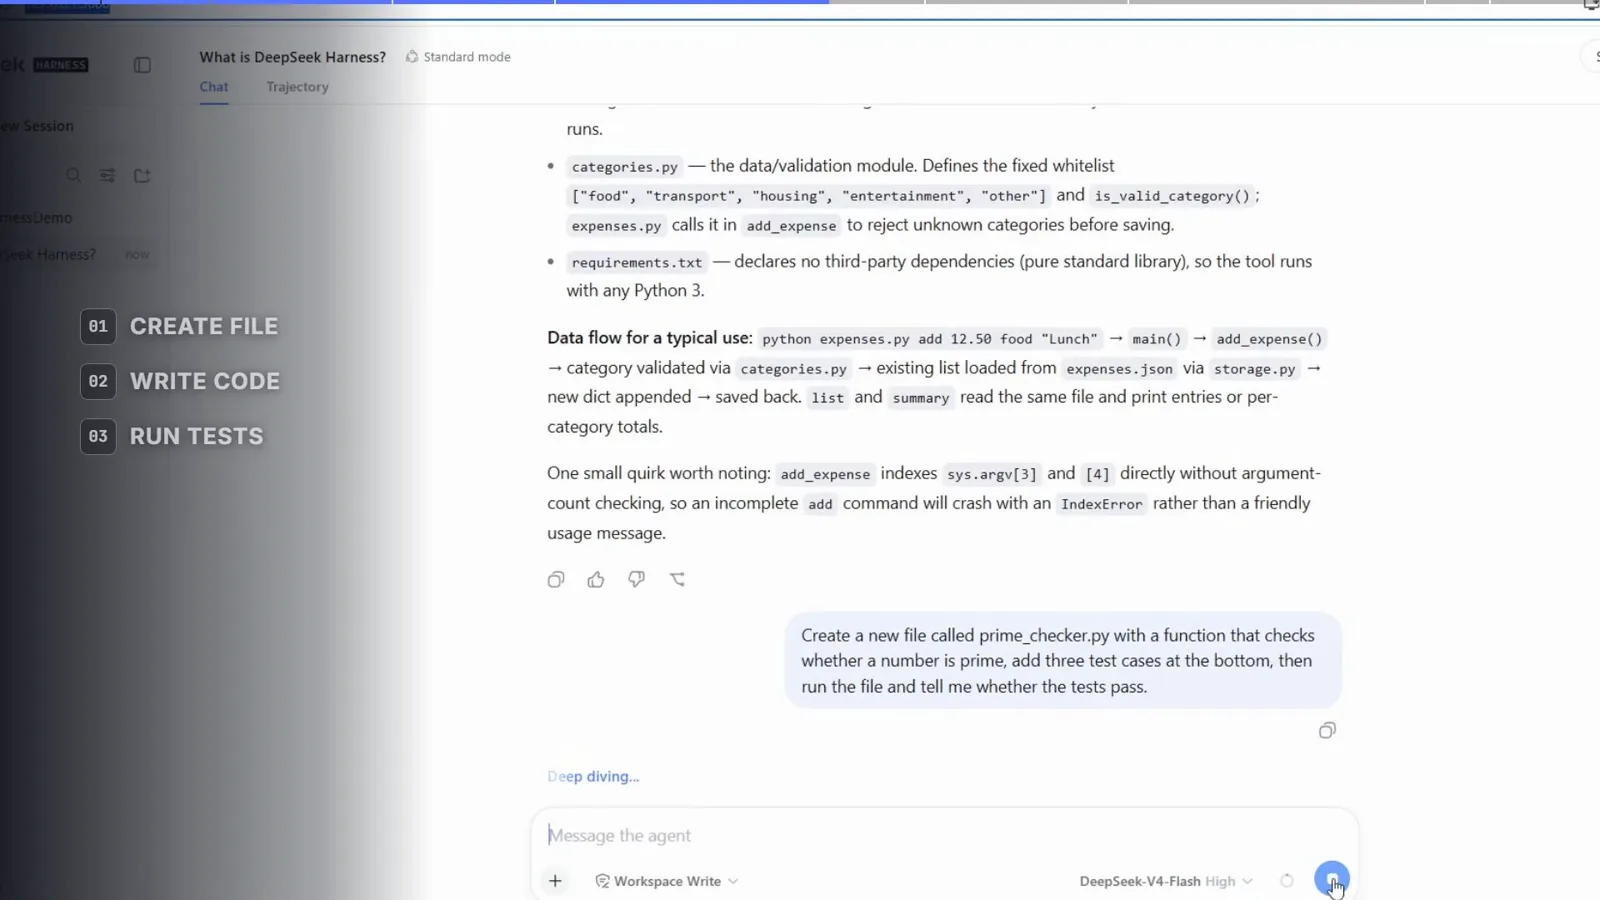
Task tracker: CREATE FILE → WRITE CODE → RUN TESTS.Watch at 5:20
Windows install FAQ
The questions that come up most while installing DeepSeek Harness on Windows.
Does DeepSeek Harness work on Windows 10 and 11?
Yes. DeepSeek Harness installs through npm on Node.js, and both Windows 10 and Windows 11 work — no WSL required. Keep in mind it is a developer preview, so behavior can change between releases.
Do I need WSL2 to run dsh on Windows?
No. PowerShell is enough for installing and running dsh. That said, DeepSeek Harness moves quickly as a dev preview — if platform support ever changes, the official README is the source of truth.
Why does npm install -g fail with a PowerShell execution policy error?
If you hit a red 'running scripts is disabled on this system' error, npm itself is fine — PowerShell's ExecutionPolicy is blocking the shim scripts npm creates for global installs. A common fix is Set-ExecutionPolicy -Scope CurrentUser RemoteSigned, or you can sidestep installs entirely with npx @deepseek-ai/dsh web.
Is DeepSeek Harness free on Windows?
The harness is open source and free to install. Model usage is separate: you connect your own DeepSeek API key and DeepSeek bills the tokens — at DeepSeek prices, that typically works out to very little.
The Web UI didn't open automatically — how do I find it?
dsh web serves the UI at http://127.0.0.1:3080. Open that address manually in your browser and check the URL printed in PowerShell. If you start it with dsh web --no-open, DSH deliberately skips opening the browser and just prints the URL.
Where do I go after installing?
Install your first plugins: our plugin directory lists thousands of community plugins, and the installing-plugins guide shows you how to vet third-party code before you add it.
Related guides
Keep going once dsh is running on your machine.
Installing plugins you can trust
How plugin installation actually works in dsh, plus a checklist for vetting third-party code.
Read the guideTroubleshooting & error encyclopedia
Symptom → cause → fix: install failures, pnpm workspace allowlist errors, cordis.patch.yml conflicts, bundle format errors, and profiles that won't apply.
Read the guideSandboxes, approvals & secrets
The dsh safety model: three sandbox tiers, approval policies, guards, and where your secrets go.
Read the guideWhat is DeepSeek Harness?
Agent = Model + Harness, profiles and patches, presets and the four modes.
Read the guideDeepSeek Harness Plugin Directory
Browse 12400+ DeepSeek Harness (dsh) plugins — UI skins, tools, workflows and agents — synced from GitHub, searchable by category, stars and recency.
Read the guideSources & credits
The screenshots on this page are frames from the real install walkthroughs below, verified frame by frame. Every image deep-links to the matching moment in the original video.