Install DeepSeek Harness on Mac
Seven screenshot-verified steps from an empty Terminal to a working local dashboard — no DeepSeek API key required.
Last updated: 2026-09-11
DeepSeek Harness ships as a single npm command, and macOS is one of the smoothest places to run it: Terminal, Safari and the local dashboard all behave exactly the way the official README describes.
Every screenshot below comes from a real macOS install, captured from a public setup walkthrough and credited at the foot of this page. By the last step you'll have the dashboard running at 127.0.0.1:3080 with a working model provider.
Install DeepSeek Harness on macOS in seven steps
- 1
Grab the run command from the official site
Open the DeepSeek Harness homepage — the headline reads "Everything is a plugin" for a reason. The Quick start panel carries the one command you need; copy it, or keep this page open and type along.
$npx @deepseek-ai/dsh web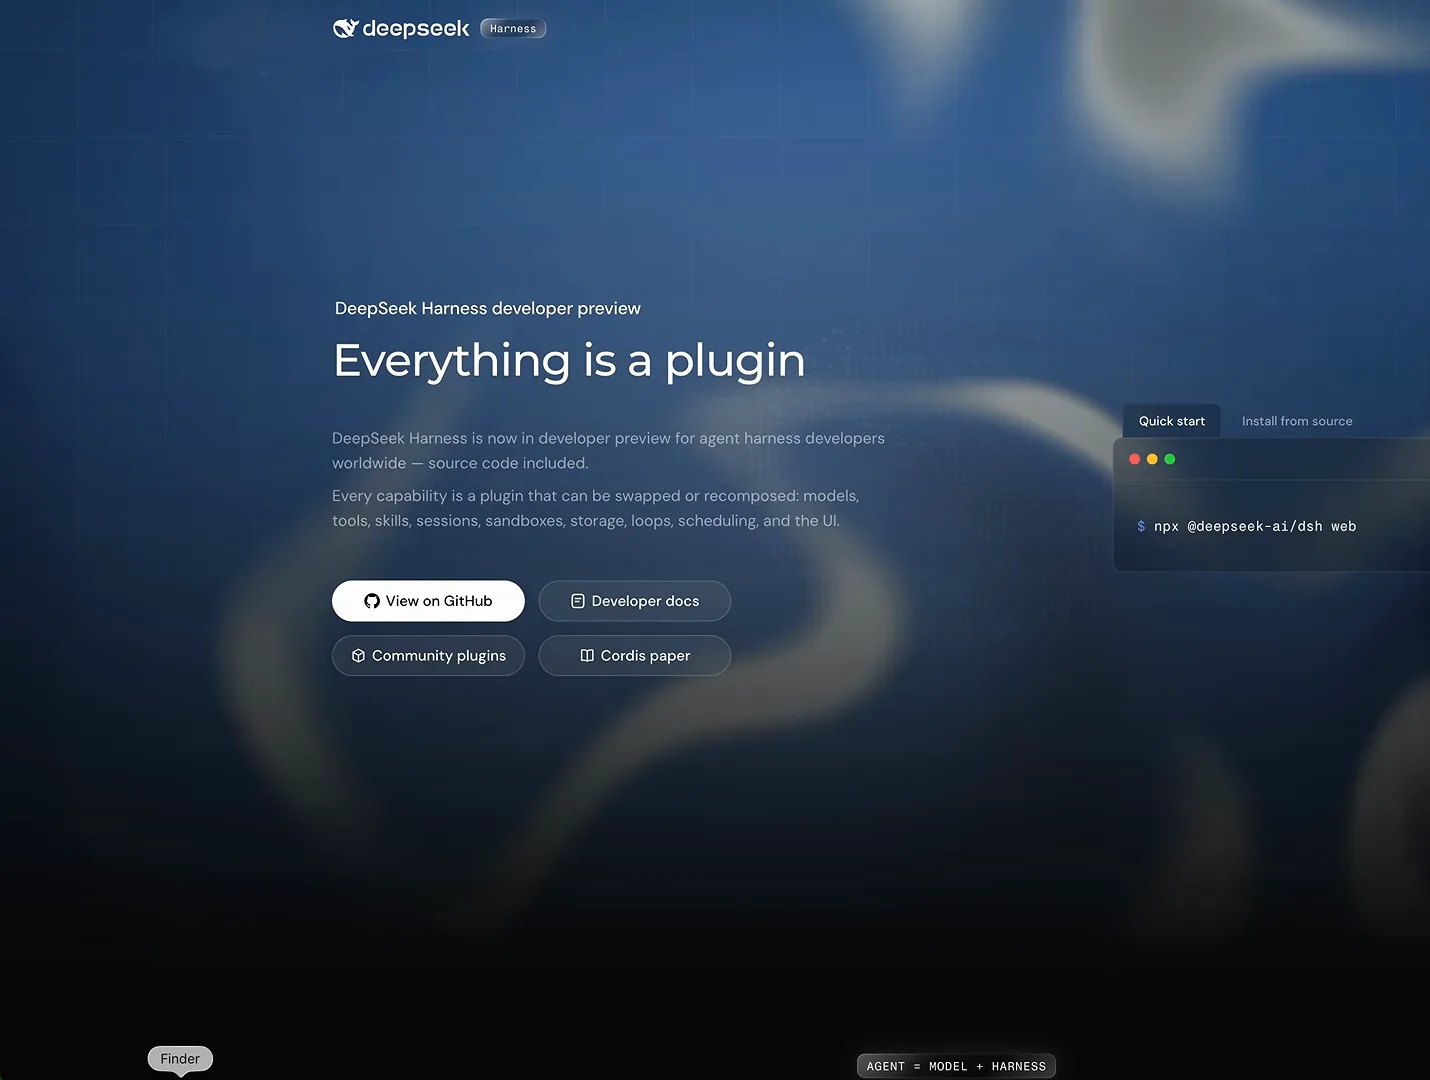
The official homepage hands you the one command you need — copy it straight from the Quick start panel.Watch at 2:06 - 2
Check the README's two run options
The GitHub README documents the same command under Run from npm, plus a Run from source path (git clone, pnpm install, pnpm build) for developers who want to modify the harness itself. For a normal Mac install, npx is all you need.
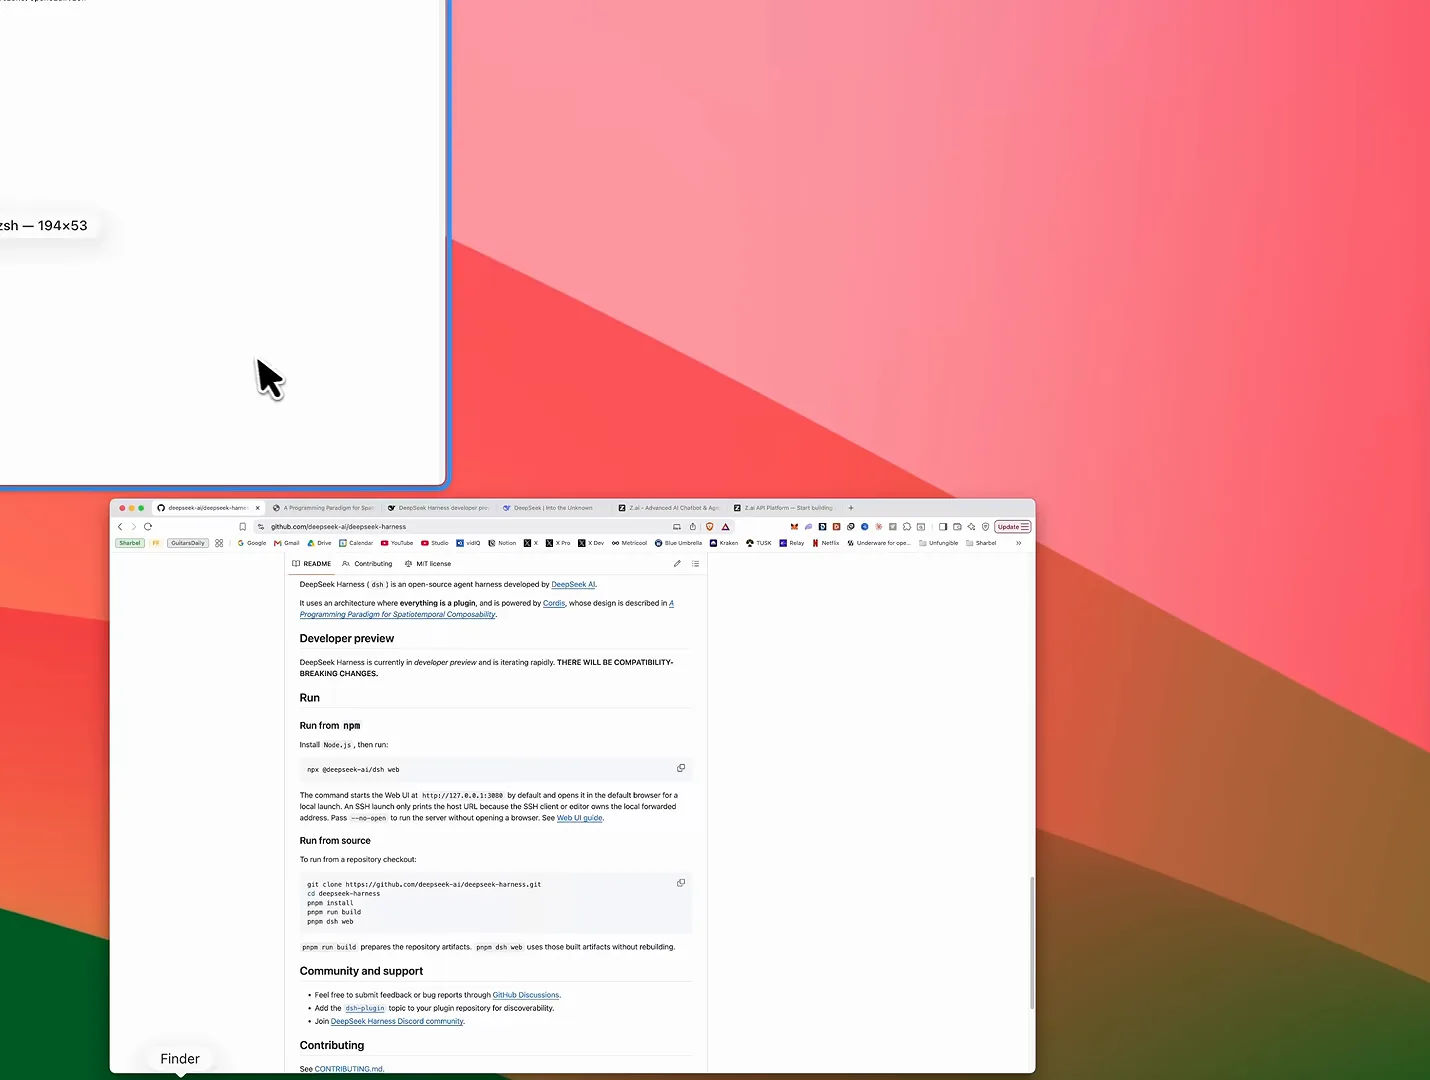
Same command, two delivery paths: npx for the one-liner, or clone the repo if you want to run from source.Watch at 2:25 - 3
Run it in Terminal and wait for the local server
You need Node.js 22 or newer — verify with node --version first. Paste the command in Terminal and press Enter: the first run downloads packages and builds for a few minutes, then prints dsh web: http://127.0.0.1:3080 and opens your default browser by itself.
$node --version$npx @deepseek-ai/dsh web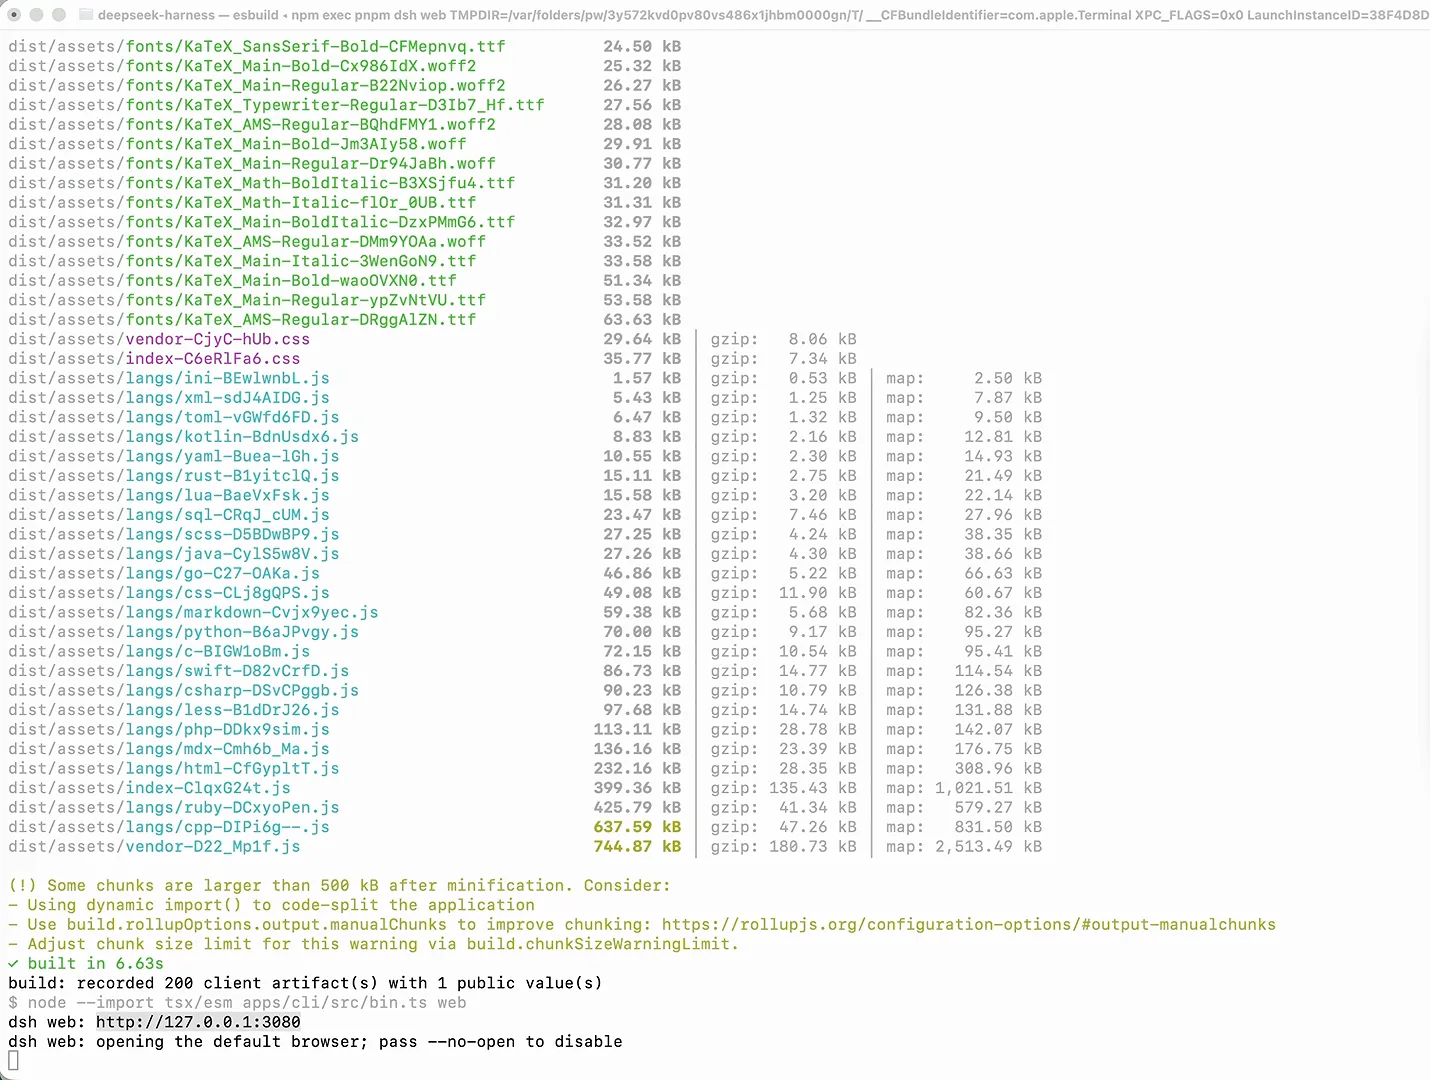
The first install builds for a few minutes — when the local URL appears, the server is up and your browser opens by itself.Watch at 2:38 - 4
Accept the notice, then decide on the API key
First launch shows an Internal Testing Notice — the harness is a developer preview, so expect breaking changes and click Continue. Next, the Add an API key dialog asks for a DeepSeek key; Configure later is a perfectly good answer, because any provider can be connected afterwards.
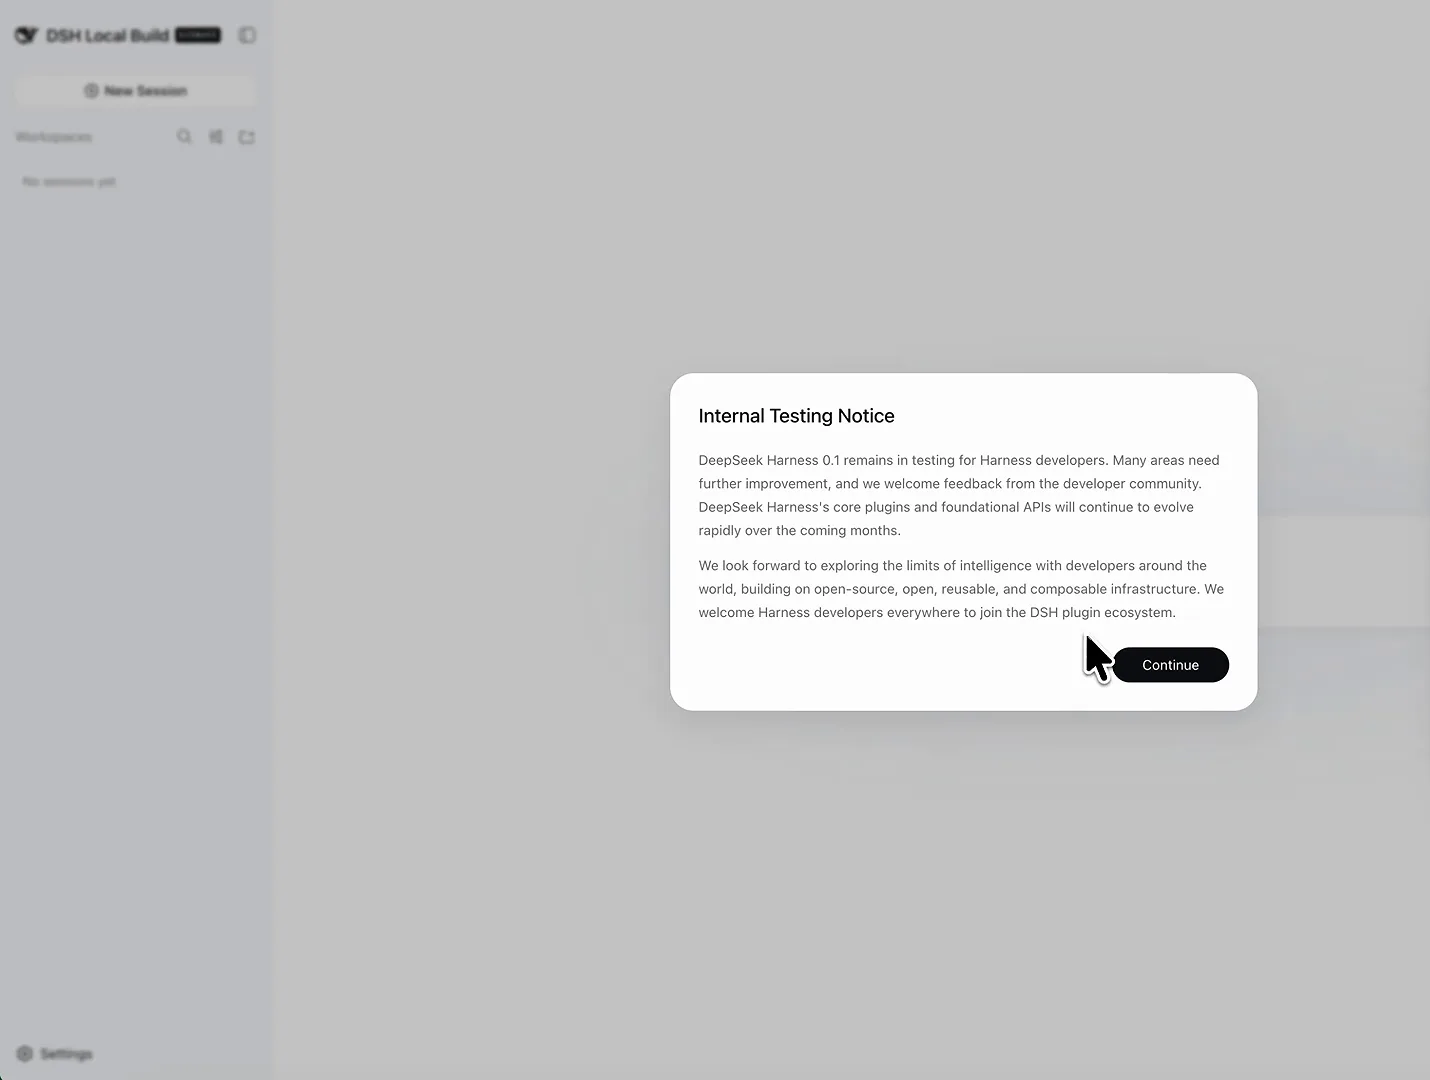
The developer-preview notice is honest about breaking changes — accept it and move on.Watch at 2:50 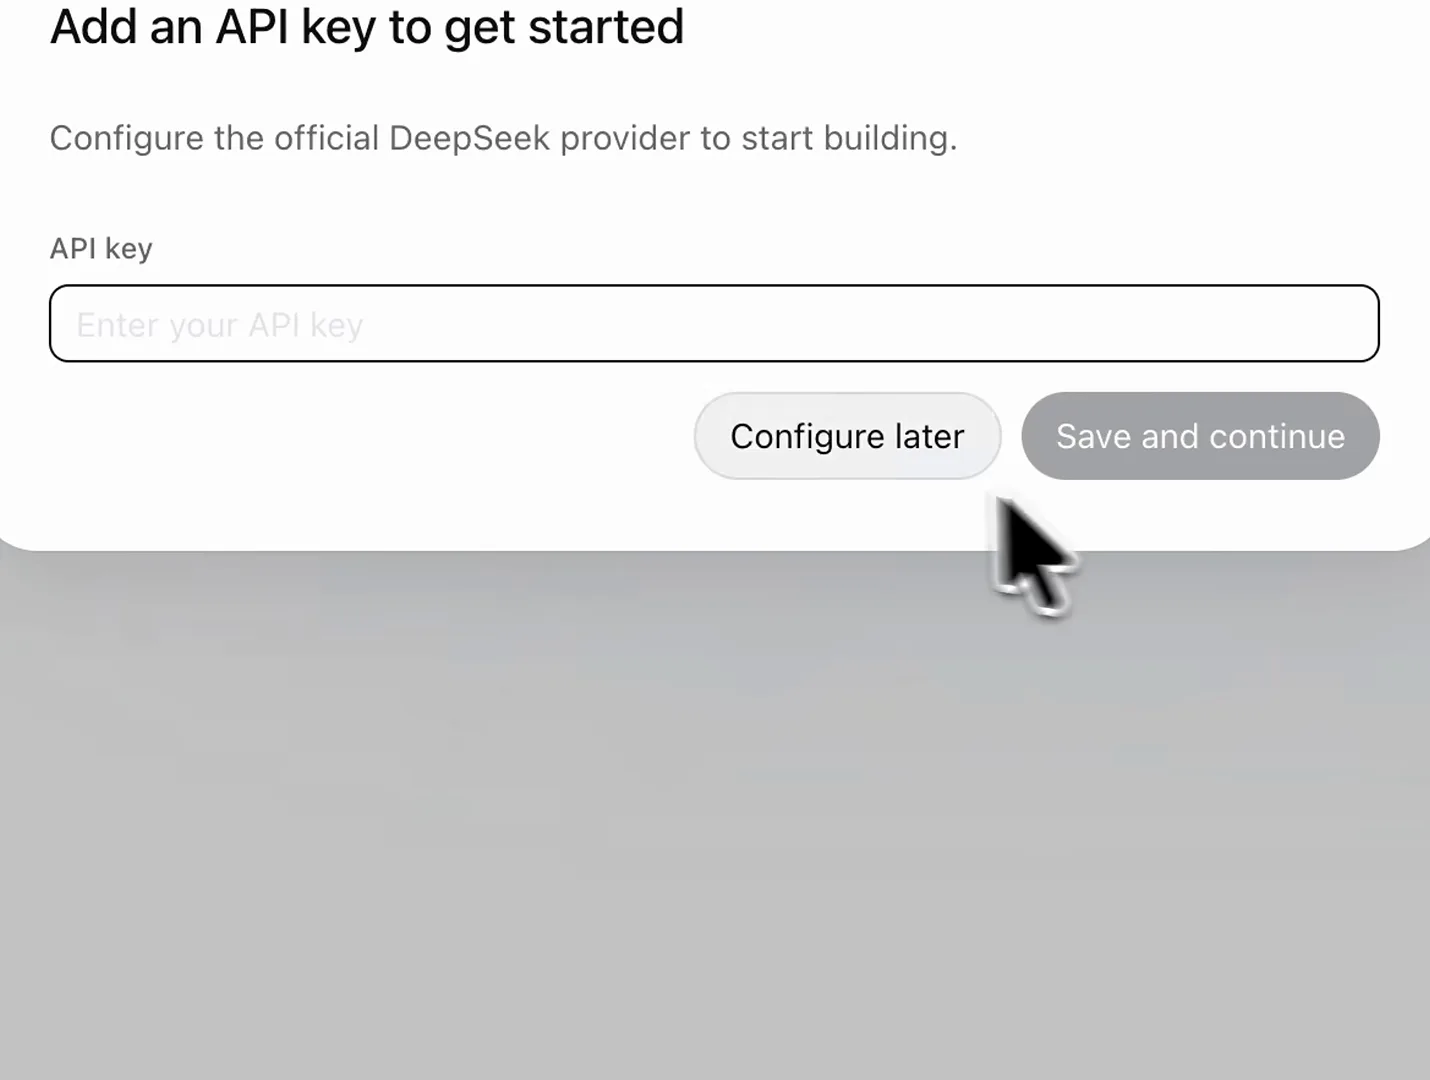
The DeepSeek key is optional — Configure later skips it, and you can connect any provider once you're in.Watch at 2:55 - 5
Meet the dashboard
That's the whole install. The dashboard greets you with a workspace picker and the composer's Standard mode selector — every session starts from here.
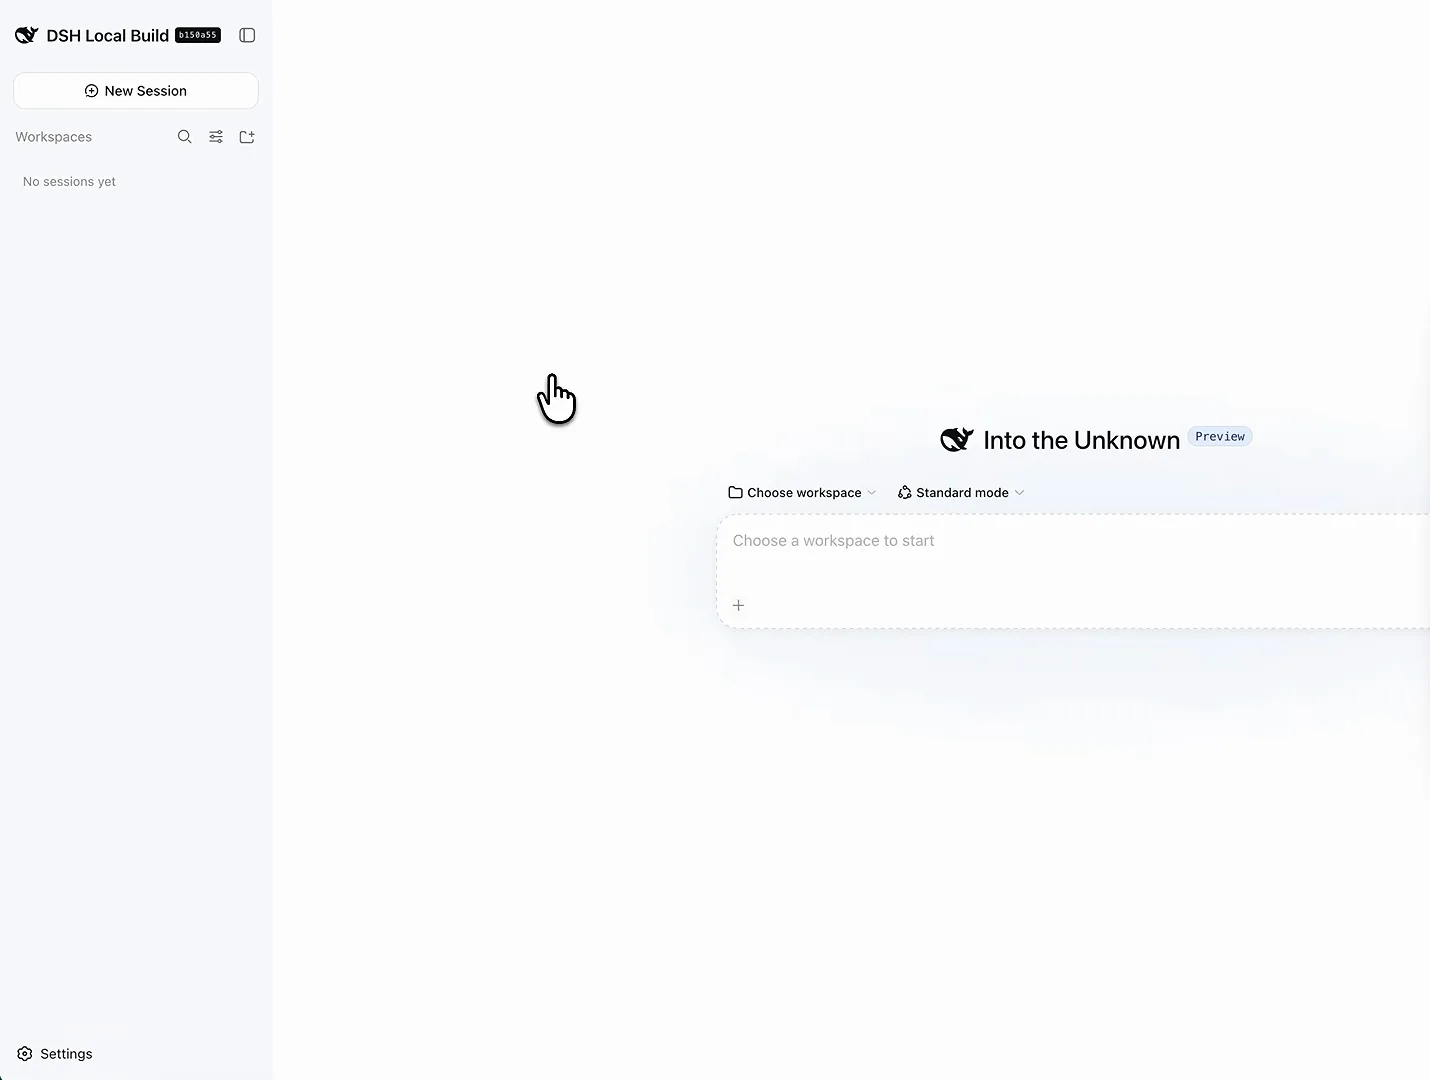
That's the whole install: pick a workspace and start typing. Standard mode is the default preset.Watch at 3:00 - 6
Open Settings → Models
Click Settings in the sidebar and switch to Models. This panel holds the official DeepSeek API key field and two doors out: Add provider for built-in providers, and Add a custom provider for anything with an OpenAI-compatible endpoint.
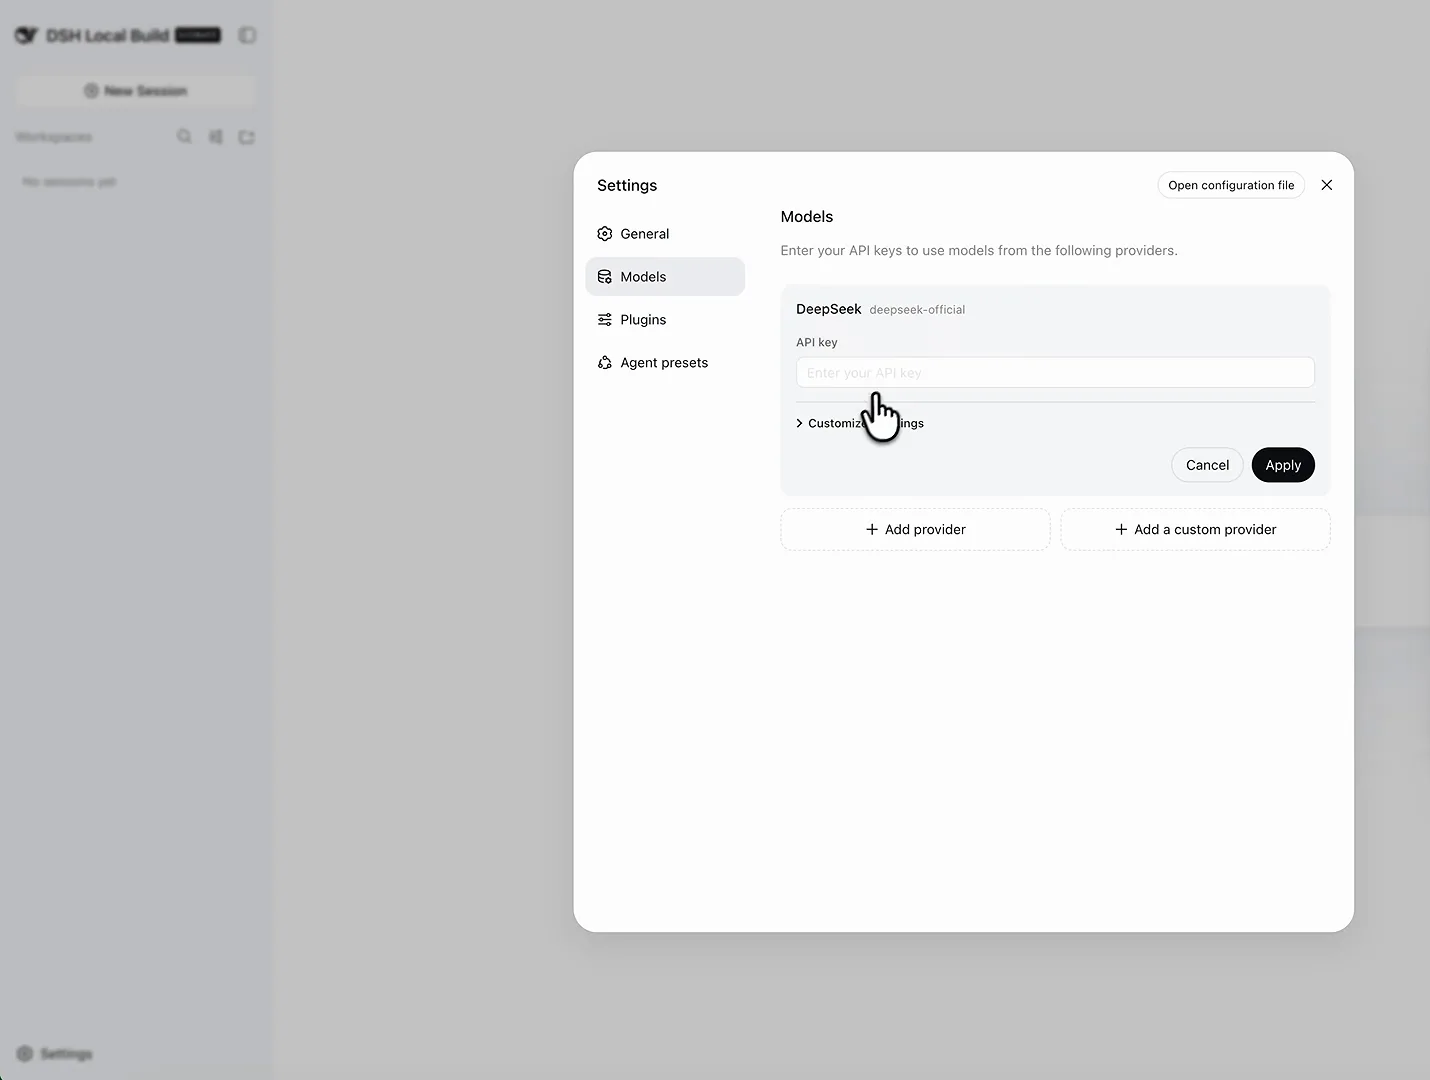
The Models panel is where the API key goes — or where you add any other provider instead.Watch at 3:07 - 7
Connect your first provider and build
The walkthrough connects GLM through the zai provider — the green dot means the key works and models are live. OpenRouter, Anthropic, OpenAI or a local Ollama server connect the same way; our switch-models guide covers every option in detail.
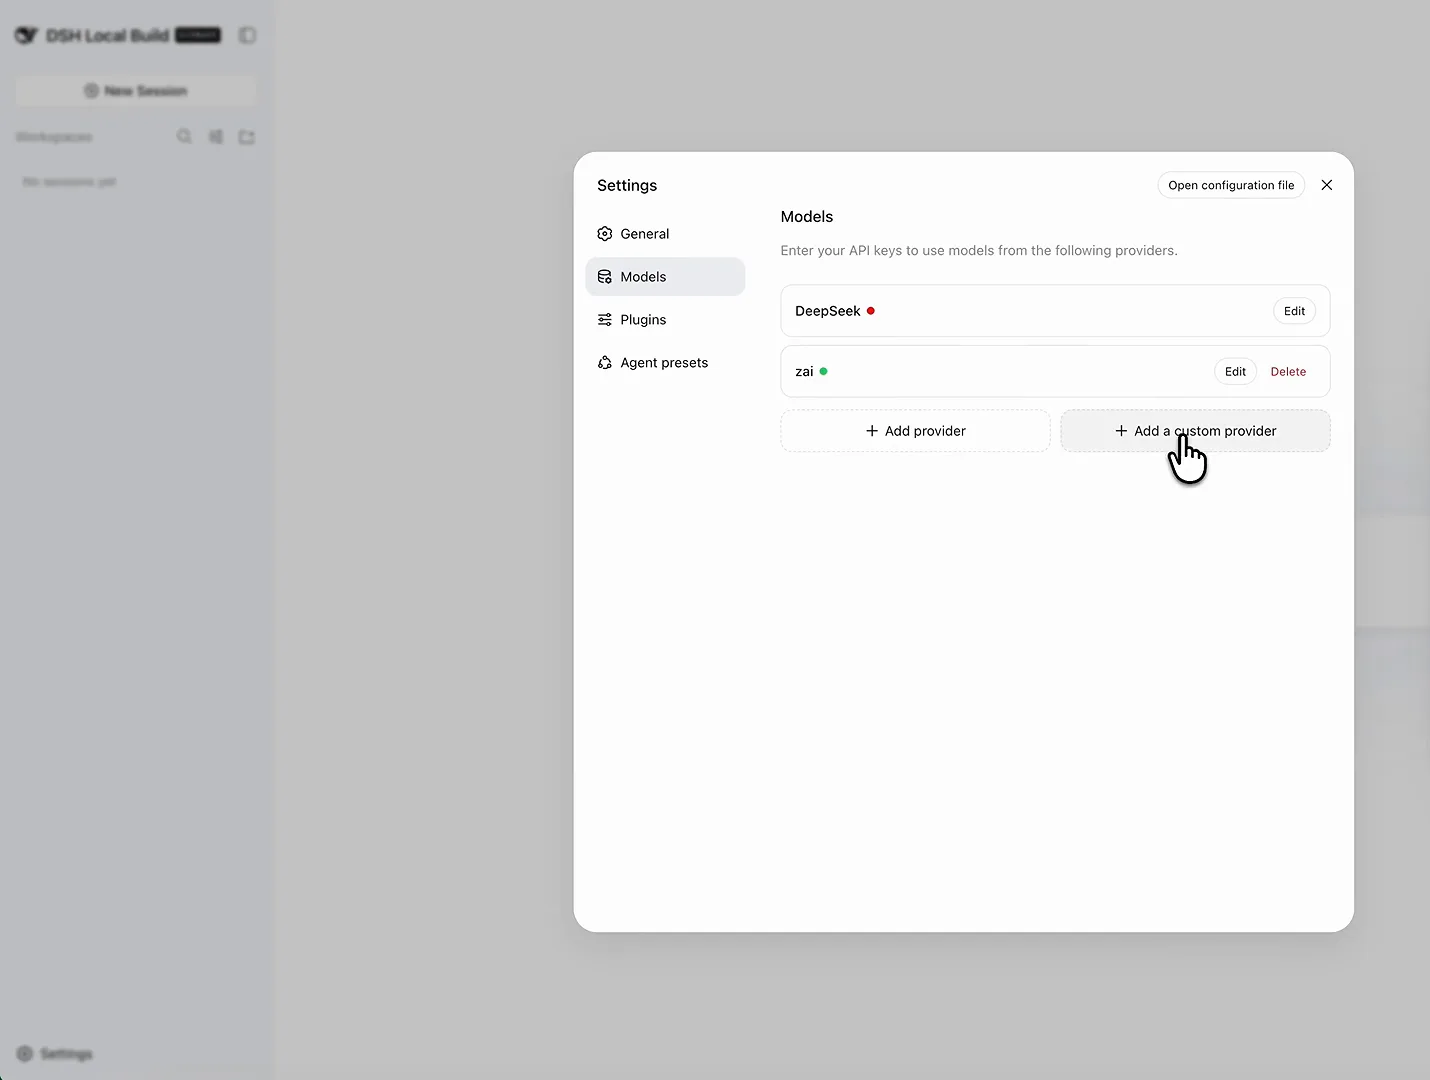
One green dot later, your Mac runs a working harness — this setup serves GLM models through the zai provider.Watch at 3:39
DeepSeek Harness on Mac: FAQ
The questions Mac users ask before running the install command.
Does DeepSeek Harness run on Apple Silicon Macs?
Yes. The harness is a Node.js application, so it runs natively on Apple Silicon (M-series) and Intel Macs alike. Make sure Node.js 22 or newer is installed — node --version confirms it — and the same npx @deepseek-ai/dsh web command works in Terminal regardless of chip.
Do I need a DeepSeek API key to use it on Mac?
No. First launch asks for one, but Configure later skips it. You can connect any provider instead — GLM, OpenRouter, Anthropic, OpenAI, or a local Ollama server — from Settings → Models.
How long does the install take on a Mac?
The download and first build take about five minutes on a typical connection, as shown in the walkthrough. After that, starting the harness again is quick because everything is already built.
Is installing on Mac different from Windows?
The command is identical — the difference is the shell. Mac users run it in Terminal (zsh), Windows users in PowerShell. If you also set up a PC, our Windows walkthrough covers the same steps with Windows screenshots.
Where is the dashboard after installing?
The harness serves its Web UI at http://127.0.0.1:3080 and opens it in your default browser automatically. If it doesn't, re-run the command or type the address into the browser yourself.
How do I keep it updated afterwards?
Re-running the install command pulls the newest release, and the developer preview expects breaking changes — our update guide has the verified upgrade and rollback commands.
Related guides
Where to go once your Mac setup is running.
Install DeepSeek Harness on Windows
A 10-step, screenshot-by-screenshot Windows walkthrough: Node.js, npm install, the Web UI on port 3080, your API key.
Read the guideSwitch models & custom providers
Change models mid-session, add NVIDIA NIM or Ollama as a custom provider, and verify what you're really talking to.
Read the guideThe four modes: Standard, PTC, Minimal, Creator
What each agent preset includes, when it wins, and how to build a preset of your own in Creator mode.
Read the guideInstalling plugins you can trust
How plugin installation actually works in dsh, plus a checklist for vetting third-party code.
Read the guideDeepSeek Harness desktop app: official vs community
The official Web UI, community clients like DSHDesktop, and a safe-download checklist.
Read the guideSources & credits
All screenshots in this guide come from this public macOS walkthrough. Every image deep-links back to the exact moment in the source video.