Access DeepSeek Harness Remotely from Any Device
Eight screenshot-verified steps to put the dsh web UI on your phone through a free ngrok tunnel — no companion app, no router changes.
Last updated: 2026-09-12
DeepSeek Harness is a pure web application: the agent runs on your machine, but you drive it from a browser at localhost:3080. That single design choice is what makes remote control trivial — as the walkthroughs below put it, the web is a universal platform, so unlike Codex or Claude Code there is no companion app to install. Any browser that can reach the page can run the harness.
This guide follows two public walkthroughs (credited at the foot of the page) that both solve the same problem: the machine running dsh sits at home or on a server, and you are outside with your phone. The fix is a free ngrok tunnel that publishes the local port to the internet — either typed by hand or set up by the agent itself.
Remote-control DeepSeek Harness in seven steps
- 1
Get the harness running on the machine you want to reach
Remote control starts at home: the README's run command starts the web UI, and the console shows it listening on localhost:3080. On first launch the harness asks for a DeepSeek API key — create one on the platform's API keys page, confirm the dialog, and paste it in. Leave this machine powered on; it is the one your phone will call later.
$npx @deepseek-ai/dsh web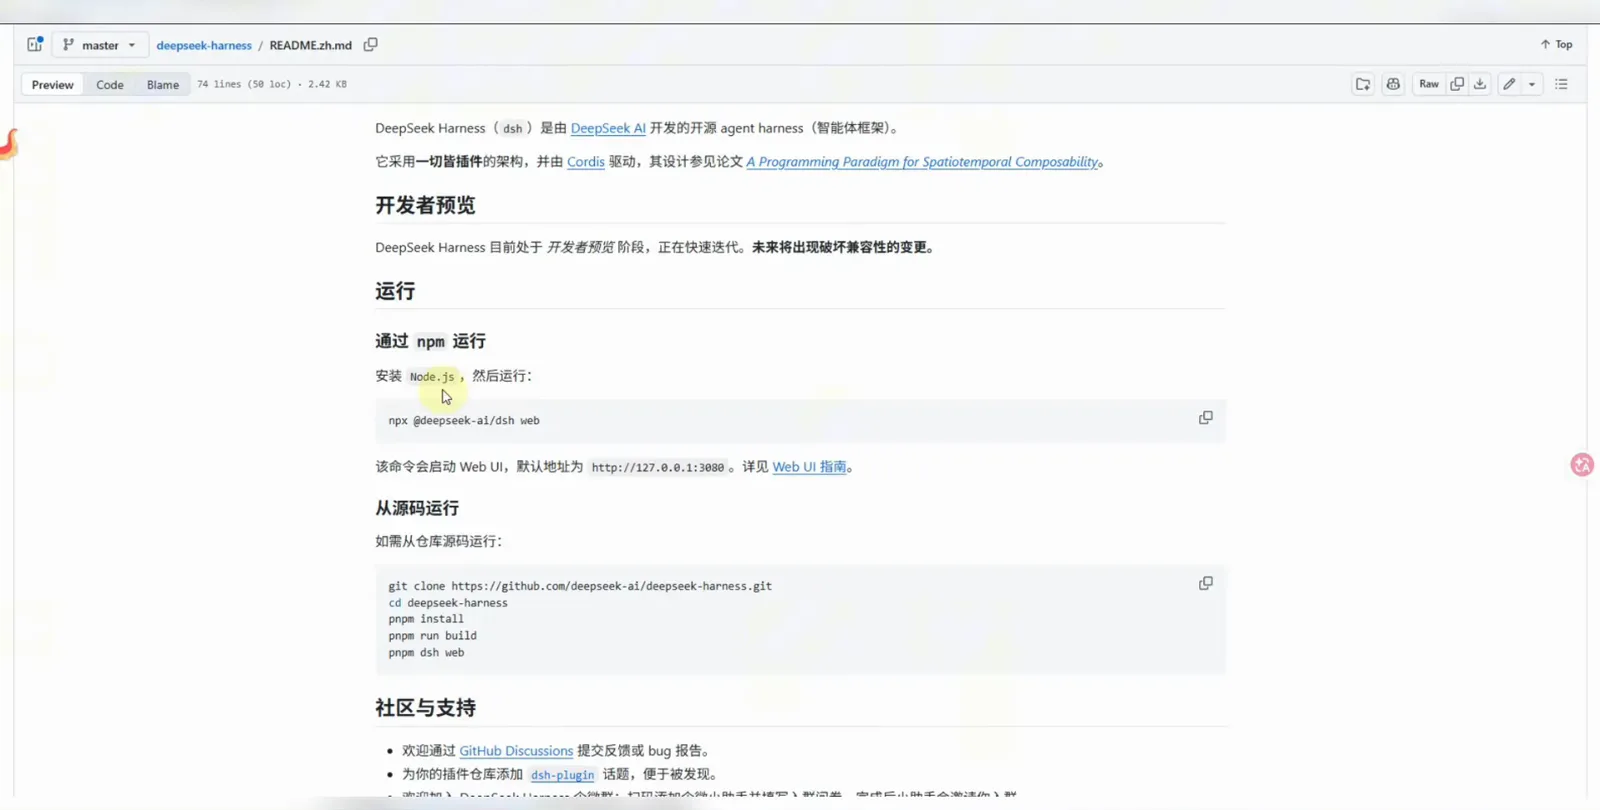
One command starts the whole thing — everything else in this guide assumes this process is running at home.Watch at 4:40 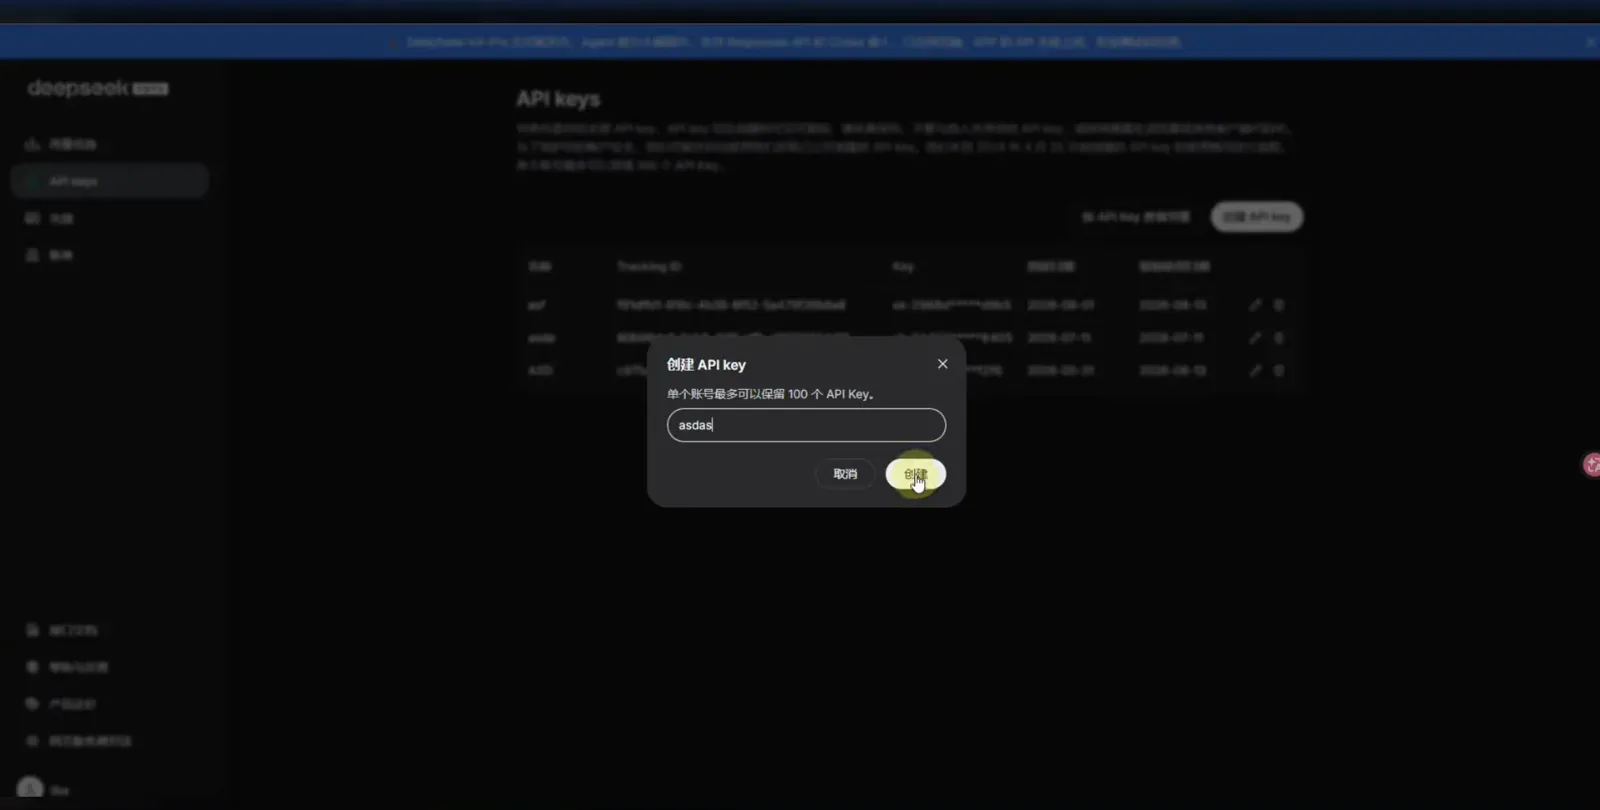
First launch asks for a key; generate one on the platform and confirm the dialog to hand it over.Watch at 5:17 - 2
Copy your ngrok authtoken from the dashboard
Tunnelling needs a free ngrok account. The dashboard's Setup & Installation page is the one-stop sheet: it lists the agent install command for your OS, the ngrok config add-authtoken line with your personal token, and the forwarding command. Copy the token — the tunnel will not start without it. (The second walkthrough reaches the same page via Gateway → Authtoken.)
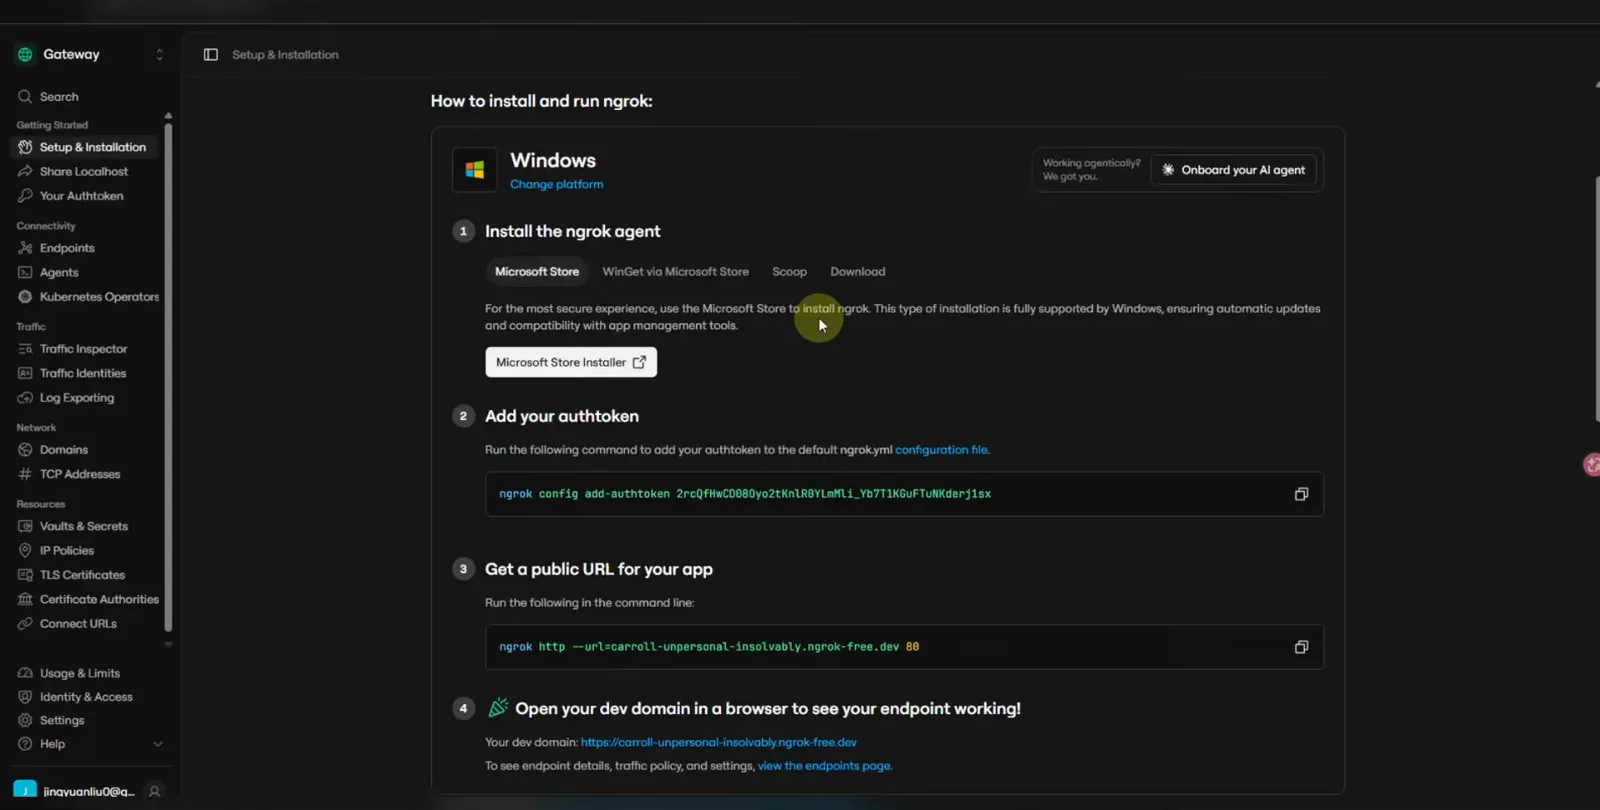
The dashboard gathers install, authtoken and forwarding on one page — grab the token here.Watch at 10:29 - 3
Open the tunnel with three commands
In a terminal on the same machine: install the ngrok agent (winget on Windows, as shown; Homebrew works on macOS), register your token, then point ngrok at the harness port. ngrok http 3080 prints a forwarding URL like https://something.ngrok-free.app — that random address is your door in from the outside world.
$winget install ngrok.ngrok$ngrok config add-authtoken <YOUR_AUTHTOKEN>$ngrok http 3080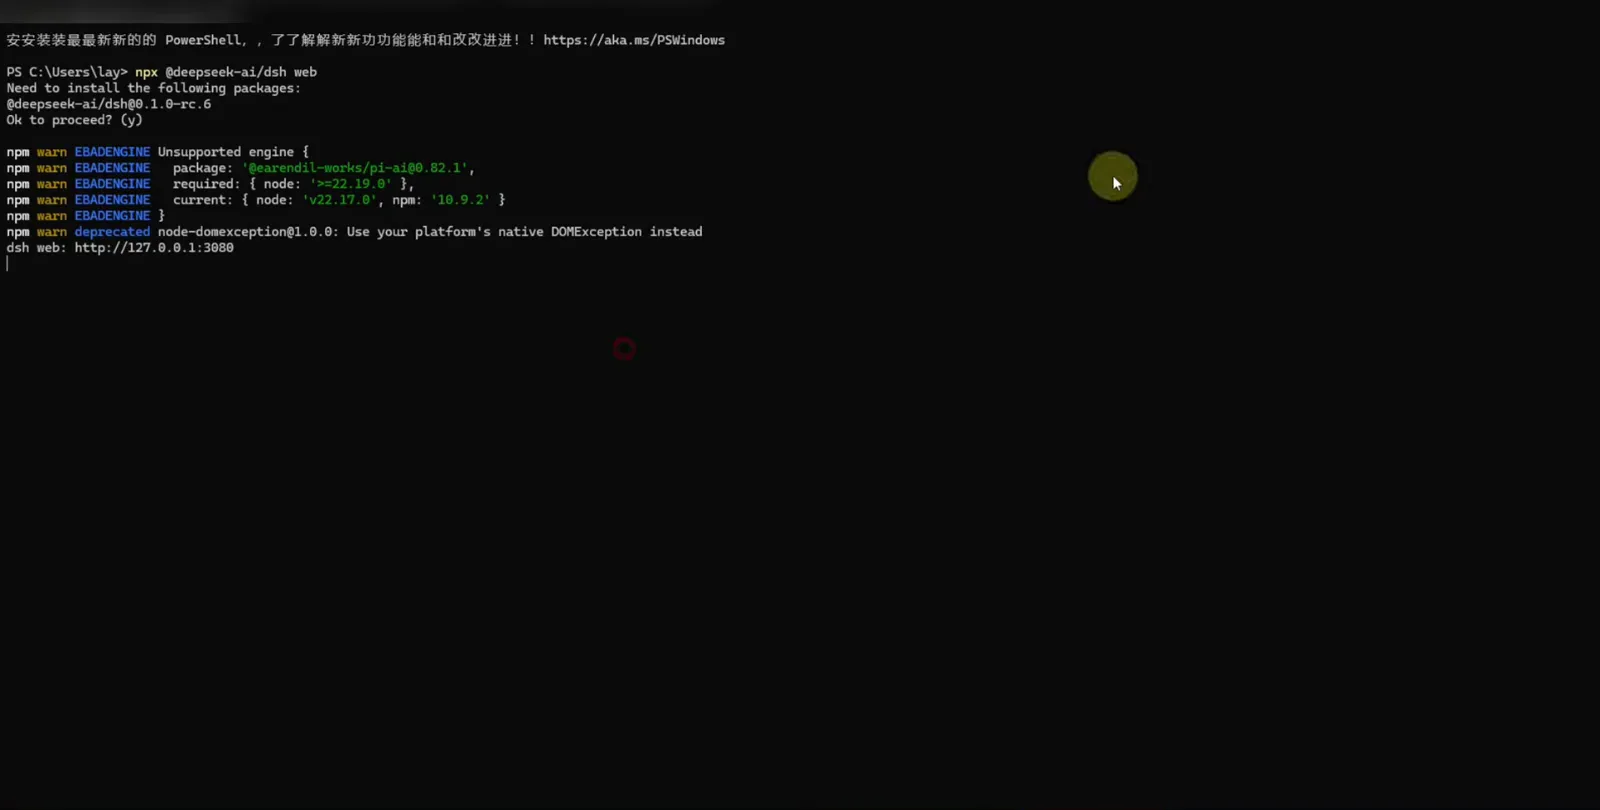
Token saved, tunnel up — the line that follows prints the public URL your phone will visit.Watch at 10:40 - 4
Or skip the terminal and ask the agent itself
The walkthrough's neatest trick: the presenter simply asked the running harness to expose port 3080. The agent picked the ngrok plugin, installed the client when winget's copy proved too old, saved the authtoken, started the tunnel, verified the local service answered 200, and posted the public URL into the chat with a copy button — plus the warning that free URLs are random and change on every restart.
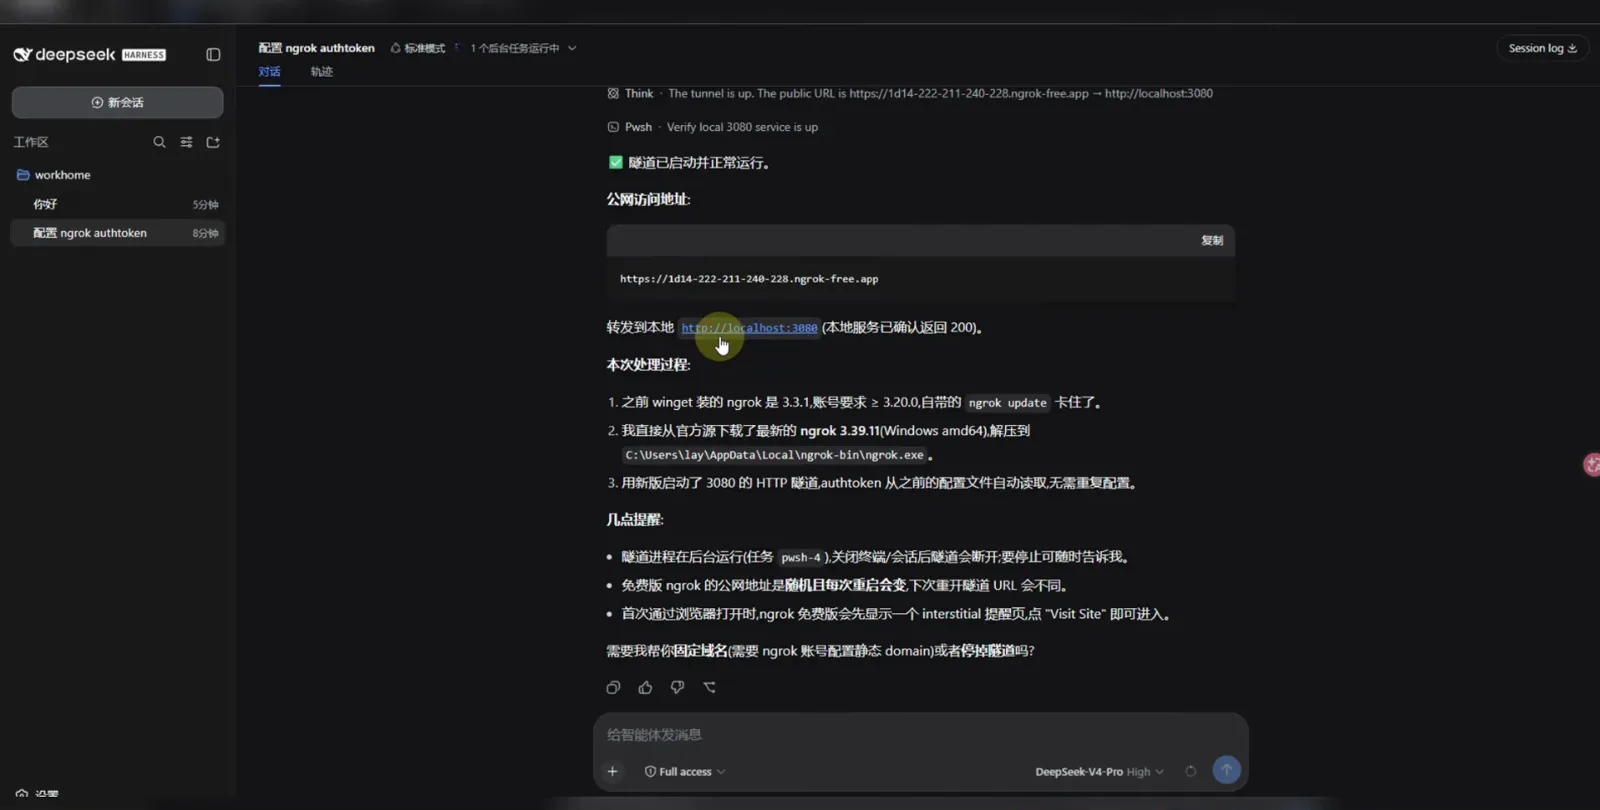
The agent's own summary: URL issued, forwarding to port 3080, and a reminder that free links change on restart.Watch at 10:56 - 5
Open the link on your phone and pass the warning page
Send the ngrok-free.app URL to your phone — a chat app or QR code both work. The first visit shows ngrok's free-tier interstitial, "You are about to visit …", which exists so nobody mistakes the tunnel for a phishing page. Tap Visit Site once per browser and the real dashboard loads at full width.
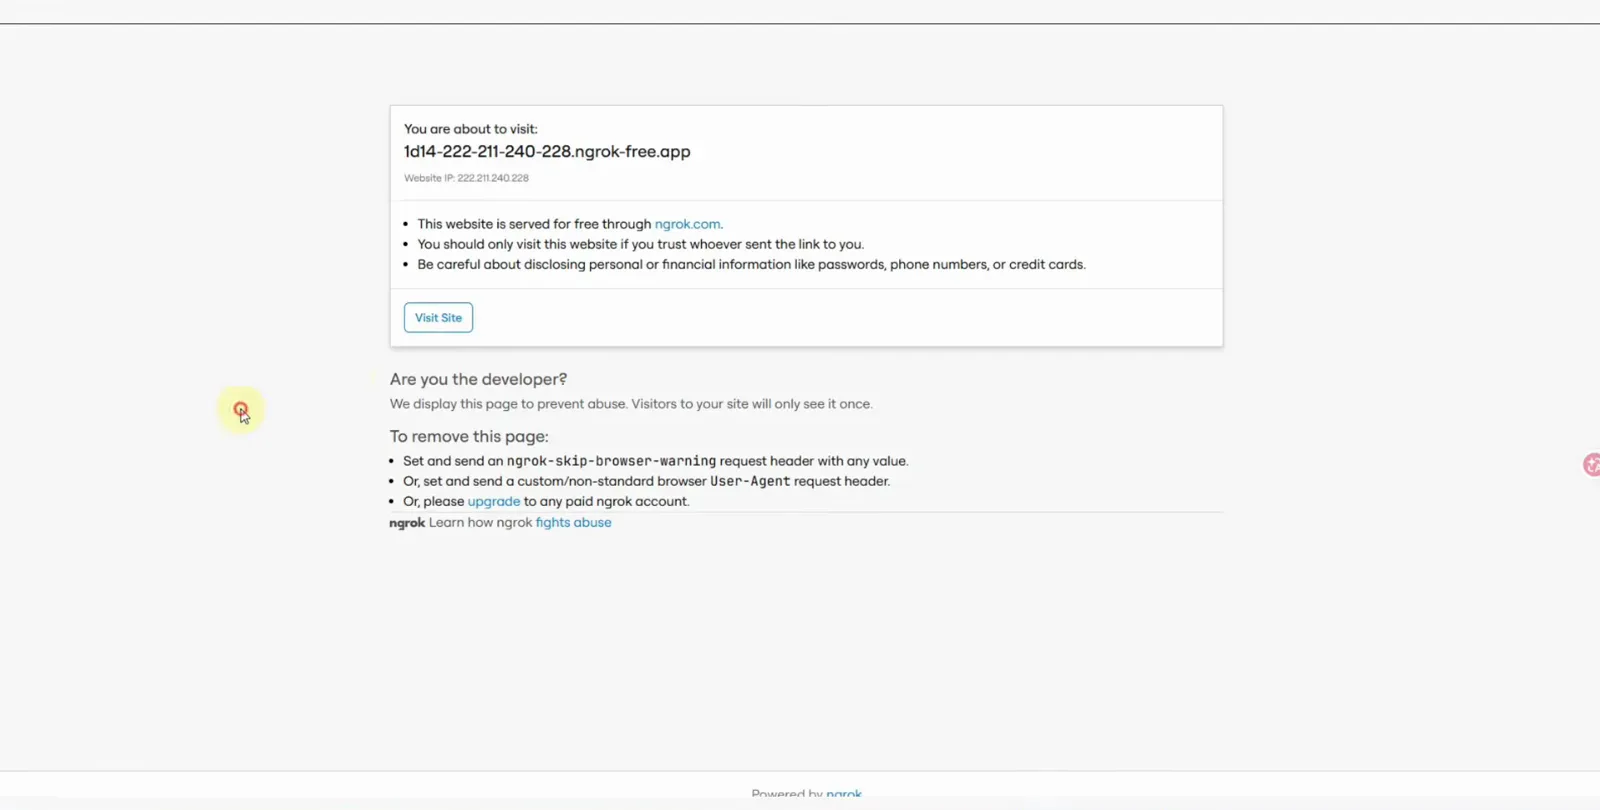
One tap on Visit Site and the interstitial never bothers that browser again.Watch at 11:04 - 6
Same session, full history, real-time control
What loads on the phone is not a stripped viewer: the tunnel forwards to the very same localhost:3080 instance, so the session list, conversation history and the running ngrok task are all there. The second walkthrough demonstrates exactly this — commands typed on one computer appear instantly on the other, and both sides can steer the agent.
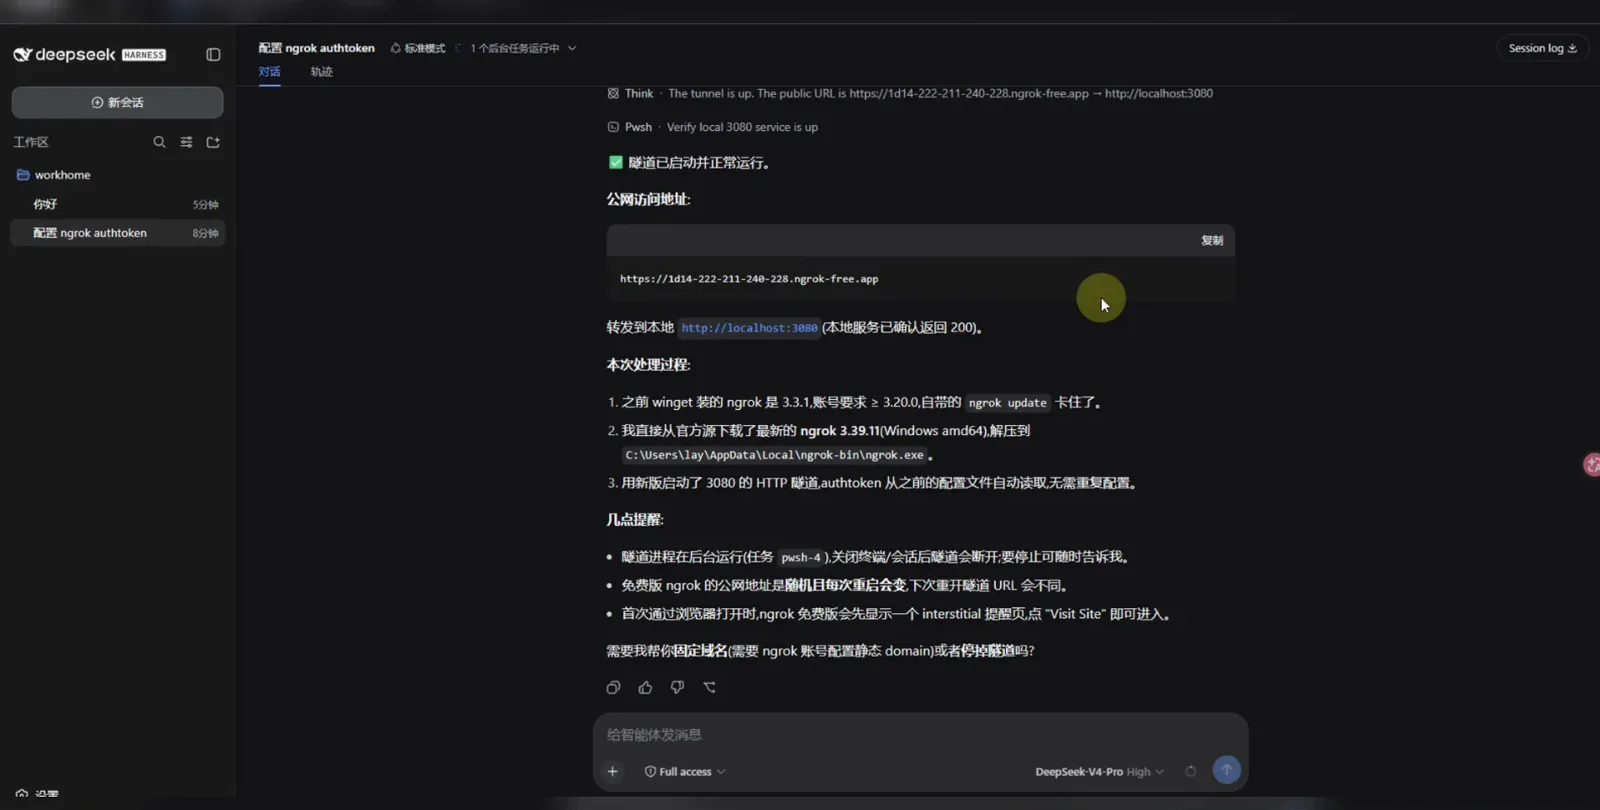
History, session state and the tunnel's own notes — the phone sees exactly what the home screen sees.Watch at 11:28 - 7
Drive it with slash commands
Everything you use locally works through the tunnel. Typing / opens the command menu: /compact compresses the context when the phone screen gets crowded, /export saves the session, /permissions flips the sandbox mode, /model switches providers, and /plan or /feedback round out the set.
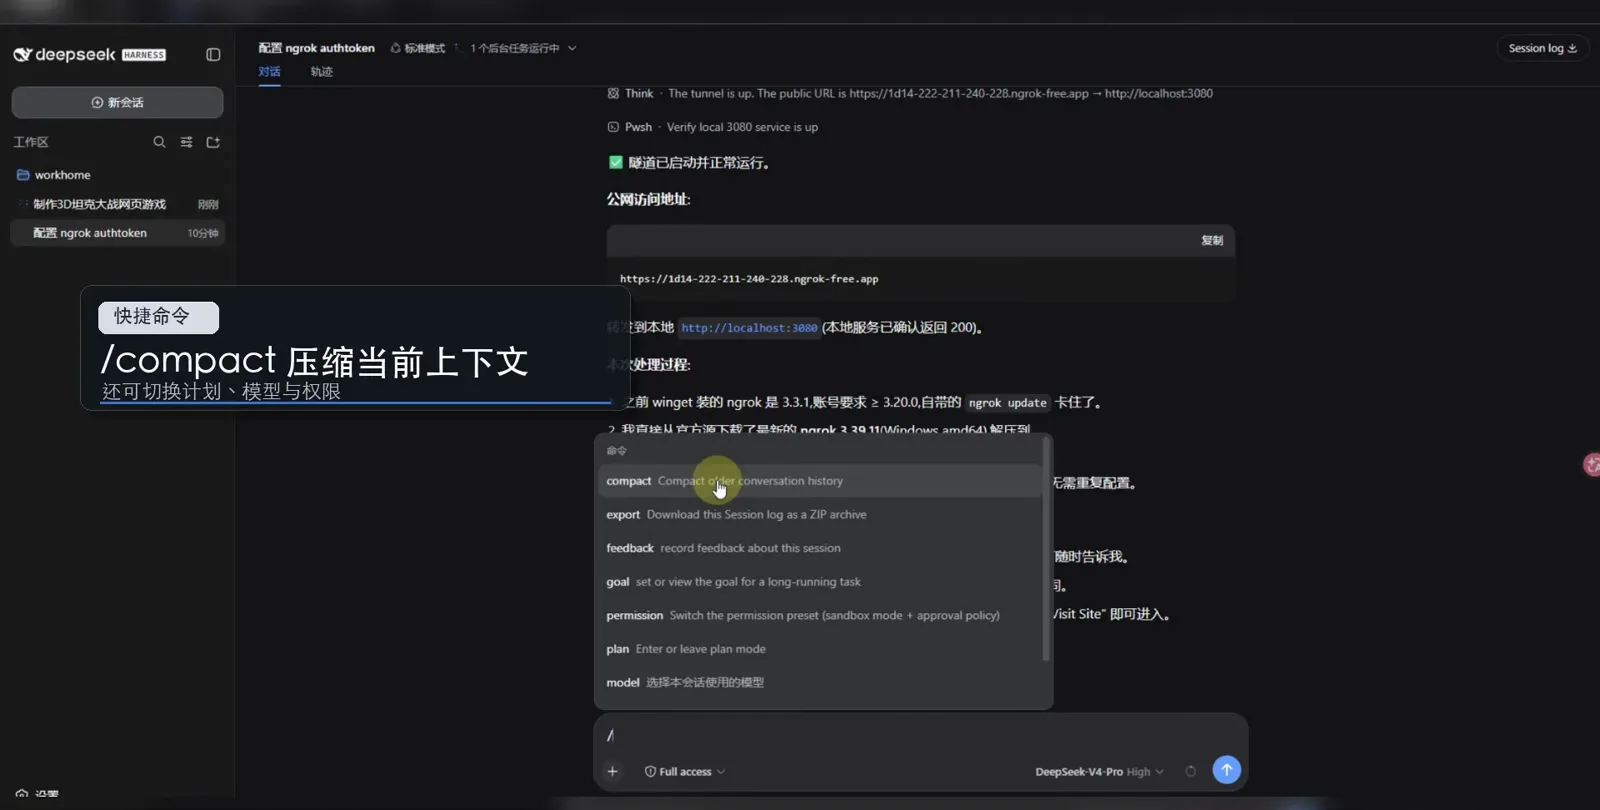
The full command menu works remotely — /compact is the one you will use most on a small screen.Watch at 11:52
DeepSeek Harness remote access: FAQ
What to know before you put your harness on the public internet.
Do I need to install an app on my phone?
No. DeepSeek Harness is a web application, so a browser is the only client. Both walkthroughs make the same comparison: unlike Codex, which needs a companion app for phone access, dsh just needs its URL — the tunnel makes that URL reachable from anywhere.
Is the phone controlling the same instance?
Yes. The tunnel forwards the public URL to the same localhost:3080 process running at home, so the phone sees the identical session list and history. The second walkthrough shows commands entered on one computer appearing on the other in real time, with both sides able to steer the agent.
Is ngrok the only way to do this?
No — any tunnel or reverse proxy in front of port 3080 works, because the harness is a plain Node.js web server. The walkthrough explicitly mentions Cloudflare's free tunnel as an alternative, and a fixed-domain ngrok configuration removes the random-URL surprise if you tunnel often.
How does remote access differ from just using the LAN IP?
Inside the same Wi-Fi you can open the machine's local address directly and skip the tunnel entirely. Tunnelling matters once you leave: on mobile data or an office network, nothing can route to your home machine, and the ngrok URL is what bridges the gap.
Is it safe to expose the harness this way?
Treat the URL as a password: anyone who has it can reach your agent, and the free plan protects it with only the interstitial page. The agent's own notes in the walkthrough suggest stopping the tunnel when you are done — just ask it to — and upgrading to an authenticated or fixed-domain setup for regular use.
Why did my public URL change since last time?
Free ngrok links are random and expire on every restart — the walkthrough's agent flags this explicitly after issuing the URL. Re-running ngrok http 3080 (or asking the agent) prints a fresh one; a reserved static domain needs a configured ngrok account.
Related guides
Round out the setup that your phone now connects to.
Install DeepSeek Harness on Mac
A screenshot-verified macOS walkthrough: one npx command, no API key required, provider connected by step seven.
Read the guideDeepSeek Harness desktop app: official vs community
The official Web UI, community clients like DSHDesktop, and a safe-download checklist.
Read the guideTroubleshooting & error encyclopedia
Symptom → cause → fix: install failures, pnpm workspace allowlist errors, cordis.patch.yml conflicts, bundle format errors, and profiles that won't apply.
Read the guideSwitch models & custom providers
Change models mid-session, add NVIDIA NIM or Ollama as a custom provider, and verify what you're really talking to.
Read the guideThe four modes: Standard, PTC, Minimal, Creator
What each agent preset includes, when it wins, and how to build a preset of your own in Creator mode.
Read the guideSources & credits
All screenshots come from 搞机零距离's public walkthrough; the manual ngrok steps and the real-time two-computer demo follow 灵姐说AI | Ling Talk AI. Every image deep-links back to the exact moment in the source video.